Slice & Bake Pumpkin Cookies
This page contains affiliate links. For more information please read my Disclosure Policy.

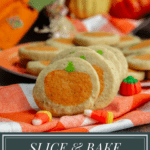

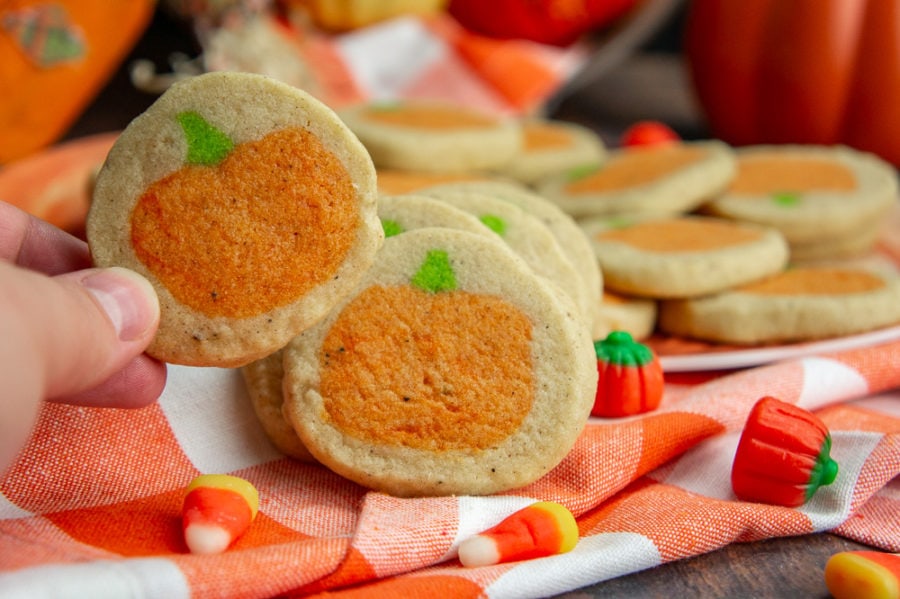
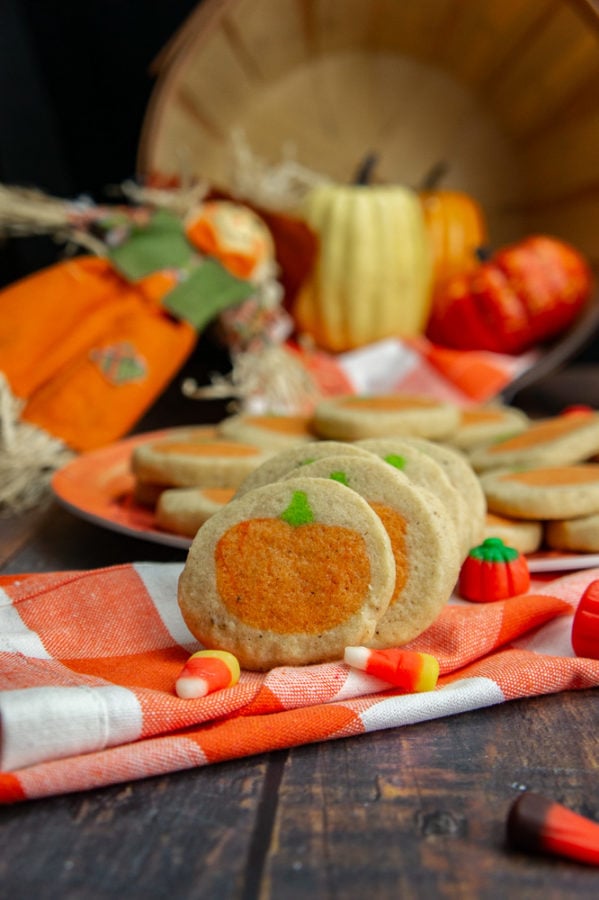
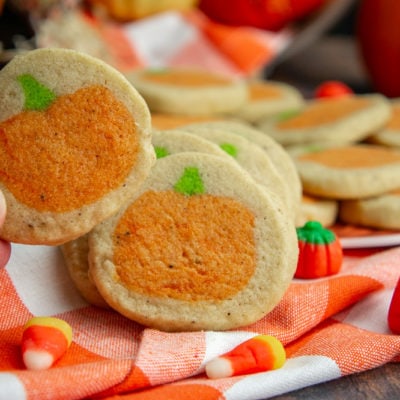
Forget the plastic wrapped tube, make your own slice and bake pumpkin cookies with an adorable pumpkins at the center of every cookie. These soft and sweet sugar cookies have an optional spiced flavor to go with the season and are an easy, fun project to bake with kids.
I think it’s one of those iconic American treats, that tube of cookie dough with hidden pictures waiting inside. It’s easy to understand why, with no extra effort decorating, you and your kiddos get to have fun festive cookies, what’s not to love?
While I love the concept, I do pretty much always find that homemade knocks the socks off of any store bought cookie, cute pictures included. So I set out to create our own festive slice and bake cookies made with a dough that uses recognizable ingredients and flavored just the way we like them.
Ingredients for Pumpkin SLice & Bake Cookies
You may be wondering if it takes a special kind of dough to make slice and bake cookies. It actually doesn’t! A good sugar cookie recipe is all you really need. I went for my never fail Crisco Sugar Cookie, that I usually make for Christmas time.
Using a shortening based cookie let me work with and then chill my dough with a lot less concern about melting gooey butter.
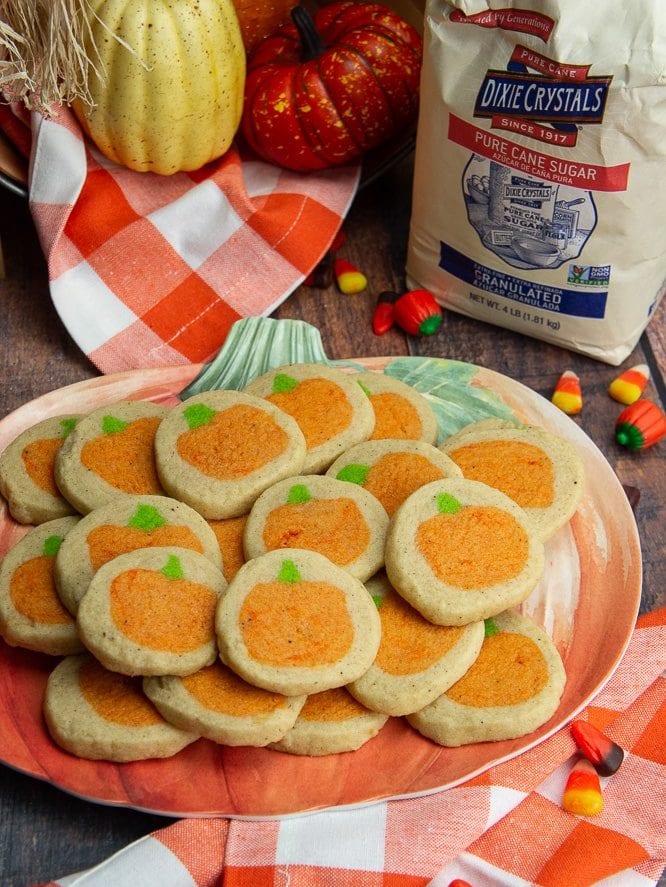
The ingredients for these cookies is a simple combo of flour, sugar, shortening, egg, vanilla, baking powder, salt, and milk. Be sure to check out the sugar by my sponsor Dixie Crystals Sugar for really tasty cookies!
- Slice & Bake Pumpkin Cookies from The Flour Handprint
- Halloween Lollipop Cookies from Lemon Blossoms
- Blood Splatter Cupcakes from Big Bear’s Wife
- Jack-o-lantern Cake Pops from Tastes of Homemade
- Graveyard Dirt Cake from House of Nash Eats
- Halloween Mummy Cake Pops from Karen’s Kitchen Stories
- Air Fryer Mummy Apple Mini Tarts from Fresh Coast Eats
- Cinnamon Roll Intestines from Devour Dinner
- Frankenberry Jell-O Shots from Sweet ReciPEAS
- Halloween Chex Mix from West Via Midwest
- Bloody Zombie Brains (Candied Walnuts) from The Spiffy Cookie
- White Chocolate Mummy Crispy Rice Treats from Savory Moments
- Halloween Spider Web Dip from I Am A Honeybee
For the pumpkin and stem some orange and green food dyes are all you really need. You can use the dye you have, I’ve used the standard boxed Easter egg style dye with no issue, but the dough gets a little softer with the addition of so much. For best, easiest to work with results, I recommend:
- Powder based food dye – I used these for this recipe and it worked great. Vibrant, and no additional liquid to make the dough too soft to form.
- High concentrated dyes – I love and keep these on hand so I can dye pretty much anything. It takes a lot less than standard dyes and works well.
Just for fun, and because it’s so easy, I spiced up the dough with the same winter spice combo I love so much in my spiced shortbread and my spice cupcakes. It made it seem like I was eating a pumpkin spice cookie while I bit into the pumpkin! Cinnamon, nutmeg, clove, and allspice is the magic combo! (Or, leave the spices out, it’s up to you!)
Rather than spend a lot of time on the mixing and baking of these cookies, let’s chat about the more important piece, how to get that perfect pumpkin in the middle!
Nothing about this cookie is complicated. The dough is mixed using the creaming method with the shortening and sugar, then egg, milk, and vanilla are added, followed by flour, spices, salt, and leavening. Boom dough.
The baking is similiarly simple, once the shaping and chilling are done, just slice, lay on a parchment lined baking sheet, and bake for 10 to 12 minutes. Boom cookies.
How to Shape SLice and Bake Pumpkin Cookies
The middle steps, shaping and chilling, aren’t too much more complex, just more unfamiliar. Let me show you how easy it is!
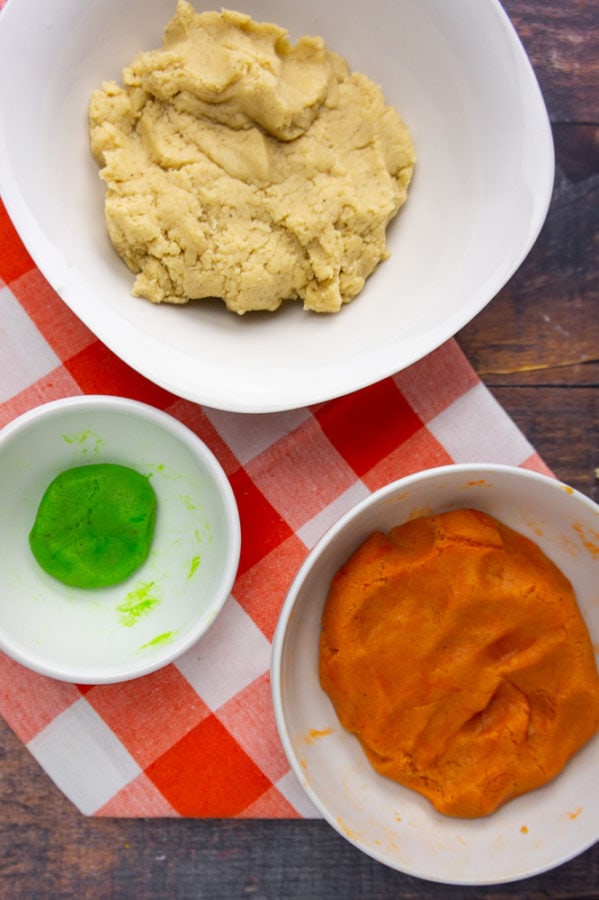
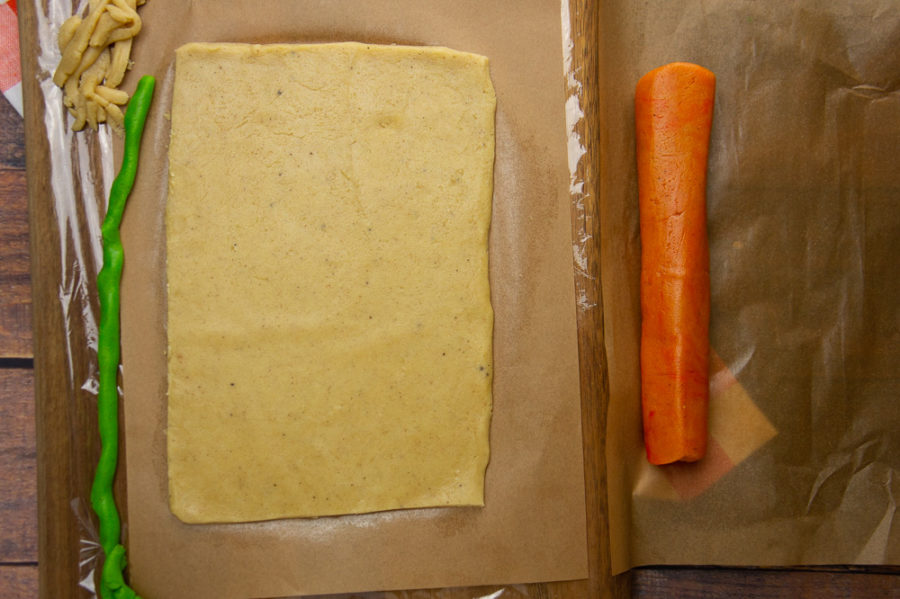
- Start by separating your dough to color it. I used just 1 ounce for the green pumpkin stem, and 9 ounces for the orange pumpkin. That’s about 1 heaping tablespoon of dough for green, and 1 shallow cup for orange.
- Gently work in your dye until you’ve got colors you like.
- Roll out the uncolored dough into an 8 x10 rectangle, 1/4″ thick on a piece of parchment paper set on plastic wrap. Square off the long edges and save the small scraps.
- Shape the orange dough into a log 9 inches long. You want it maybe a quarter to half an inch shorter than the rectangle.
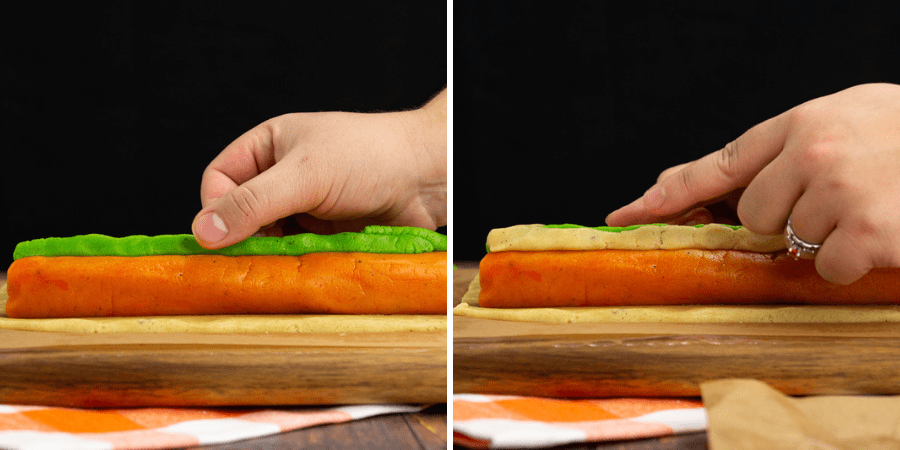
- Set it along one long edge of the rectangle and make an indent along the top. I used the back of a butter knife! This is the track for your green stem.
- Roll the green out thin and set it into the indent of the orange pumpkin. Use your fingers to press and pinch the green stem into a triangle along the top of the pumpkin.
- Next use the scraps of plain dough to box in the stem, I even cut a strip from the opposite long edge of the dough to get what I needed. Make sure the stem has plain dough along both sides.
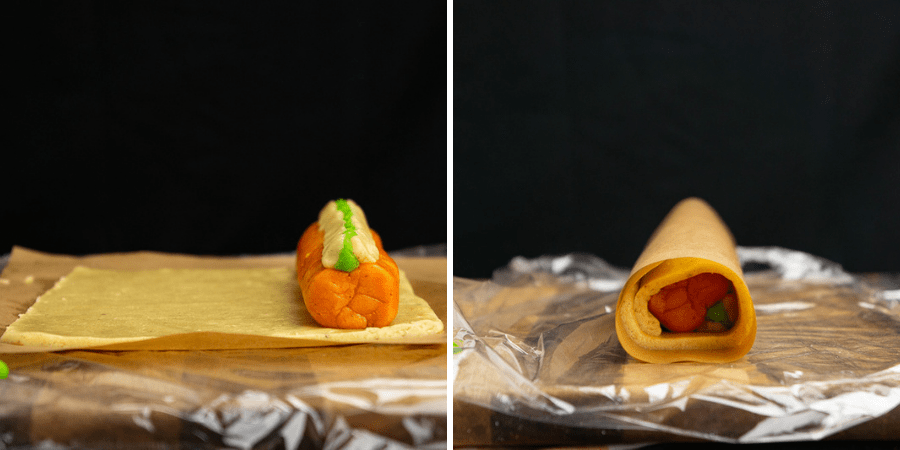
- Start rolling up the dough, starting at the long edge with the pumpkin. Roll tightly, but don’t press down on the dough. Slide out the parchment paper.
- When you have a log, gently fold in the edges, crimping them down in a circle and pinch off the seam.
- Tighten the plastic wrap around the dough log and twist off the ends as close to the dough as possible, then gently roll to make it a uniform smooth log. Press against the ends gently every few moments to keep the thickness uniform from the middle to the ends.
- Once you have a smooth log, stick it in the fridge for 30 minutes, up to 24 hours! This makes for easy slicing and baking.
That’s really it! As you slice you may find that the dough wants to go flat against your cutting surface. You can roll the log as you slice to battle that, but usually I just use my sharpest knife, a swift motion, and shape any oddball ones gently with my finger on the baking sheet.
Storage and Freezing
One thing I love about cookie dough is having it ready to go in my freezer. This dough works just as well! I recommend you slice and freeze the cookies individually rather than freeze the log. As the entire log would need to thaw for cleanly sliced cookies, it’d be easier just to pop a few out and bake directly from frozen.
For frozen cookies, just bake them at 350°F for 12 to 13 minutes.
Once baked these cookies last fairly well for 3 to 4 days in an airtight container at room temperature!
I hope you like this homemade version of pumpkin slice and bake cookies. This is my first slice and bake cookie, but now that I’ve got the process and dough down, I’m really excited to see what other shapes I can create in the middle! Have fun baking these in the meantime!
Don’t forget about my other fabulous cookie recipes!
- Never Fail Shortbread Cookies
- Lemon Poppyseed Cookies
- White Chocolate Raspberry Cookies
- Flourless Peanut Butter Cookies
Slice & Bake Pumpkin Cookies
Ingredients
- 2/3 cups shortening 4.7 ounces
- 3/4 cups granulated sugar 5.75 ounces
- 1 teaspoon vanilla
- 1 large egg
- 4 teaspoons milk
- 2 cups all purpose flour 9 ounces
- 1/2 teaspoon baking powder
- 1/4 teaspoon salt, finely ground
- 1/2 teaspoon cinnamon optional
- 1/4 teaspoon nutmeg optional
- 1/8 teaspoon clove optional
- 1/8 teaspoon allspice optional
- 1/2 teaspoon green powder dye*
- 1 tablespoon orange powder dye**
Instructions
Making the Dough
- Cream together shortening and sugar until creamy and smooth. 3 to 4 minutes.
- Add the egg and beat until well incorporated, then add milk and vanilla and beat to combine.
- Measure the flour, spices, salt, and baking powder into another bowl and sift it into the shortening mixture.
- Gently mix until a uniform dough forms. Separate into 3 pieces in the following sizes: 1 ounce, 9 ounces, 12 ounces (or whatever remains).***
- Add 1/2 teaspoon of green food powder dye into the 1 ounce portion and fold to combine until dough is uniform green color.
- Add 1 tablespoon of orange dye to the 9 ounce portion of dough and blend until dough is a solid orange color. (See notes for liquid dye tips).
Shaping the Cookie Log
- Lay parchment paper on a sheet of plastic wrap and roll out the plain dough into a 8 x 10 inch rectangle, about 1/4 inch thick. Trim the long edges to make an even straight line and set trimmings aside.
- Form the orange dough into a 9 inch pumpkin log. When round and even, place near the bottom long edge of the dough rectangle, leaving about 1/2 inch on either end.
- Use a butter knife to make a gentle indent along the top of the pumpkin log.
- Roll the green dough into a thin, 9 inch rope. Place along the indent on the top of the pumpkins, gently pressing it down into the orange while pinching off the tip to create a triangular shape. Trim off excess if needed.
- Use the white dough trimmings and line either side of the pumpkin stem to help it hold its shape during rolling.
- When ready, carefully begin rolling the dough by lifting up the edge of the parchment and pulling gently away from yourself. Take your time and smooth the log as you go, keeping the roll tight.
- Pull the parchment away and pinch the seam of the dough together gently. Fold in the edges of the dough like wrapping a Christmas present to close the log.
- Wrap the plastic wrap tightly around the dough and roll it gently against a firm surface, like your clean counter to form a smooth log. You'll need to pause and press the ends in every few rolls to keep the log width uniform.
- Chill for 30 minutes.
Baking Cookies
- Preheat your oven to 350°F and line a baking sheet with parchment paper.
- Remove cookies from fridge and slice with a sharp knife into 1/4 inch thick coins. You may need to gently reshape the cookies as you go to keep them round.
- Place on cookie sheet 1 inch apart and bake for 7 to 9 minutes, or until edges are set and they no longer look wet.
- Remove, allow to cool for 2 minutes on the pan, the move to a cooling rack. Enjoy!
- Store cool leftovers in an airtight container for up to 4 days.
Notes
Nutrition
I’d love to hear what you think, feel free to tag me on Instagram @theflourhandprint so I can see how it went! Until next time, Happy Eating!
Nutrition information and cooking times are provided as a best estimate. Values may vary based upon ingredients and equipment.

Oh my, this slice bake pumpkin cookies are incredibly yummy! An instant favorite among our kids! An absolutely perfect treat for any given occasion! Thanks, loved it!
Thanks Jamie, I’m thrilled your kids enjoyed them so much!
Mikayla, these are the cutest pumpkin cookies ever! You’re so creative and talented. Your blog is for sure my favorite source of inspiration when is about recipes for the kiddos.
Erin, Thank you so much, that is one of the nicest compliments.
Delicious, and so fun to make! Just a note—the recipe is missing the amount of salt required :^)
Oh Goodness Juliana, thank you I will correct this right away!
I’ve seen store bought cookies like this but prefer homemade. Decided to give this recipe a trial run for Halloween and they turned out so good – both flavorful and super cute too!
Thanks Lauren, My kiddo loves to make these kinds of cookies, so I had to make them homemade. I’m so glad you you enjoyed them!
A burst of all the spice flavors. Love your creativity of a pumpkin in the centre. Looks so good and colorful.
Thanks, the spices in the cookie dough makes these extra fall like and fun to make.
These cookies are so fun! My grandkids are requesting to make them together again this year! Great recipe!
Colleen, this makes me so happy to hear.