Easy Halloween Witch Finger Cookies
This page contains affiliate links. For more information please read my Disclosure Policy.
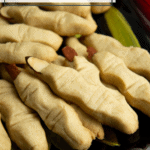
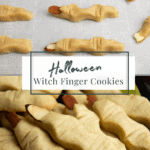
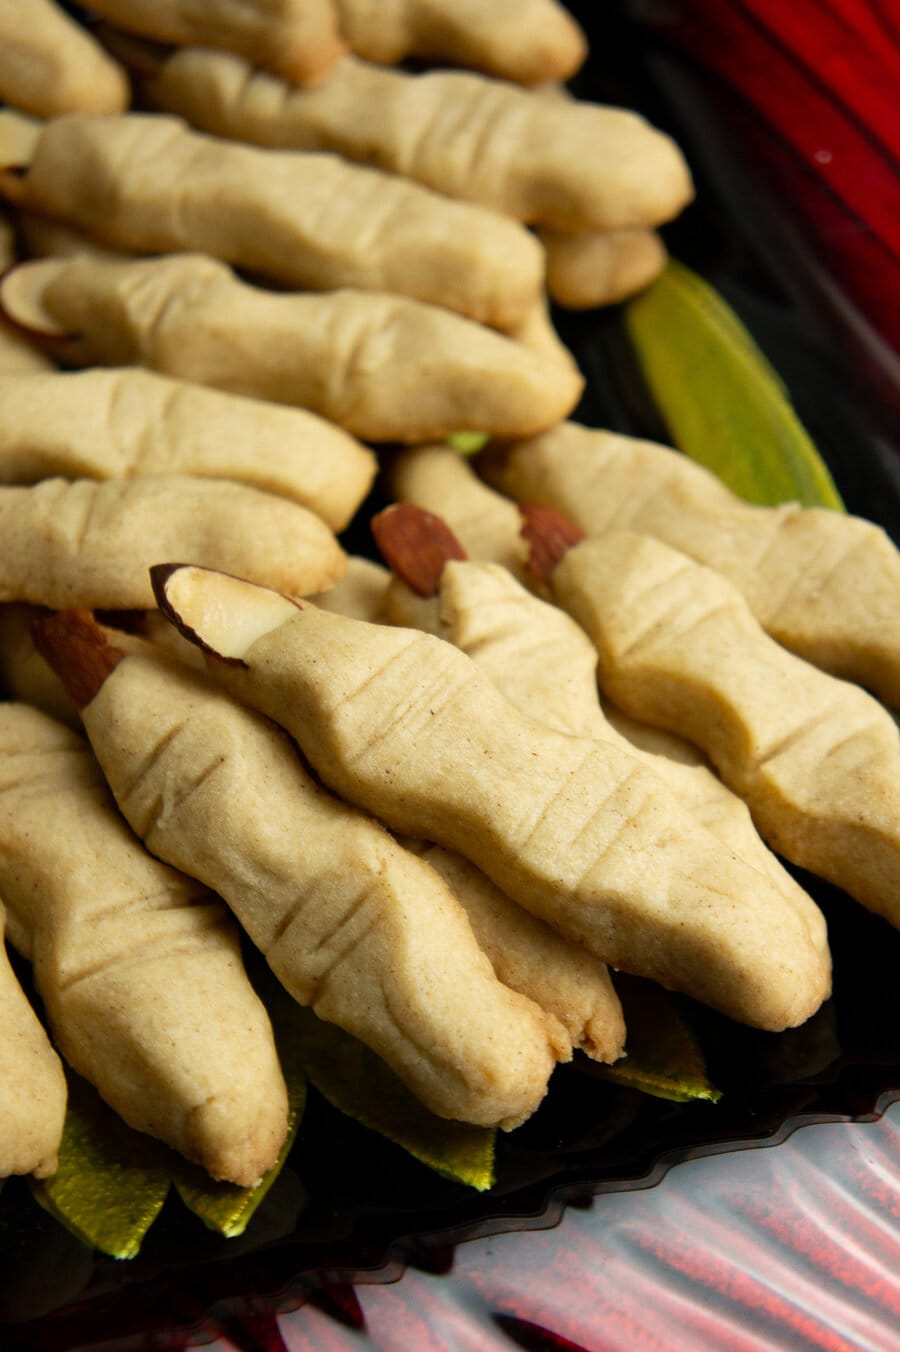
Whip up these quick and Easy Halloween Witch Finger Cookies for a spooky, festive treat. Shortbread dough bakes quick, is easy to customize, and tastes great. They’re a kid-friendly treat that’s perfect as a creepy snack at home or for parties!
When it comes to making the creepiest, spookiest treats, these Halloween finger cookies check all the boxes. Thanks to the buttery shortbread dough, they hold their shape so you have never end up with puffy, huge cookies.
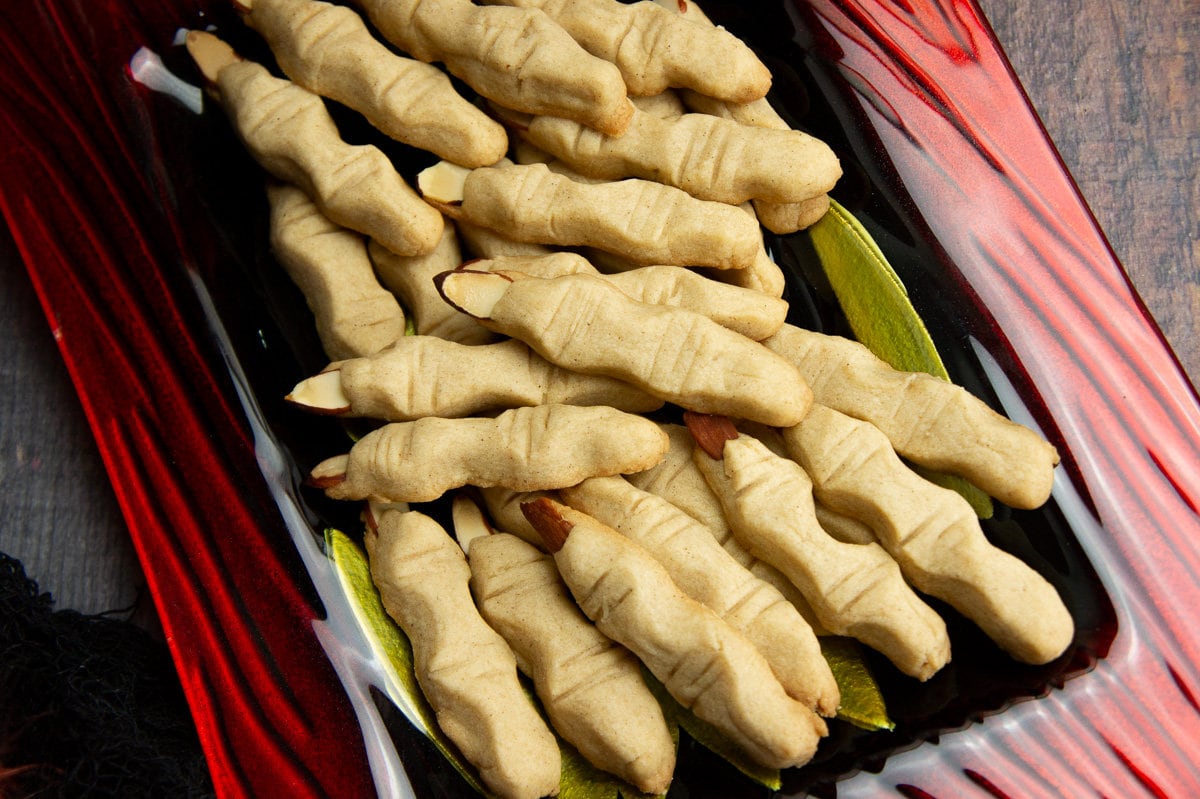
Brown sugar and cinnamon in the dough creates a ‘dirty’ finger and a simple almond fingernail finishes the gnarled, severed look. I’ll walk you through how to shape the knuckles, and even how you can make them more gruesome when it’s time to set them out.
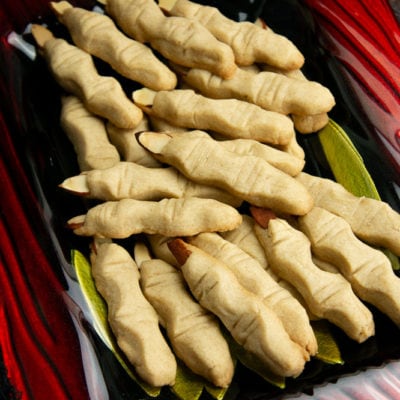
They’re also tasty! Make them ahead of time to display at parties with some spider donuts, and mummy cupcakes or treat your kids to a special treat by serving up a cookie or two with a spooky Halloween milkshake.
Ingredients & Substitutions
A variation on my classic, easy shortbread is the perfect dough for witch finger cookies because other types contain leavening agents like egg, baking powder, or soda. That can cause puffy, fat fingers, instead of these realistic ones. They only take a handful ingredients to makes too!
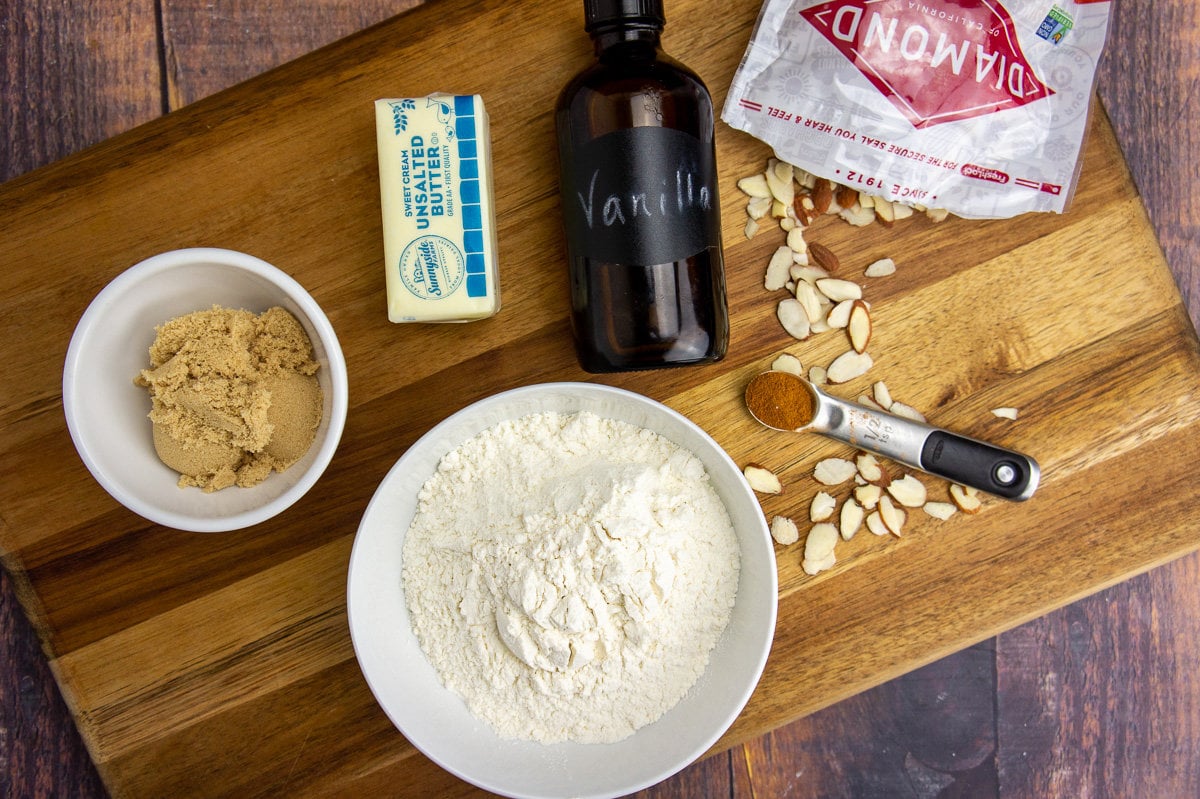
- All-purpose flour – I use just regular flour for these, Bob’s red mill gluten free blend also works well. I’d approach other options like whole wheat flour with caution, some need more or less hydration and may affect the baking ratios.
- Brown sugar – I used Dixie Crystals brown sugar to add a little color to the dough, which creates a ‘dirty’ look perfect for Halloween finger cookies. White granulated sugar, coconut sugar, or turbinado work well too.
- Butter – standard, unsalted butter. Vegan baking sticks can be used instead.
- Vanilla extract – make your own for best flavor! You could also use maple or almond extract in half the amount.
- Cinnamon – I added this to amplify the ‘dirty’ witch finger cookie look, but you can also leave it out. The amount called for doesn’t affect flavor a lot.
- Salt – Just a pinch to enhance the other flavors.
- Slivered almonds – The unusually shaped ones, or the broken fragments make the best witch fingernails!
Alternative fingernail options: Don’t have slivered almonds? Go with what you’ve got! I’ve used blanched almond slivers, pecan pieces, and even whole almonds.
Options for Customizing your Cookies
If you want to make your cookies more playful, creepy, or gruesome, then these tips can help you do it!
- Food Dye – You can use this to either dye the cookie dough or paint the fingernails. Add 4-5 drops of high intensity green food dye to the dough during mixing, or use a powdered food dye mixed with a few drops of vodka to pain the almond fingernails.
- Cocoa Powder – You can make these using a chocolate shortbread dough too! Then paint the nails with dye and create a dark and delicious witch finger cookie. Replace 3 tablespoons of flour with 3 tablespoons of cocoa powder.
- Add ‘bloody’ jam – If you want gruesome, bloody Halloween finger cookies, then you can brush jam around the fingernails, or dip the ‘severed’ end into it. Go for red like in a pomegranate jelly, strawberry watermelon jam, or strawberry jam.
- IMPORTANT! If you choose to add jam, the cookies are no longer safe to store on the counter. I recommend waiting to add it until you’re ready to serve. Leave them out no longer than 2 hours to preserve food safety.
How to Make & Shape Realistic, Creepy Finger Cookies
I promise that making these are no more trouble than any other cut out cookie. And, since they’re ready to eat just minutes after they come out of the oven, they’re pretty perfect for a quick spooky treat.
- Don’t overmix – Cream the butter and sugar together until it’s smooth, but not fluffy which prevents puffy cookies. Also mix the dry in carefully (I prefer by hand) so the cookies are tender instead of dry.
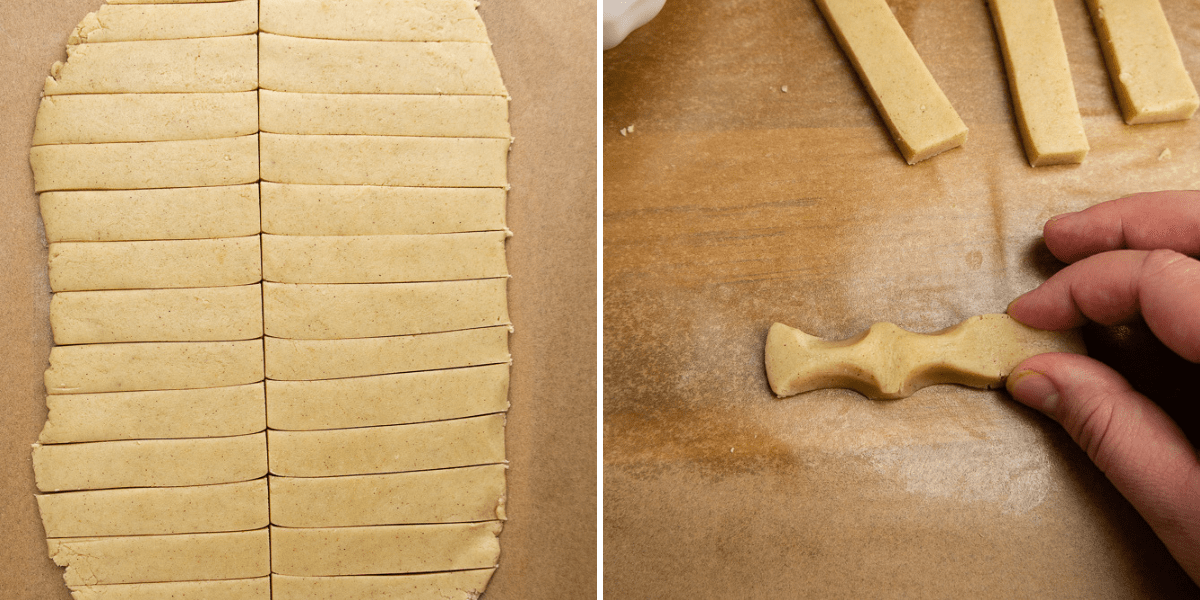
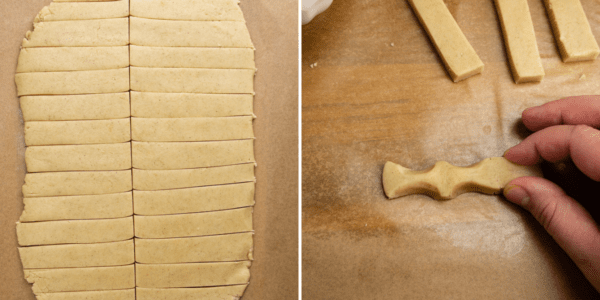
- Roll it out – This makes shaping so easy! Let the length be uneven for more realistic fingers. Aim for 1/4″ and 1/2″ thick and slice into narrow rectangles.
- Squeeze each rectangle three times – once about half an inch down, then down another half inch, then finally at the bottom of the rectangle to create the bony knuckles along the finger
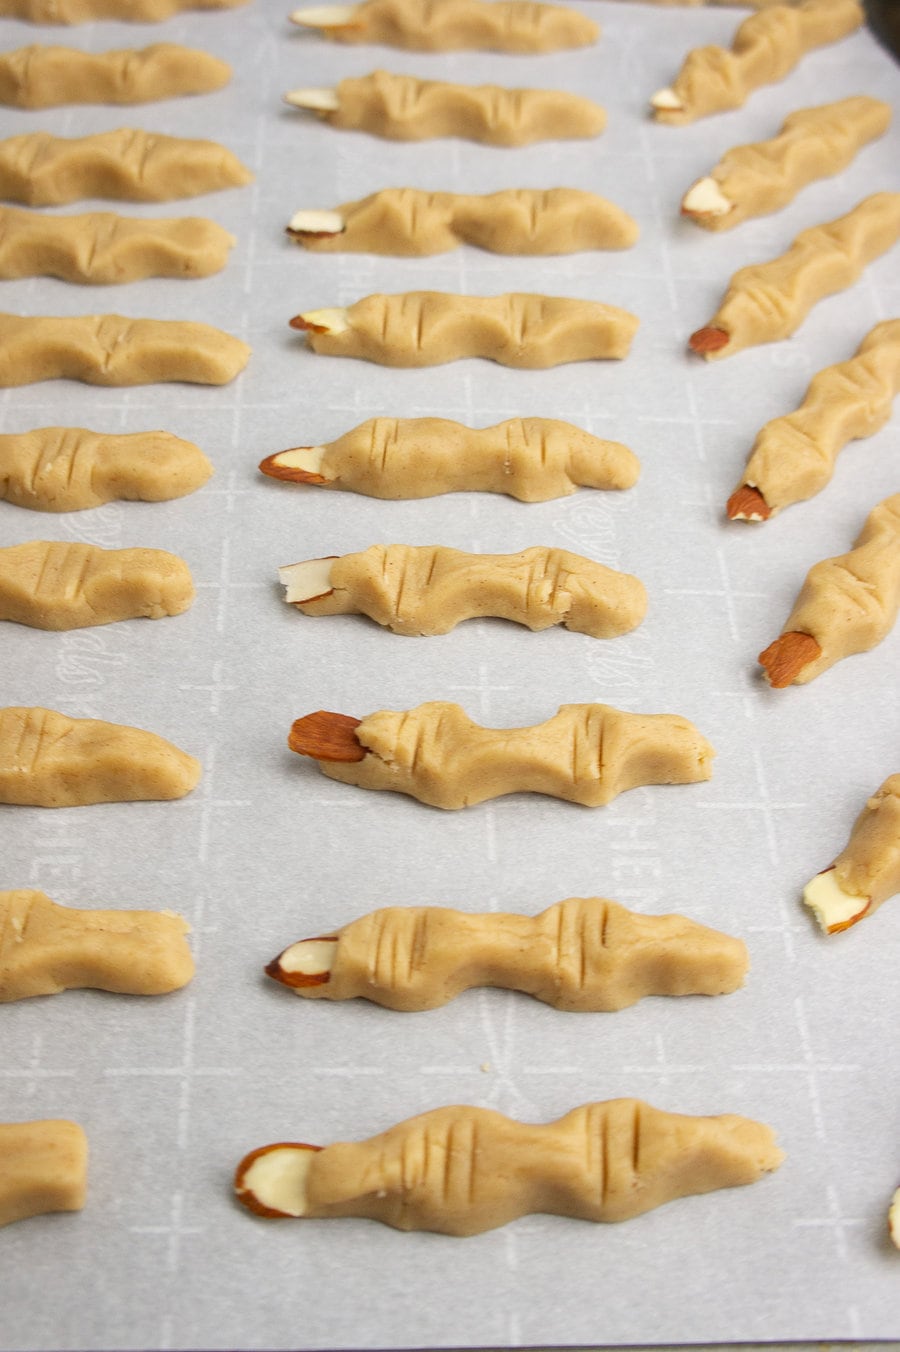
- Slice three lines in each of the two knuckles – this creates a gnarled, authentic look. Use a toothpick or the dull side of a butter knife and press gently.
- Chill the dough – Going from fridge to oven will lock in the shaping you’ve done for perfect finger cookies.
- Embed the Almonds – Slide the end of the almond into the dough so it bakes around it and holds it in place.
- Don’t Overbake – They’ll appear dry and the bottom will barely begin to brown for the most tender cookie.
- Cool for 5 minutes – Moving them to the cooling rack too soon will cause crumbled, broken witch fingers.
FAQs
Once baked and completely cooled, witch finger cookies can be stored in an airtight container on the counter for up to 1 week. After that they’ll become more dry.
Yes! You can make my shortbread dough up to 3 days in advance and store it in the fridge. Let it sit for 20-30 minutes before trying to roll it out for shaping.
Alternatively you can shape the cookies and store them covered, unbaked, in the fridge for up to 3 days. OR, bake them and store them on the counter for up to 1 week.
I’ve never seen a store-bought shortbread dough, but if you do, it should be fine. Check the ingredients for baking powder, soda, or egg, which might cause puffy cookies. If you want to try sugar cookie dough you can, but they are more likely to puff up and cause fat fingers.
I yield about 30 finger cookies from this batch, and it’s very easy to double or even triple if you’re baking them for a Halloween party!
Yes! You can add a few drops of green dye when mixing the flour it to create green witch finger cookies. Or you can use cocoa powder for a natural coloring. Swap 3 tablespoons of flour for 3 tablespoons of cocoa powder.
These are a buttery shortbread cookie with a small addition of cinnamon to create the gross, dirty look of a witch finger. They’re delicious, tender, and crisp on the outside, with a mild sweetness.
I hope these buttery delicious, creepy witch finger cookies satisfy all your Halloween cravings. They’re fun and easy, and give you just enough squirminess to suit the spookiest holiday of the year.
While you’re here, don’t forget to check out the other fabulous Halloween desserts on the blog!
- Slice & Bake Pumpkin Cookies
- Bat Sugar Cookies
- Mummy Cupcakes
- Spider Donuts
- Baked Pumpkin Donuts
- Pumpkin Cupcakes with Maple Frosting
- Pumpkin Spice Layer Cake
Shortbread Witches Fingers
Ingredients
- 6 ounces all purpose flour 1 1/4 cups + 1 tablespoon (spooned and leveled)
- 4 ounces unsalted butter 1/2 cup
- 2 ounces brown sugar 1/4 cup, lightly packed
- 1 teaspoon vanilla extract
- 1/2 teaspoon ground cinnamon
- pinch kosher salt
- 1 tablespoon slivered almonds
Instructions
- Cream together the brown sugar, butter, and vanilla until smooth and creamy, 1 to 2 minutes.
- Add in cinnamon, flour, and salt and fold gently until dough just begins to come together. Turn it out onto a clean surface for rolling.
- Press dough gently together until no more crumbs exist, then press into a square.
- Lay a sheet parchment over the dough or use a lightly floured rolling pin to roll dough into a rectangle between 1/2" and 1/4" thick.
- Slice the rectangle in half lengthwise, then cut lines widthwise every 1/2" creating many thin, long rectangles.
- Shape each rectangle into a finger by pinching three times along its length. Once 1/2" in down, another 1/2" down, and a third time at the bottom of the rectangle.

- Transfer to parchment lined baking sheet and repeat with remaining rectangles.
- When fingers are all shaped, slice three small lines across the bumps created between the 1st and second pinch and the second and third pinches.
- Slide a almond sliver into the dough at the tip of the finger. Cover and chill baking sheet for 30 minutes, up to 3 days.
- Preheat oven to 350°F, take cookies out while oven preheats (About 10 minutes to allow the pan to warm slightly). Bake when oven is ready for 9 to 11 minutes or when bottom is just barely beginning to color.
- Let cool on pan for 5 minutes then transfer to a cooling rack until completely cool.
Notes
Nutrition
I’d love to hear what you think, feel free to tag me on Instagram @theflourhandprint so I can see how it went! Until next time, Happy Eating!
Take a look more spooky Halloween recipes from our #HalloweenTreatsWeek Bloggers today: Halloween Cookies & Bars:- Meringue Witch Finger Cookies from BigBearsWife
- Pumpkin Snickerdoodles from Devour Dinner
- Shortbread Witches Fingers from The Flour Handprint
- Gingerbread Mummy Cookies from 4 Sons R Us
- Hocus Pocus Mini Pancake Cereal from Fresh Coast Eats
- Count Chocula Cream Pie from Sweet ReciPEAS
- Individual Halloween Parfaits from Tastes of Homemade
- Radioactive Jell-O Shots from A Kitchen Hoor’s Adventures
- Spiced Caramel Corn from Pastry Chef Online
- Halloween Strawberry Ghosts from I am a Honey Bee
- Easy Pumpkin Pudding Dip from Love and Confections
- Screamsicle Milkshake from For the Love of Food
Nutrition information and cooking times are provided as a best estimate. Values may vary based upon ingredients and equipment.


I’d use less vanilla next time. I used 1 1/8 of flour and 1/8 cornstarch they have a nice crispness. I really enjoyed making them
Thanks for sharing how you adapted the recipe, that’s a great tip with the cornstarch!
I think the ingredient quantities are off, because my dough was very crumbly. I tried adding another half stick of butter to fix it, but it was still too crumbly to roll and cut. I had to abandon my effort and try something else.
Hm! I just made these myself at Halloween and it worked beautifully. I imagine something was askew with the flour amount/ratio.
These were delicious and so cute! I’m way too excited for Halloween this year and couldn’t wait until October to make them. I just love the flavor the cinnamon and brown sugar added.
Lol I get excited about Halloween too! I’m glad you enjoyed them, and I hope you make them again when we get closer to the date!
How cute for Halloween. Bookmarked to give them a test run. Thanks for the easy step by step instructions too.
I hope you enjoy them, have fun!
The grandsons came over this morning and I served them the witches fingers with their milk. They got such a big kick out of them. They were simple to make and they really tasted good. They asked if I’d make them again. Of course I said yes!!
I’m so glad they liked them! They’re just spooky enough, right! I hope you guys keep on enjoying them!
These are so much fun and easy to make! Kids will love them!