Strawberry Watermelon Jam
This page contains affiliate links. For more information please read my Disclosure Policy.
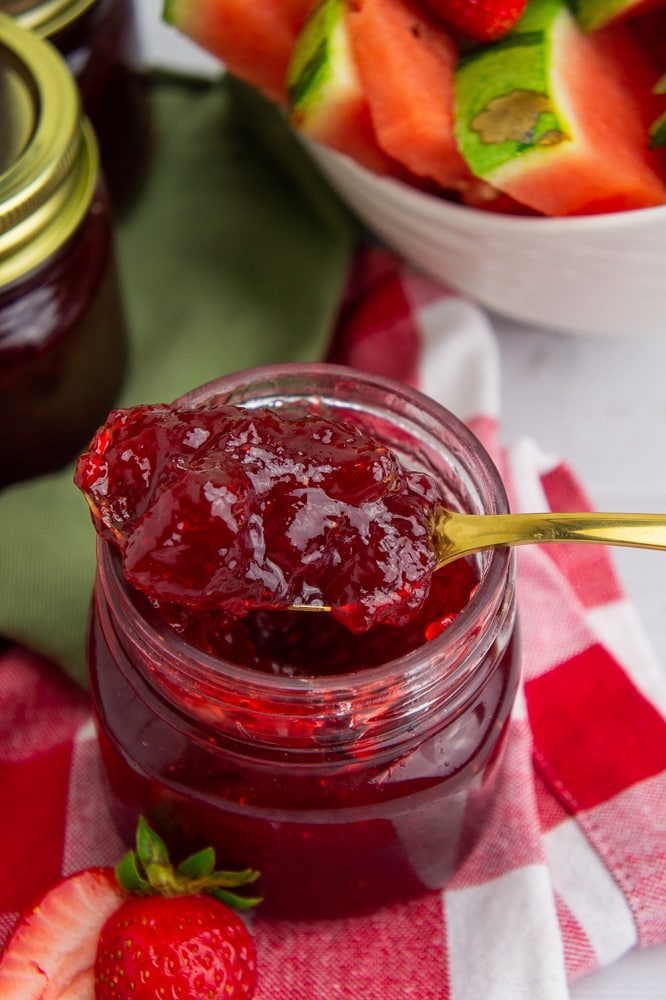
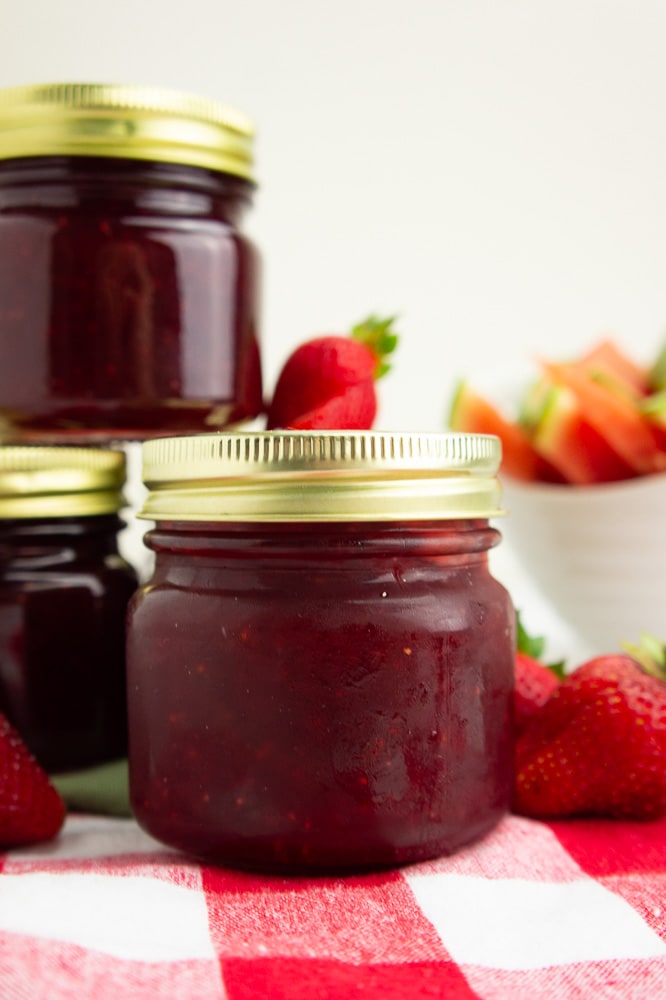
Canning jam is a great way to preserve the sweet fresh fruit of spring and summer, but what about making a jam that will literally transport your taste-buds to summer? Strawberry Watermelon Jam is just that, sweet, bright, fresh, and a true taste of summer.
If you’re at all familiar with the numerous other jam recipes on my site, you know I’m a big fan of combo flavors. I love a good classic strawberry jam, but when making homemade jam, why not experiment and make things you’ll never find on a grocery store shelf?
Sweet strawberries and fresh summer watermelon are flavors that go naturally together so well, in salads, in juices, so why not in jam? I had high hopes from the beginning for this one and let me tell you, it did not let down! It was magical from the first taste and dare I say it…it may be my favorite jam!
Okay, I know, I say that every time I make a new jam, so let’s say this is my favorite summer jam! That’s exactly how it tastes, like summer in a jar. If you’re ready to preserve some summer flavor, look no further than this sweet, fresh, bright strawberry watermelon jam.
Canning Tools & Steps
Before I get into the process for cooking and making this jam, I always like to remind any newbie home preserve makers that there are some tools and steps that ensure safe canning and quality jam every time. Not to mention making the process simpler for you!
Canning Equipment
- A large canning pot with canning rack – You can buy a canning pot, or use a large wide stock pot and simply buy an insert that keeps the jars from the bottom of the pot (shattered jars are no fun!).
- Jar clamps – This is essential, trust me!
- Hand Protection – I like to use thick gloves, but my mom goes with towels, just be aware those jars will be HOT.
- Funnel – A good wide mouth one works well for canning.
- Ladle – I like a nice metal one for working with hot jam, especially if you can get one with a hook that holds it on the side of the pot.
- 8 ounce mason jars(or whatever jars you choose to use) – I like 8 ounce jars because I go through it faster, which means more jam variety in my fridge, but you can use any jar with NEW lids.
- You can also buy a canning set, but there are tools in there I never use, so that’s up to you!
Once you’ve got your canning equipment assembled, read through these canning steps. They happen while your jam is cooking, so it’s important to know when and how to complete each step!
- Before you start cooking your recipe fill your canning pot with enough water to cover your canning jars by 1 inch. Bring it to a boil over high heat.
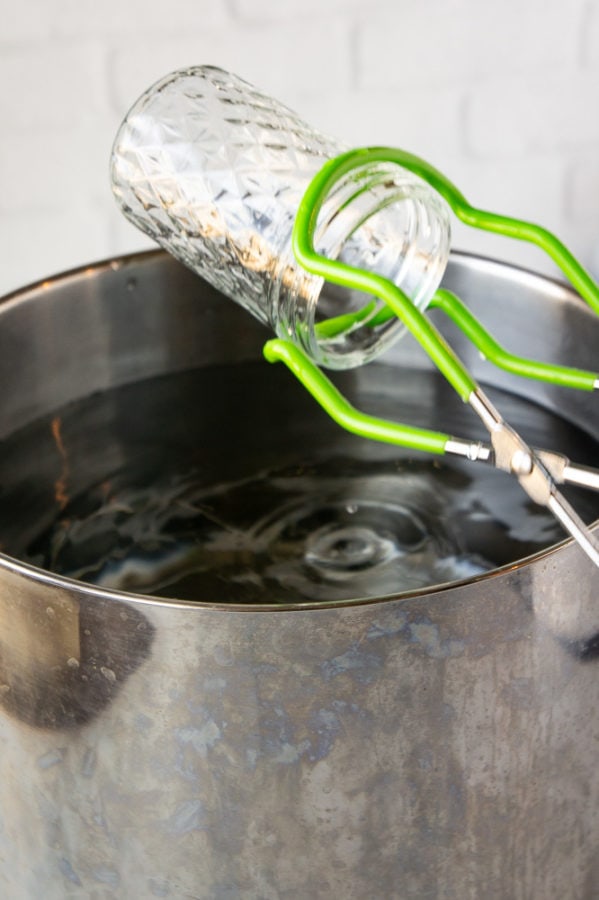
- While your cooking place your clean jars in the pot of boiling water for a minute or so to warm them up. This prevents cracking from a temperature difference when you add the hot food to them.
- Remove them from the water with your jar clamps and place them on a towel upside down to let the water run out. Make sure your jar clamps are angled as the picture shows below to prevent hot water from running down onto your hand or stove.
- When your preserves are done, flip the jars over using your hand protection, they’ll still be hot.
- Using your funnel and ladle, fill jars immediately with your hot preserves, leaving ¼” of space between the rim and the jam.
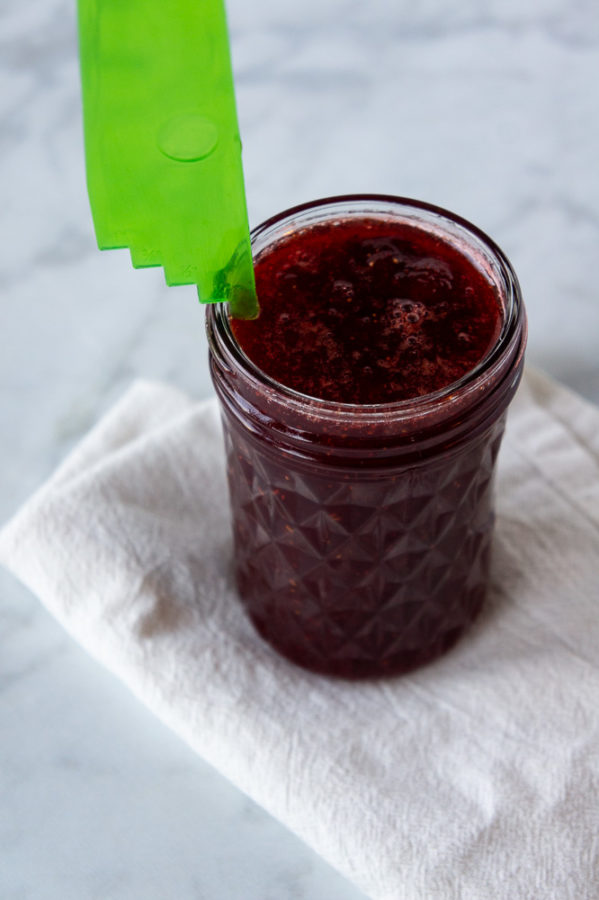
- Wipe the rims clean carefully with a warm, damp paper towel then dry them completely. This is important for the jam to seal properly.
- Place seals on and using your hand protection, screw on the lids as tightly as you can. Then use your jar clamps to submerge the jars in the boiling water again.
- Allow to ‘process’ in the boiling water for 10 minutes. Remove and set them on a towel, (they’ll be very hot!) and leave them at room temperature until each lid has ‘popped’
Pro Tip: You’ll know the jars are ready for the cupboard when you hear a ‘pop’ of the seal locking. You can also check this by pushing down on the center of the seal. If it clicks, it isn’t done yet. This can take up to 24 hours, so be patient!
Ingredients
As with most jam recipes, you’ll find that the ingredient lists isn’t long or complex, it’s all about the right balance of sugar, fruit, and when necessary, pectin.
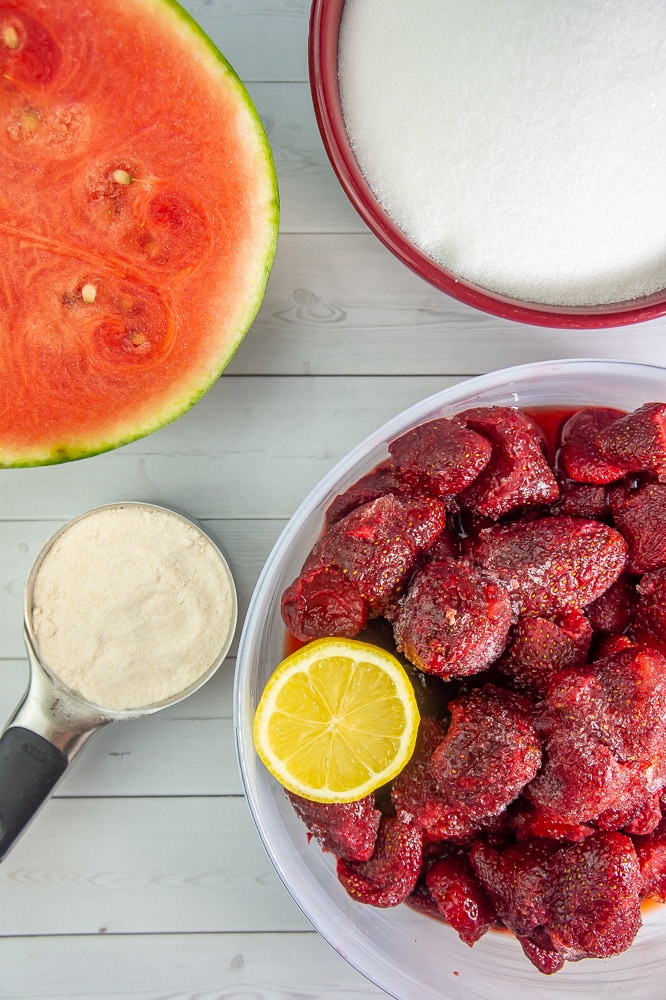
- Strawberries – Either fresh or frozen strawberries are perfect for this. While fresh strawberries definitely do the job on delivering flavor, I actually preferred frozen. They broke down better and resulted in an evenly textured final jam. Be sure to let them thaw at least halfway, and discard the excess liquid.
- Watermelon – You’ll need roughly half a large watermelon for this. Look for one with a yellow field spot or one that feels heavy for it’s size for best flavor.
- Lemon – Just a splash to brighten things up!
- Sugar – Classically made jam is not a health food! There is sugar, and that’s what makes it delicious. White sugar is my go to for jam making.
- Regular pectin – you’ll need a shallow half cup or 1 packet of regular pectin for this. For questions on using low or no sugar pectin, please see FAQ’s.
- Butter – This is completely optional, it doesn’t affect flavor or the set up of the jam. Adding a mere teaspoon of unsalted butter however will prevent any foaming during the cooking. Foam is not harmful in any way, but it doesn’t look great in the jars and I don’t love skimming it off, so I add butter!
That’s it, pretty simple! Now I see a lot of recipes out there lately touting ‘no pectin’ as some sort of selling point and I’m here to tell you, the jam is not better or worse for using pectin. Some fruits contain enough natural pectin to set up beautifully on their own, like my loquat jam. Others, like this strawberry watermelon jam, use fruits that have little or no natural pectin, so we add powdered pectin (which is naturally derived from pectin rich fruits) to help the jam set up quickly without cooking the fruit to death.
I’m pro-pectin all the way. It keeps jam cooking times consistent, it allows for a beautifully set up final jam, and takes a lot of guesswork steps out of the process. It’s inexpensive (order pectin here) and I recommend stocking it to anyone who likes the idea of homemade jam.
Read more about pectin and the various types of home preserves in my Jams, Jellies, and Home Preserves Guide.
A Note on Pectin – 1 box of pectin is 1.75 ounces, to use regular (not low sugar) bulk pectin, use 6 level tablespoons unless directed otherwise by the package instructions. This is a shallow 1/2 cup.
How to Make Strawberry Watermelon Jam
With your canning equipment in hand and your canning pot of water coming to a boil, you’re ready to get started! The actual jam making process is simple, and you’re kitchen will smell incredible.
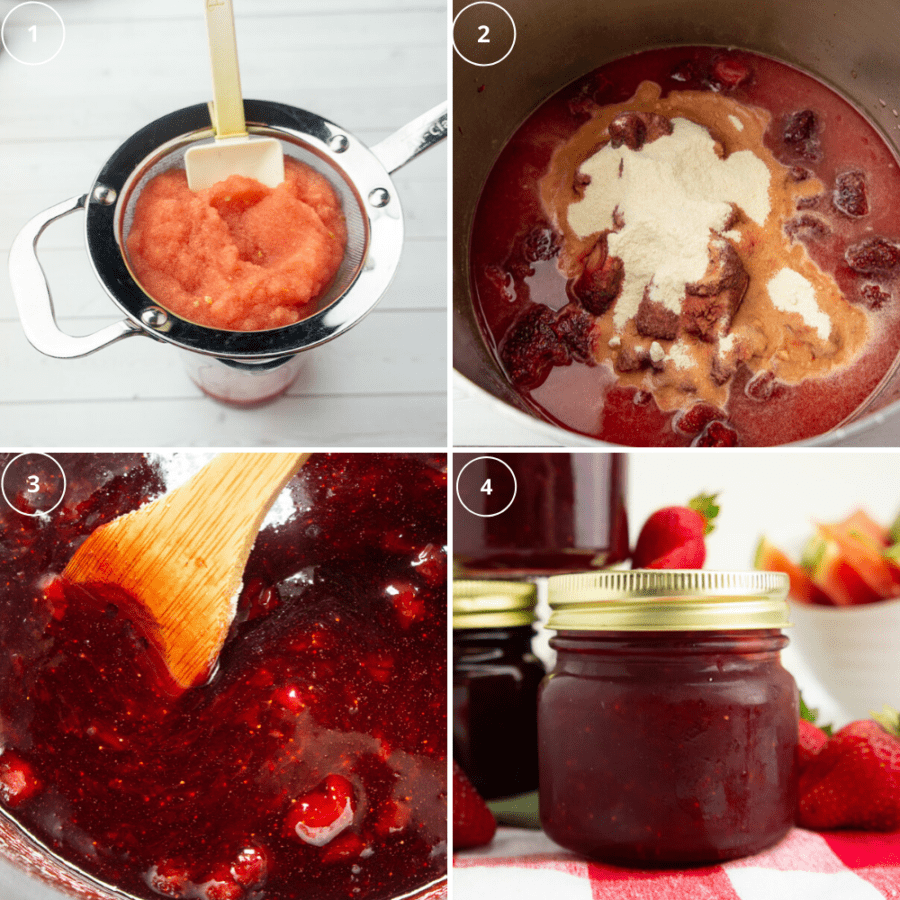
- First we’ll need some watermelon juice. Start by removing the rind and chopping the watermelon into rough cubes. Then pop them in your blender or food processor to create a puree. Drain the puree through a fine mesh sieve and collect the juice.
- Next combine the strawberries, watermelon juice, pectin, and lemon juice in a large pot. If you’re using a dab of butter, add that now. Place over medium high heat and stir. Keep stirring gently but frequently until the mixture comes to a rapid boil that does not stop even when you stir.
- When you’ve reached that rapid boil, begin adding the sugar. Stir the entire time you add the sugar, and continue to gently stir after, until the mixture returns to a rapid boil that does not stop even as you stir. Begin timing for exactly 1 minute and 10 seconds.
- When the time has elapsed, remove the jam from the heat and proceed with your canning! (see above!). Or ladle into jars, allow to cool, and store in the fridge.
Regardless of whether you choose to can, freeze, or just pop your jam in the fridge, know that an open (not sealed by canning) jar of jam is safe in your fridge for up to 1 month. This yields enough for six 8 ounce jars of jam that can be canned, with enough extra to enjoy immediately.
Should you choose not to can this, allow the jam to cool completely before you place in the fridge.
FAQ’s
No. The jam is perfectly edible once it’s cooled enough not to burn your mouth. However, canning the jam allows you to store the extra safely in your cupboard for up to 18 months. SInce this yields just over 48 ounces of jam, I recommend canning or freezing unless you have plenty of people to gift it too.
If you choose not to can or freeze this, it can remain safely in your fridge, sealed, for up to 1 month.
Follow all the same jam making steps. When your jam is done carefully ladle the jam into freezer safe jars or containers, leaving 1 inch of headspace between the jam and the top of the jar. Allow to cool completely then seal and place in the freezer for up to 1 year. I recommend you cook the jam for 1 minute instead of 1 minute and 10 seconds.
I have not tested this specific recipe with that pectin, but I use it in other recipes such as Cherry Vanilla Jam. While I can’t guarantee success, I recommend using the included chart that comes in pectin boxes and using the amount of sugar they suggest for 5 cups of strawberries.
Frozen strawberries give off a lot of extra liquid when they thaw. I’ve found I get better strawberry flavor if I let them thaw about halfway and discard the liquid. This also means a short cook time since the strawberries aren’t frozen!
Enjoy your Taste of Summer
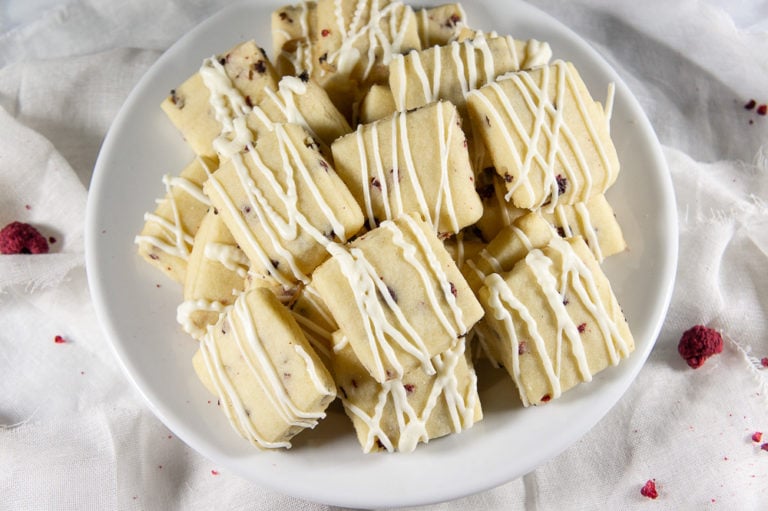
Try your homemade jam on everything! Homemade drop biscuits, classic shortbread cookies, a toasted slice of white whole wheat bread, or a fun summery version of these easy raspberry twists are all great options. to simple whole wheat sandwich bread. It’s incredible how the freshness of watermelon comes through and brightens up the strawberry flavor. It’s sweet and summery and I know this is certainly going to become a yearly ritual for us now. I hope it’s that for you too. Enjoy, and until next time, Happy Eating!
If you liked this jam recipe check out these!
- Pomegranate Cranberry Jam
- Pomegranate Jelly
- Pear Butter
- Quick and Easy Blueberry Compote
- Strawberry Jam
- Cherry Vanilla Jam
- Loquat Jam
Strawberry Watermelon Jam
Equipment
- Funnel
- thick gloves or hand protection
- Seven 8 ounce mason jars with new seals
Ingredients
- 2 1/2 cups strawberries, chopped fresh or frozen
- 2 1/2 cups watermelon juice*
- 7 cups sugar
- 1.75 ounces regular pectin 6 tablespoons of bulk pectin
- 1 tablespoons lemon juice
- 1 teaspoon unsalted butter optional, prevents foaming
Instructions
Canning Instructions (Skip if not canning your jam)
- Fill your canning pot with enough water to submerge your jars and have 1 inch of water on top. Bring to a boil over high heat.
- Set out your jar clamps, funnel, ladle, and clean jars with new seals and clean lids on a dish towel nearby (double if you don't have heat-safe counter tops).
- While your jam is cooking (step ) place your clean jars into the boiling water gently with your jar clamps and allow to heat for a minute or so. Remove with jar clamps and carefully place upside down on the dish towel to allow water to drain off.
- When jam is finished cooking, use your ladle and funnel to carefully fill each jar, leaving only 1/4 inch of space between the top of the jam and the rim of the jar.*
- Wipe the rims of the jars (just where the seal sits) clean with a damp, lint free towel and then dry.
- Place the seals on the jars and screw on the lids, using your hand protection while holding the jars. Tighten the lids as much as possible by hand.
- Using your jar clamps, lower the jars into the boiling water and allow to process for 10 minutes.
- Remove from the water and set on towel. Let them cool and seal. They're ready to cupboard storage when the lids seal. You'll hear a 'pop' as they do. You can also check this by pressing down on the top of the seal, if it clicks, it hasn't sealed yet. This can take hours, so be patient. Once sealed they can be stored at room temperature for 18 months.
Jam Instructions
- Puree watermelon chunks in a blender or food processor and strain it through a fine mesh sieve to collect the juice. Juice your lemon.
- Combine watermelon juice, strawberries, lemon juice, butter if using, and pectin in a large pot over medium high heat.
- Stir gently but frequently until the mixture comes to a rapid boil that does not stop even as you stir.
- Add in sugar and continue to stir frequently but gently until the mixture returns to a rapid boil that doesn't stop even as your stir. Begin timing for 1 minute and 10 seconds, stirring the entire time.
- Remove your jam from the heat and proceed with canning. Or, if not canning, ladle into jars and allow to cool completely before storing in the fridge for up to one month.*
Notes
Nutrition
Nutrition information and cooking times are provided as a best estimate. Values may vary based upon ingredients and equipment.


Nice and easy was teaching my granddaughter how to canning.
Love to hear that! Glad you both enjoyed it!
Why if you can the recipe will it only last 30days? I am new to canning so this question is genuine.
I’m happy to answer! If you follow the proper water bath canning steps and your jars seal, the jam is actually good for 1 year at room temperature (though I recommend a cool dark cupboard). Once you open it, you’ve broken the preservation seal, and that’s when the clock starts, so to speak.
I recommend storing opened jam in the fridge, and using it within 30 days. Truthfully I’ve definitely had jam in the fridge for longer and still used it, but I cannot safely recommend my readers do that! Hope that helps, welcome to canning!
Thank you so much for your fast reply! I will be making this tomorrow with a local farms, watermelon. They have a tropical punch, watermelon that I’m sure it will be divine with the strawberries!
You’re welcome! If I can share one piece of advice to a new canner, take the time to get all your supplies and ingredients measured and ready before you start, and start that water bath boiling first so it’s ready when you are. Good luck and enjoy the process!
This is the second year I’ve used this recipe and it works perfectly. It yielded exactly 8 half pint jars, which is what fits in my digital canner. So, perfect! I did use bulk pectin – 6 Tbsp. They all gelled last year and I’m hoping this year will be the same but from the consistency in the pot, I think it will. Thank you for the printable recipe as it took me a minute to find the recipe that I remembered from last year so now I’ll print it out and hedge it handy for next year!
Tammy, it makes my day when I read comments such as yours. I am so happy the jam has worked so well for you. It is on of my families top requested flavors!
I made this jam yesterday and it was not set this morning. How long does it typically take to set? Wondering how long I should wait until I recook…
Hi Laurie, sorry to hear you’re having trouble. Whenever I make this it sets up same day by the time it cools.
I would go ahead and recook it. If you need any help please email me directly at [email protected] so I can walk you through it!
I made two batches both with a packet of liquid pectin. Turned out great. On my second batch I threw in 3 bananas that I had in the freezer and vanilla paste. OMG it tastes like banana bread. Thanks for the recipe.
I’m so glad you liked it and it turned out great! Thank you for sharing that it went well with liquid pectin too. This is one of my all time favorite jams so this makes me so happy. I never thought to add bananas…but now I might!!
I only have liquid pectin on hand. How does that convert? How much should I use?
Ah substituting pectin can be tricky! I’ve never worked with liquid pectin, but from what I understand, it’s about 3 oz of liquid per 2 tablespoons of dry pectin. (The tricky part is that a packet of sure jell powdered pectin is 4 tablespoons, but the bulk pectin I use requires 6, you can see how it starts to get complicated!) I would begin with 6 ounces of liquid pectin, and be sure to follow the package instructions on YOUR pectin for when to add it, I believe liquid is added at a different stage. I sincerely hope that works for you, and please let me know how it goes!
Sounds fantastic! I also love to make combo jams (a favorite is cherry lemon cranberry). Have you tried this by using all of the watermelon (rind excluded of course) instead of just the juice? My granddaughters made watermelon jam and it was great! Just a thought!
Hi Sherry, thanks for stopping by! I’m glad to hear you like the strawberry watermelon combo, I do love fun combinations! Cherry lemon and cranberry sound wonderful. I haven’t tried it with the pulp included simply because the few times I’ve made syrups or reductions with watermelon, the pulp left an unpleasant texture – that could just be personal preference! Maybe someday I’ll give it a go with jam ;). Thanks again!
Questioning the amount of pectin… 1.75oz… is just under 1/4 c not 1/2c . Which should I use? 1.75 is or shallow 1/2c?
Thank you for catching that! I wish I could say I caught all typos always! It is 1.75 ounces, one box worth, 1.75 ounces in weight its about 4 tablespoons and actually closer to 1/3 cup volume. Thanks again!
Hi again LaDonna, I have to make a mild amendment to my previous response. I did some digging, as I realized I put 1/2 cup on more than one recipe (which usually means for good reason), as it turns out 1 box of regular pectin at 1.75 ounces would measure out to 4 tablespoons, or about a shallow 1/3 cup. BUT, when using bulk pectin like Ball or Hoosier Hill Farms, you should use a full 6 tablespoons of pectin for every box the recipe calls for, which is a shallow half cup.
I imagine this is due to some variance in the way the pectin is made, I can’t be sure but my final answer for now is this, either use the pre-portioned box of pectin at 1.75 ounces, or use 6 level tablespoons of regular bulk pectin (not low sugar). I hope this helps. Thanks for helping me learn something new today!
I’m going to make this tomorrow, I just want to be 100% sure it is SEVEN cups of sugar, correct? I’ll do it, I just want to make sure(:
Yes it is 🙂 the amount of sugar is essential to activating the pectin properly so it will set right. It’s one of my favorite jams, I hope you have fun making it and eating it!
I made it last night and I love it! However, I don’t know what I did wrong, but I ended up with 6 full 8oz jars AND 1 full 12oz. Not that I’m complaining, It gelled, and it’s delicious even with whatever mistake I made(:
Thank you for posting it! I love these jams you can’t get in the store. I ate this with toast this morning, but I’m wondering what your favorite ways to eat it are?
Hi Victoria! I’m so glad you like it and it worked out well for you. I don’t know how you ended up with extra, but it’s always good to get a bonus! You’re so welcome, I agree, I love unique jams I don’t see in stores. Toast is a great vehicle for jam of course, but this particular jam we like with peanut butter as a classic sandwich, we also really like it on shortbread cookies or as a filling in vanilla cupcakes or a layered cake. It’s great with anything fresh and summery like strawberry shortcake. Enjoy all your jam! Thanks for the review 🙂
Thank you! Yes I’ve been eating SO many PB&J’s with this jam hehe, too good! Your other ideas sound great as well, I’ll have to try it on maybe a mug cake!
I’ll try to keep following you to see what other jams you come up with! I’m going to try to make Mango jalapeno jam next week, wish me luck..
Have a great one <3
Mango Jalapeno sounds delicious! I love a good kicky jam, best of luck! I do publish jam and jelly recipes throughout the year, I hope you find your way back to try out some more 🙂 I do have a newsletter sign up, and all my new recipes get announced straight to your inbox if you’re looking for something like that! Thanks for your feedback on this recipe, I can’t tell you how much joy I get when someone really enjoys one. Enjoy your week!