Christmas Pinwheel Sugar Cookies
This page contains affiliate links. For more information please read my Disclosure Policy.
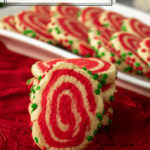
These adorable Christmas pinwheel cookies are a cute, easy way to make festive cookies. Use store bought or homemade sugar cookie dough and customize them with 1, 2, or more swirls and your choice of sprinkles. They’re a quick and delicious way to have a holiday cookie without the decorating stress.
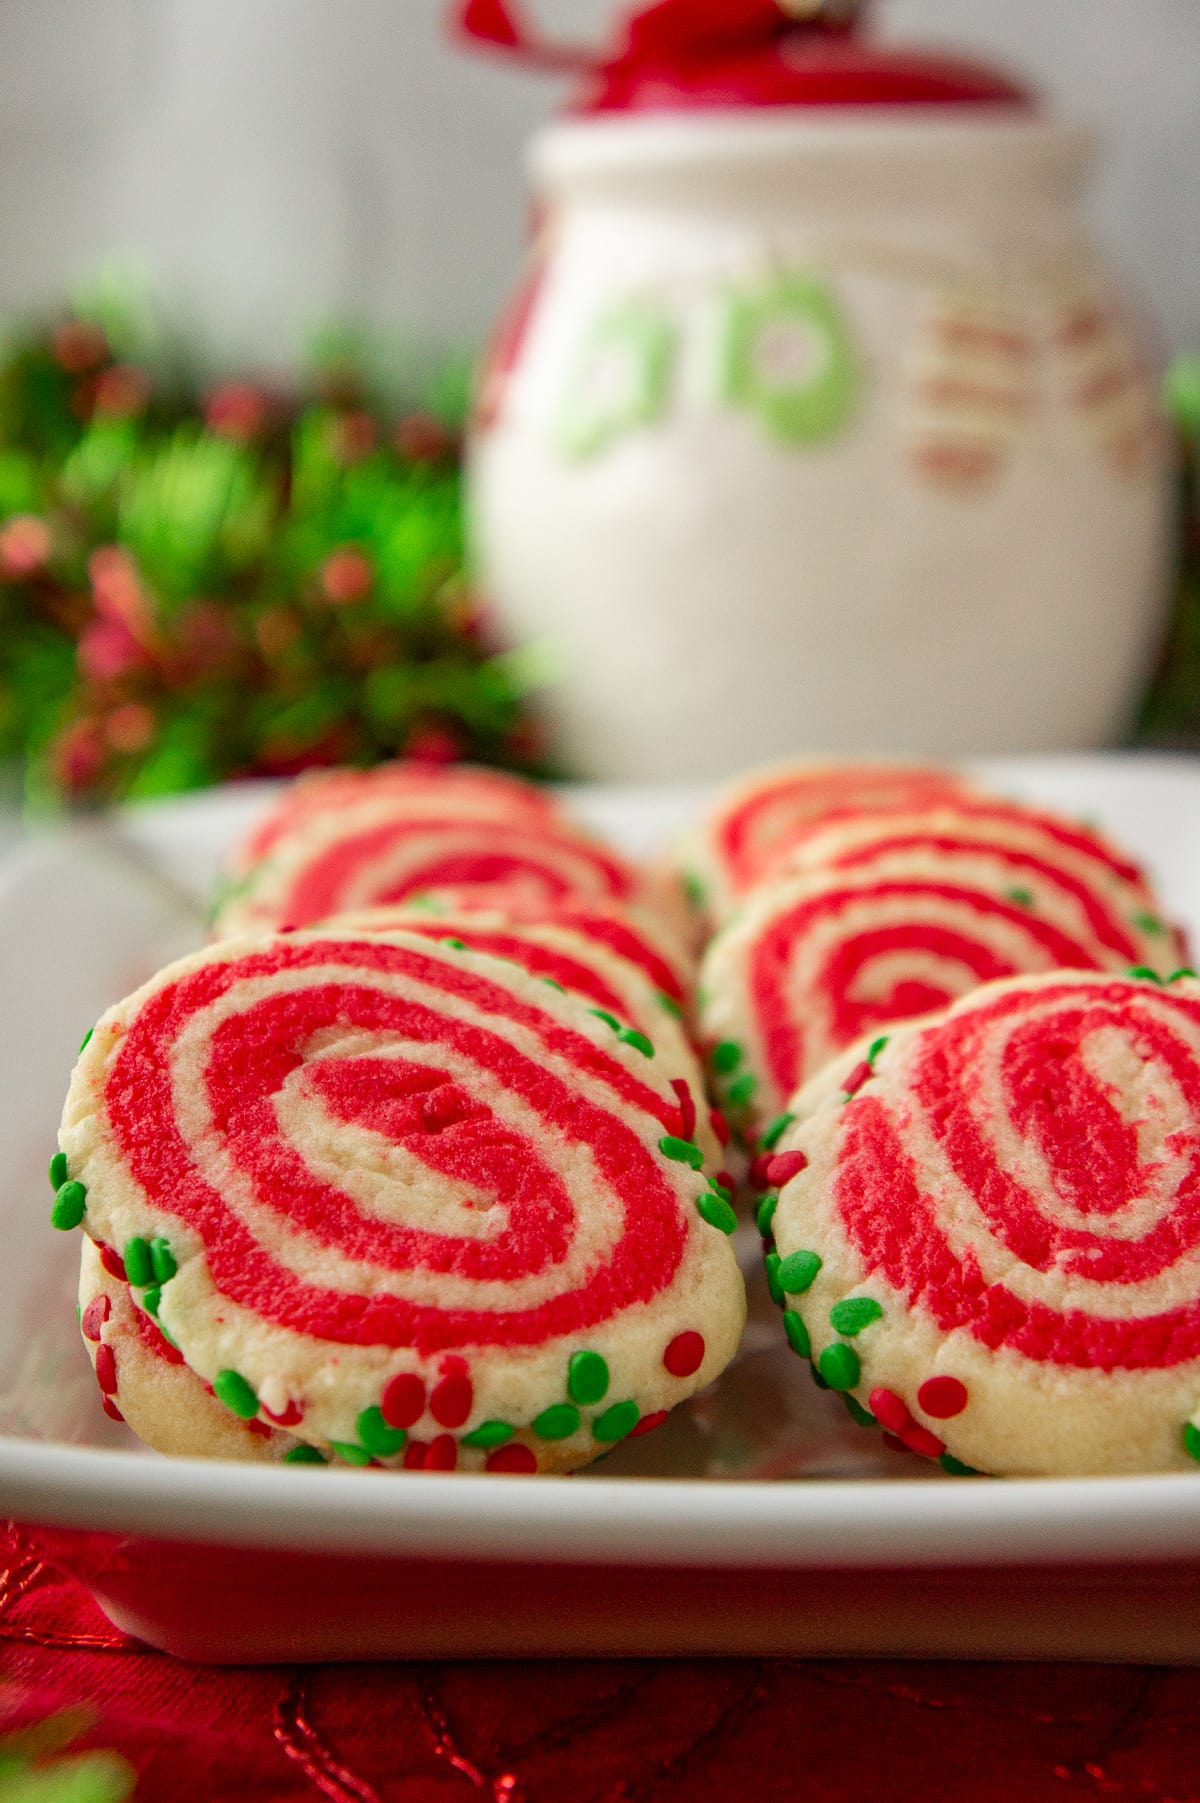
Truthfully, I don’t love the decorating aspect of baking. When I do make a cute, themed desserts like these Grinch cookies or my pumpkin cupcakes or mummy cupcakes for Halloween, it has to be EASY.
These Christmas pinwheel cookies are exactly that – so, so simple. Instead of filling a piping bag and trying to pretend I’ve got the skills of a food network decorator, they come straight out of the oven, already cute.
I’ve got all the tips, tricks, and tools you’ll need to whip up a batch whenever you’re ready. Heck, even though I made them Christmas themed, you could easily make swirl sugar cookies for whatever holiday or event you like.
Ingredients & Supplies You’ll Need
Aside from your standard baking tools and sprinkles, there are a few things I definitely recommend that make a big difference in the coloring and shaping process so that it goes as smoothly as possible.
- Sugar Cookie Dough – Pre-made dough will certainly work. But I am a fan of all things homemade! I used a half batch of my Crisco Sugar Cookies, which is my go-to recipe for all things sugar cookie all year long.
- Food Coloring – I highly recommend either a high-intensity dye or gel food coloring rather than the standard easter egg dye. The usual food dyes can add too much liquid and affect the texture of the cookie. (I used 8 drops of the high intensity to get the red I liked)
- Silpats or parchment paper – It’s much easier to arrange the layers if you use a movable, nonstick surface. I used my large baking mat and a small silicone mat to sandwich the colors together.
Step By Step Instructions
Once you have your sugar cookie dough and supplies ready, you can get baking! These steps will walk you through exactly how to create the pinwheel and bake your cookies to perfection.
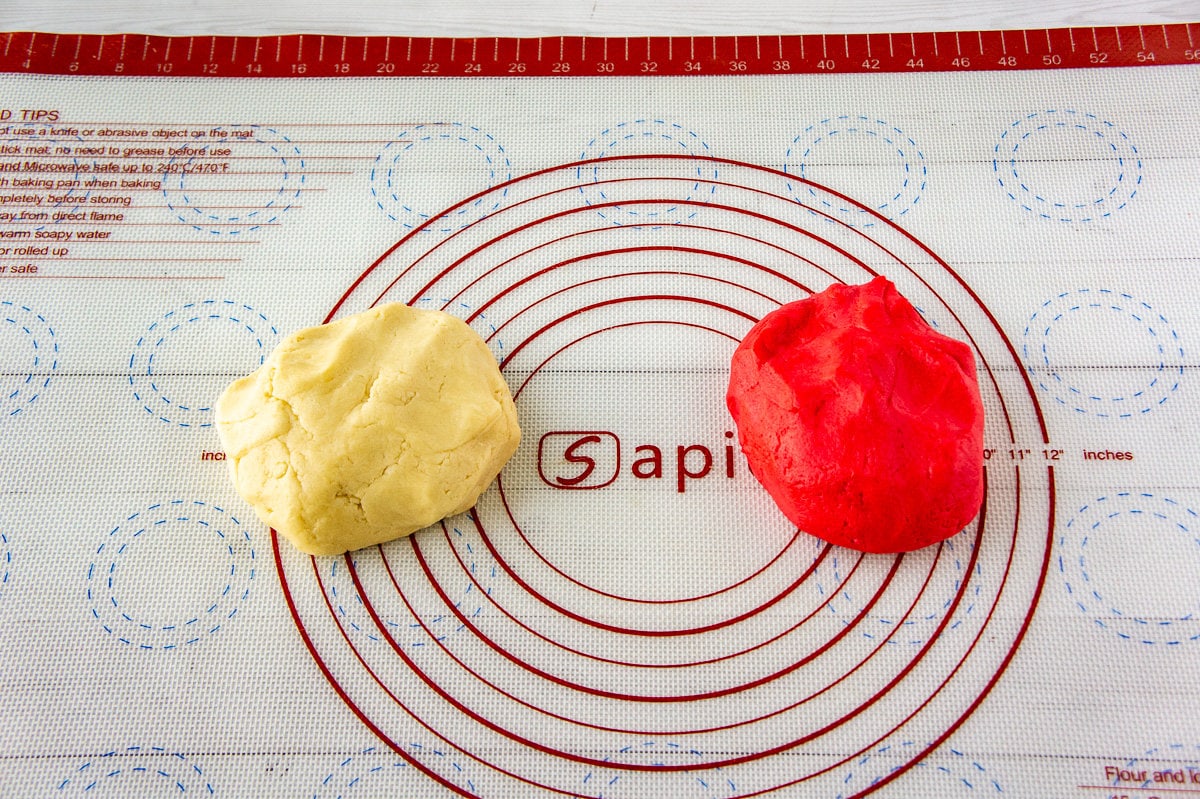
Step 1: Dye the Dough – Separate your dough into two or more equal sized chunks. If you’re doing 3 colors, you’ll need 3 equal sized chunks. Add the desired colors to the chunks and gently work it in. Try not to overhandle the dough or it can get tough.
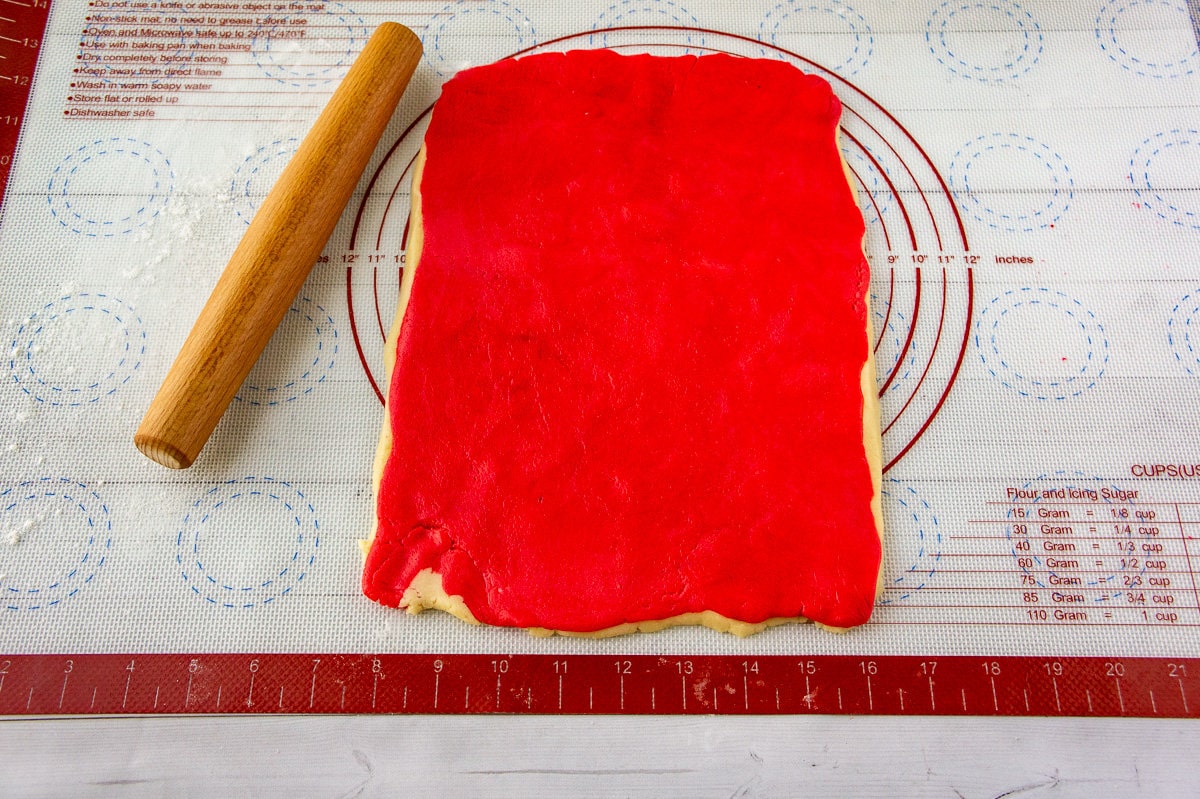
Step 2: Roll the dough out – On parchment paper or other movable surface, start rolling each dough chunk into a rectangle. For two colors I rolled each out into an 8×11 rectangle. If you have less or more dough, or more colors, you may need to adjust the size.
As long as you’re consistent and each of your colors is rolled out to the same size and thickness, it really doesn’t matter what size rectangle you use.
Step 3: Combine the Colors – Lift each rectangle onto each other. This is where having a mobile surface is helpful. I just flipped my mat with the red dough over on top of the white layer and gently peeled it away.
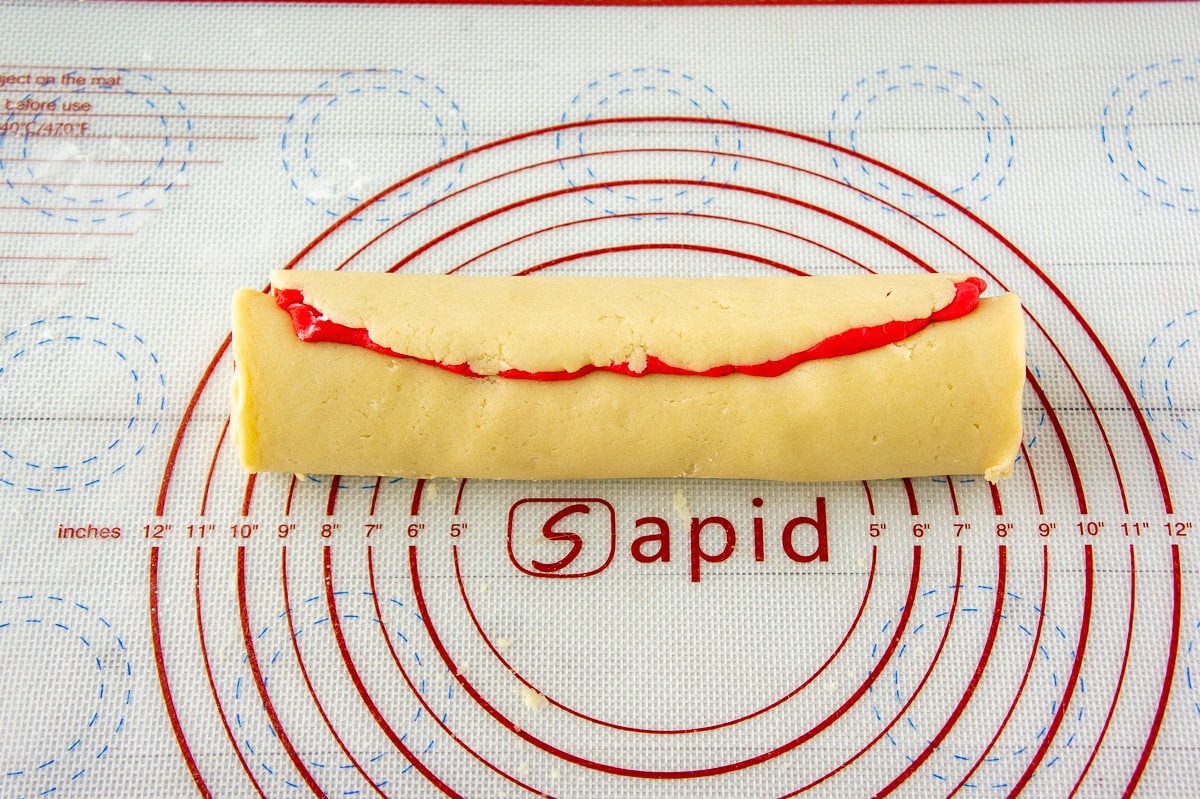
Step 4: Roll it up! – Starting at one end, roll up the dough by lifting the edge of the parchment or mat and tucking the edge in. Peel the parchment back as you continue to lift and roll it.
You can roll either way. Start at the short end for more swirls in the cookie, or at the long end for smaller cookies.
Step 5: Chill the dough – Wrap the dough in cling film. Once wrapped, roll the dough on the counter with smooth, gentle pressure if you want a perfectly circular cookie, then pop it in the fridge for 1 hour, or the freezer for 20 minutes. That lets it firm up and helps when you coat and slice it.
Step 6: Roll in sprinkles – Arrange the sprinkles you chose on a sheet pan or other rimmed bowl. Then gently roll your pinwheel cookie log in them until the outside is coated.
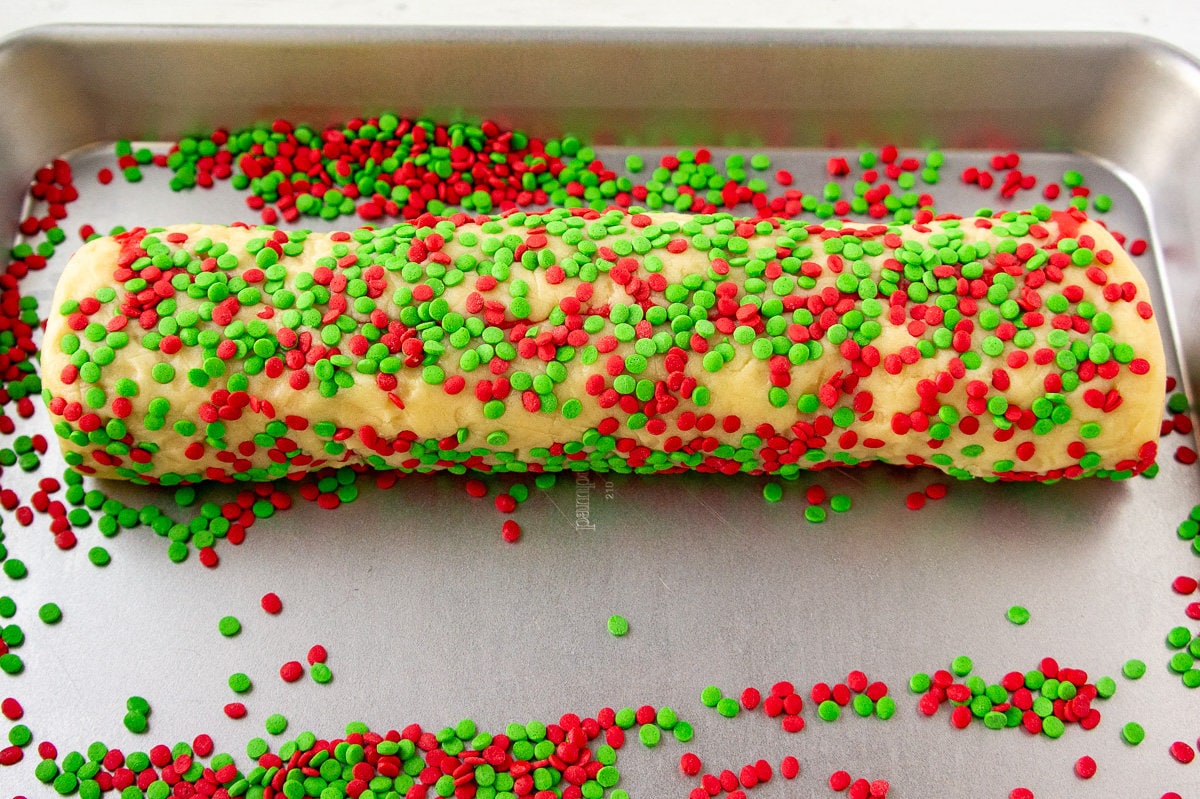
Step 7: Slice and bake – Use a sharp knife to slice 1/4″ thick cookies and arrange them on a baking sheet at least 1/2″ apart. Bake them in a 350°F oven for 6-8 minutes, or just until the top no longer appears wet. If the edges begin to brown you’ll have crunchy cookies instead of soft cookies. (If you’re using a different dough, the bake time might need to be adjusted, refer to the dough recipe for the recommended time.)
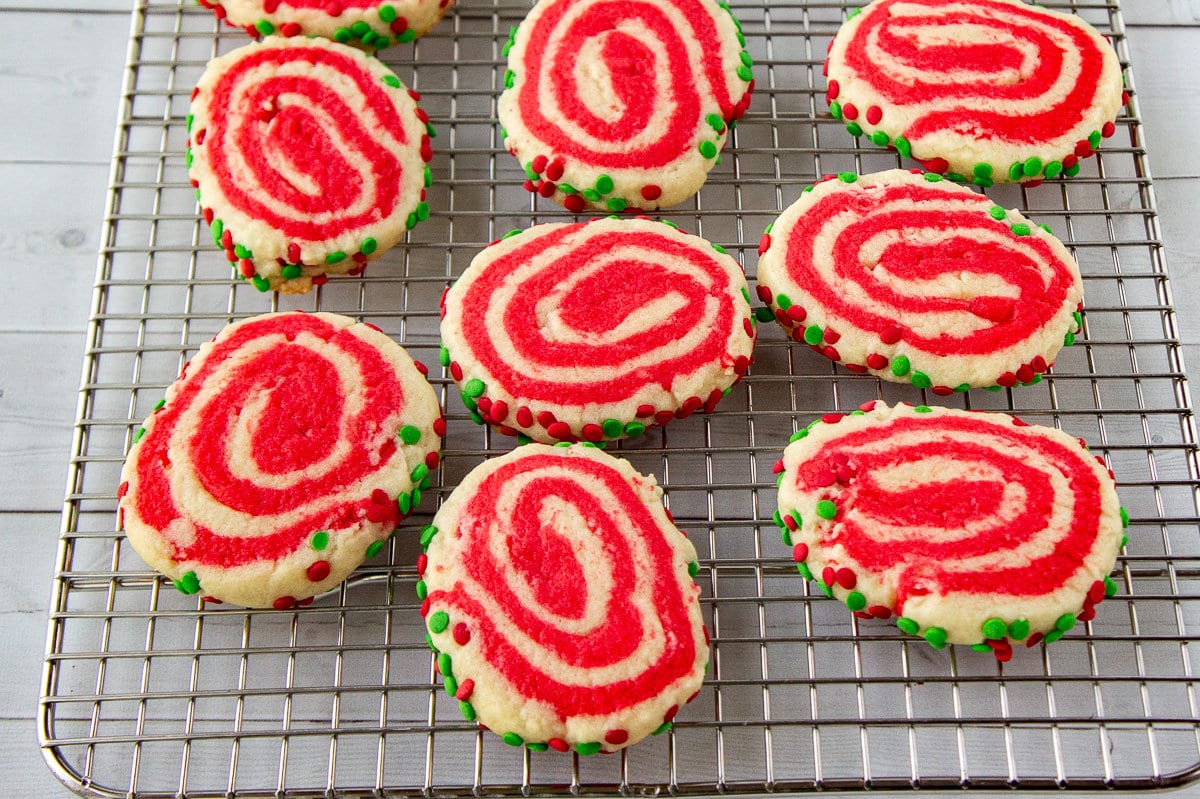
Step 8: Cool and Store – Transfer baked cookies to a cooling rack. Once completely cool they can be stored in an airtight container at room temperature for up to 5 days without losing quality.
FAQs & Expert Tips
I recommend mixing the food dye into the cookie dough by hand. A mixer is quicker, but more likely to overwork the dough and make it tough when baked.
I know the answer to that…you got impatient like I do! When you roll the dough up and place it in cling film to store it, take a few extra minutes to roll it gently on the counter until it’s a uniform circle. Make sure it’s cold and firm before slicing as well.
Yes of course, you can use whatever color you like. Using half regular sugar cookie dough and half colored dough is an easy way to create a swirl, but you could split it into thirds to create more colors.
Making a true rainbow, with all the colors, would require thin layers of dough. First separate your dough into 7 parts and work the dyes into them. Then layer them the same way you would 2 colors.
Concentrated or gel dyes are highly recommended for this kind of project especially – traditional dyes can affect flavor and texture when used in high amounts.
More Recipes to Try
Adding these festive, fun (and EASY) Christmas pinwheel cookies to a gift basket with some homemade hot chocolate mix, snow globe cupcakes, and microwave peanut brittle would make a sweet and delicious gift basket for anyone during the holidays. I hope you enjoy them, and be sure to check out the many other cookie recipes I have on the blog.
Love this recipe? Please consider leaving a 5 star rating in the recipe card below, or a comment to share your experience with fellow home cooks. I hope you enjoy and as always, Happy Eating!
Christmas Swirl Sugar Cookies
Ingredients
- 1 batch Sugar cookie dough*
- 8 drops concentrated food dye**
- 1/4 cup sprinkles
Instructions
- Divide dough into two or more equal pieces and add coloring.
- Work the dough gently until the color is even.
- Roll dough out into a thin 8×11 rectangle on parchment paper or a silicone mat. Repeat with the second dough. ***
- Sandwich them together and use the edge of your mat or parchment paper to roll it up tightly along the short edge.****
- Wrap dough in cling film and roll on a firm flat surface to make it into an even, round log.
- Chill for 1 hour.
- Preheat the oven to 350°F and arrange the sprinkles on a rimmed sheet or pan.
- Remove the cling film and roll the sugar cookie log gently in the sprinkles.
- Slice into thin slices, around 1/4" thick, and arrange on a baking sheet 1/2" apart.
- Bake for 6-8 minutes, just until the middles don't look wet. Don't bake until the edges are brown or they'll be crunchy when cooled.
- Let cool on sheet for 2-3 minutes then transfer to a cooling rack.
Notes
Nutrition
If you made this, please tag me on Instagram or Facebook and share the foodie love with fellow home cooks. Thanks for visiting!
Nutrition information and cooking times are provided as a best estimate. Values may vary based upon ingredients and equipment.


This Christmas sugar cookie recipe is AMAZING! So fun and festive. The step by step photos and tips were super helpful. Thanks for the recipe!
Noelle, thank you so much. I strive to make my recipes not only tasty but easy to follow and make as well! I am so happy you could follow the recipe so easily and enjoy the results!
My kids wanted to make x-mas cookies already so we started with these pinwheels. They were fun to make and turned out great!
Thanks so much for sharing Lauren, I’m so glad they turned out great!
These cookies are beautiful and so easy to make! I will definitely be making them again before Christmas.
That’s great to hear Kim, I’m glad you liked them so much!
I made these with my granddaughter and we had a great time making the cookies and more fun eating them!
Dennis thanks so much. I’m so glad you and your granddaughter enjoyed making them as much as eating them!