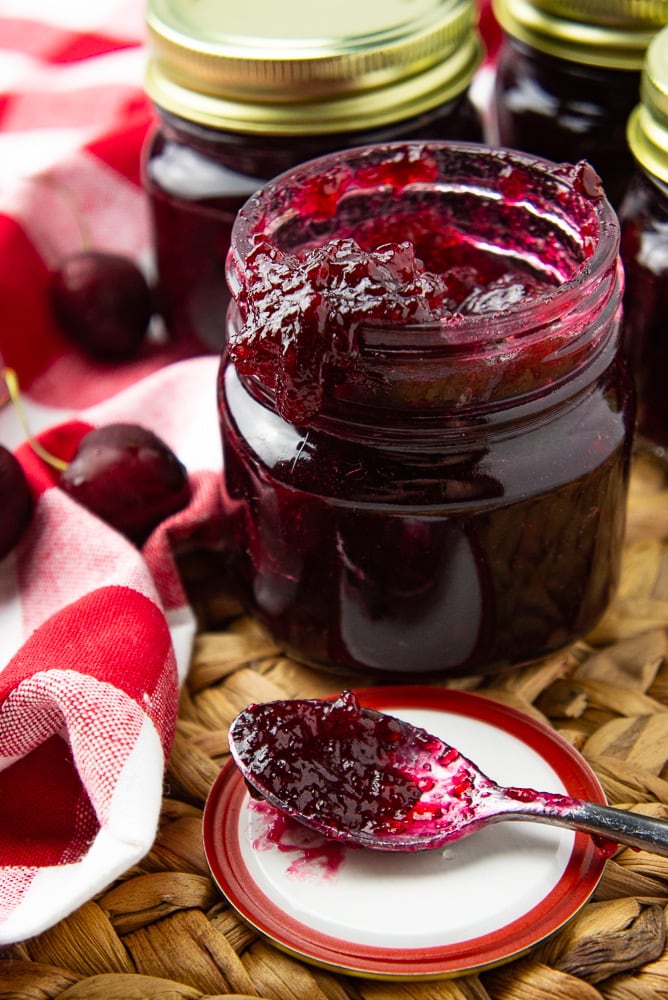
Cherry Vanilla Jam
This post originally appeared on Savory Experiments where I am a contributor.
This page contains affiliate links. For more information please read my Disclosure Policy.
Whether you’re a seasoned jam pro or just learning , this cherry vanilla jam is easy and addictive. With step by step canning instructions, you can whip up a batch and be enjoying a a sweet cherry vanilla jam in 45 minutes.
When those dark sweet cherries come into season, it’s hard not to eat them by the bowl full. There are few fruits that I like better than a fresh sweet cherry. When the season begins, cars literally clog the country roads near my house, all lined up to get first pick at the u-pick orchards.
Sadly their season is also far too short. Thankfully, with a very easy cherry vanilla jam recipe, both you and I get to enjoy them for a much longer time that nature wants us to. Jam is a great way to preserve fruit all year long!
Sweet Cherry Jam Ingredients
I’ll let you in on a secret for those winter months when you’re scraping the bottom of that last jar of jam…you can actually make most homemade jam recipes with frozen fruit. This one included! Whether you’re using fresh or frozen, you’ll only need 4 other simple ingredients to whip this up.
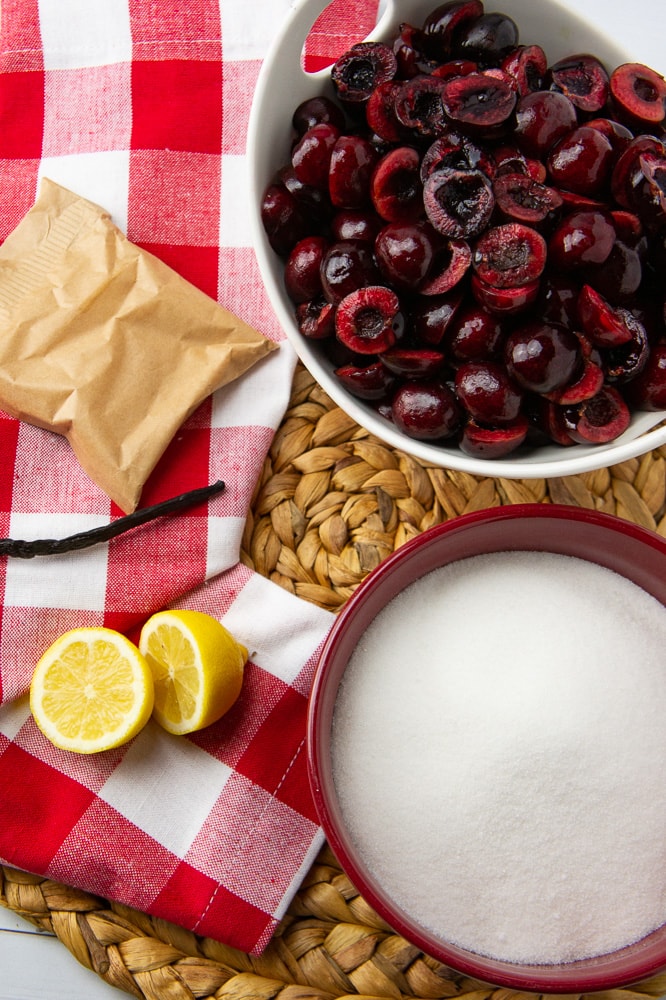
The best part of any homemade jam recipe is that they’re easier than stores would have you believe. This one is made with just a few ingredients.
- Sweet cherries – Go for dark, sweet cherries.
- Sugar – regular white granulated sugar is best.
- Lemon juice – Fresh squeezed is always best when possible.
- Vanilla – I like to use 1 whole vanilla bean with the seds scraped out, but you can also use three teaspoons of extract if you prefer.
- Pectin – I like to use the low-sugar pectin for recipes like this, so the vanilla can really shine through, however you can use regular pectin with double the amount of sugar. If using a bulk pectin (not boxed), 1 packet is equal to a little less than 1/2 cup, or weigh it for 49 grams.
That’s it! With one pot and a bit of boiling and stirring, your cherries will transform into a sugary thick jam that’ll have you craving pb&j’s all week long.
Pro Tips:
- To use frozen cherries to make jam, thaw them in a bowl in the fridge first and pour off the water that collects in the bottom of the bowl. It will cause your jam to set too loose!
- Also be sure to check for pits, sometimes manufacturers miss them!
- Pectin is an essential, naturally occurring carbohydrate that causes thickening when combined with acid and sugar. Cherries are very low in natural pectin so adding commercial pectin helps the jam set faster and prevents the cherries from becoming chewy and tough from long cooking times.
Canning Instructions
Canning your jam is the best way to make sure your jam lasts as long as possible. It takes just a few extra steps and allows you to store all of your jam in the cupboard for up to 18 months. So before we get to the jam cooking process, here are the simple steps for canning.
You’ll need a few essential tools:
- Four 8 ounce mason jars with new seals and lids. It’s fine to reuse jars as long as they’re clean, but not seals.
- A large pot with a canning rack. This prevents the jars from bumping into each other or getting to hot, both can cause them to shatter.
- Jar clamps, hand protection, a funnel, and a ladle. All of these make handling the hot jars and hot jam safe and easy.
Canning your cherry jam:
- Before you start cooking your jam fill a large pot with the canning rack with enough water to cover your canning jars by 1 inch. Bring it to a boil over high heat.
- While your jam is cooking place your jars in the pot of boiling water for a minute or so to warm them up. This prevents cracking from a temperature difference when you add the hot jam to them.
- Remove them from the water with your jar clamps and place them on a towel upside down to let the water run out.
- When your jam is done, flip the jars over using your hand protection, they’ll still be hot. Using your funnel and ladle, fill jars immediately with your hot jam, leaving ¼” of space between the rim and the jam.
- Place seals on and using your hand protection, screw on the lids as tightly as you can. Then use your jar clamps to submerge the jars in the boiling water again.
- Allow to ‘process’ in the boiling water for 10 minutes. Remove and set them on a towel, (they’ll be very hot!) and leave them at room temperature until each lid has ‘popped’
PRO TIPS:
- Wipe the rims of your jars clean with a warm, damp paper towel and then dry them before placing your seal. Any jam that gets stuck there can stop the jar from sealing safely.
- You’ll know the jars are ready for the cupboard when you hear a ‘pop’ of the seal locking. You can also check this by pushing down on the center of the seal. If it clicks, it isn’t done yet. This can take up to 24 hours, so be patient!
How to Make Cherry Vanilla Jam
Making jam is easier than you think! It’s just a bit of stirring and watching, then delicious jam forms before your eyes.
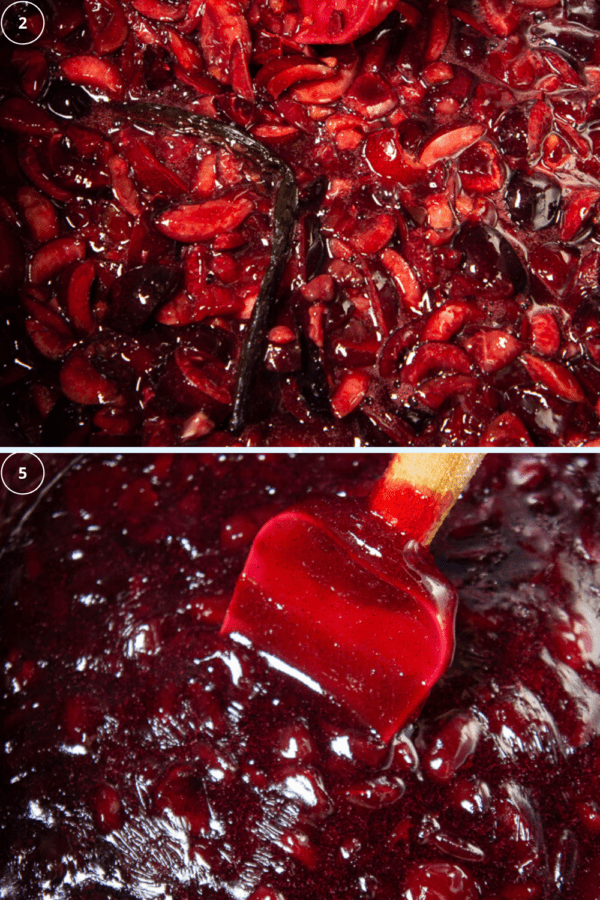
- Pit and chop all your cherries. If using frozen, chop once thaw. Collect any juice that’s released from chopping and add that to the pot.
- Combine your chopped fruit, lemon juice, vanilla, pectin, and ¼ cup of the total sugar in a large wide pot over medium high heat.
- Cook until at a rolling boil that doesn’t stop even when stirring.
- Add in the remaining sugar while stirring. Continue stirring gently until the jam boils even as you stir. Begin timing and cook for exactly one more minute.
- Remove from heat and if not canning the jam, allow to cool slightly then ladle into storage containers. Allow to cool further until cool enough to handle, then store in the fridge for up to 1 month.
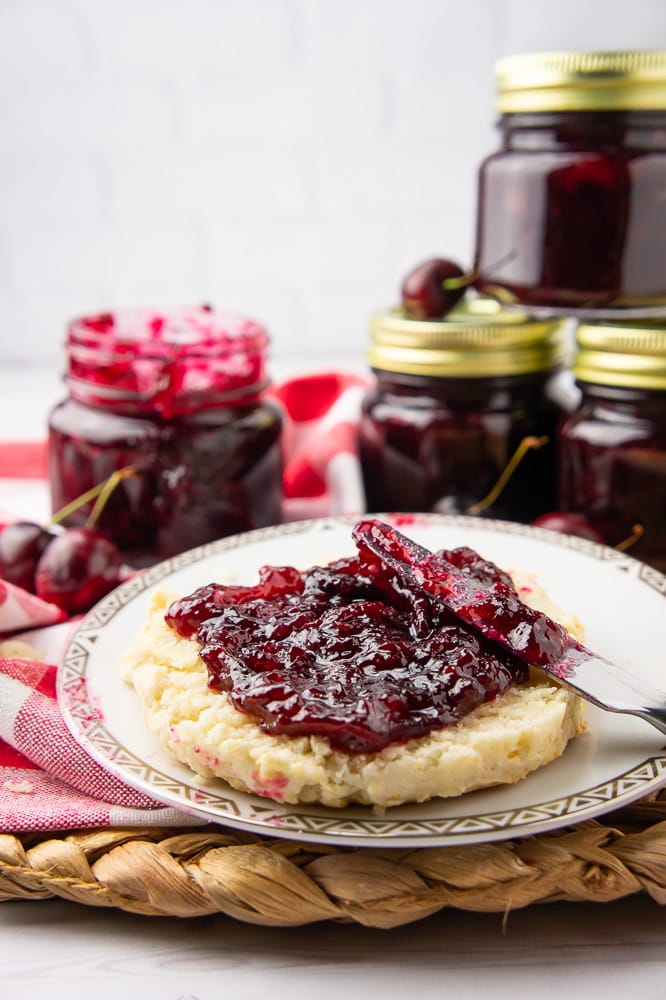
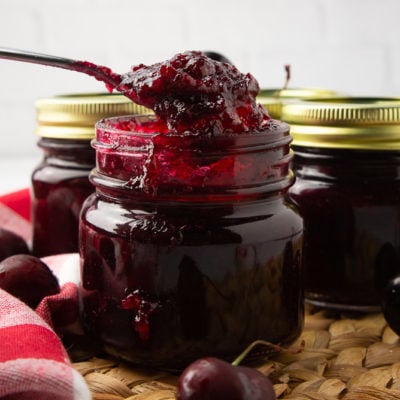
And that’s it! Simple ingredients and simple steps to gooey sweet cherry jam that’s full of warm vanilla flavors and just enough tartness to keep you eating by the spoonful!
FAQ’S
Years and years ago, before commercial pectin, our great grandma’s surely made jam without pectin. To do so you’ll need to cook all your ingredients at once until your jam reaches 220°F. Be sure to use a jelly thermometer to not overcook it. If canning, proceed as usual.
However, cherries contain almost no natural pectin, so cooking them to this temperature causes the cherry chunks in the jam to become chewy and sticky. I recommend using pectin for a more pleasant texture of the fruit.
Low sugar pectin is as readily available in major supermarkets as regular pectin and using less sugar allows the beautiful vanilla flavors to shine.
If you prefer to use regular pectin, double the sugar and don’t add the ¼ cup of sugar in with the pectin. Instead add all the sugar after the jam comes to its first boil.
Yes. To freeze jam I recommend cooking it to a looser set than traditional jam. Simply cook for 45 seconds rather than 1 minute after you add the pectin. Then transfer to freezer safe jars or containers and allow to cool completely before sealing and transferring to the freezer. You can keep it for up to 1 year.
No, as long as you’re processing your canned jam for 10 minutes in boiling water there is no longer any need for sterilizing your jars and seals before adding your jam. Be sure to use new seals and clean jars.
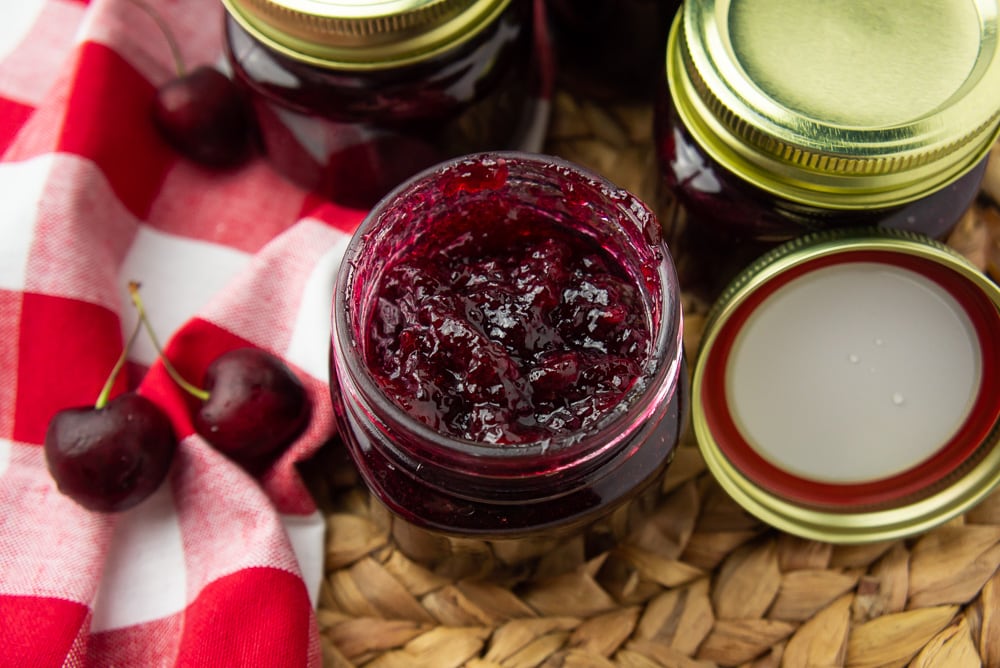
Eat & Enjoy
Now that you have 4 gorgeous jars of homemade jam, and the options for using it are endless. Here are a few of my favorite suggestions on how to use it!
- Slathering on scones, biscuits, and even waffles or pancakes!
- As a glaze on meat like pork tenderloin, meatloaf, or roasted duck.
- Served with soft cheese and crackers as an appetizer.
- Stirred in with yogurt for a healthy breakfast!
- Spooned warm over vanilla ice cream!
I hope you have fun making this and if you’re curious about making more homemade preserves, and what options are out there, be sure to check out my Guide to Home Fruit Preservation!
If you enjoyed this recipe, you may also enjoy…
- Loquat Jam with Ginger and Vanilla
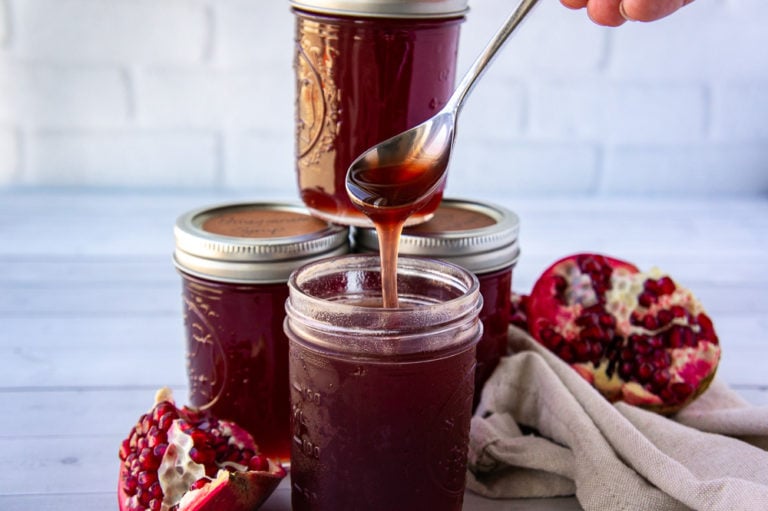
- Pomegranate Cranberry Jam
- Strawberry Watermelon Jam
- Classic Strawberry Jam
- Spiced Pear Butter
- Pomegranate Jelly
Cherry Vanilla Jam
Equipment
- Four 8 oz mason jars with new seals and lids
- Jar clamp
- Funnel
- Hand protection
Ingredients
- 5 Cups Sweet, dark cherries* about 2.5 lbs
- 2 1/2 cups white sugar
- 3 Tbs lemon juice
- 1 vanilla bean, split and seeds scraped or 3 tsp extract
- 1 packet low-sugar pectin* 49 g, or a shallow 1/3 cup
Instructions
- If Canning, please read all the instructions before beginning to cook your jam!
Cherry Jam Instructions
- Pit your cherries and chop into small chunks, add all the chopped cherries and any juice released from chopping into a large, wide pot.
- Add the lemon juice, vanilla bean and seeds, pectin, and ¼ cup of sugar to the cherries and stir to combine.
- Heat over high heat while stirring gently until it comes to a complete full boil that doesn’t stop even while you stir.
- Add the remaining sugar and continue to stir gently until the jam returns to a full boil again that doesn’t stop as you stir.
- Once it hits that full boil, time the jam for exactly 1 minute, continuing to stir. Then remove from heat.
- If not canning your jam, allow to cool slightly then place in storage jars or containers and allow to cool further then seal and refrigerate for up to 1 month.
Canning Instructions
- Before beginning to cook your jam, fill your canning pot with enough water to cover your jars by 1 inch and bring to a boil over high heat.
- Before your jam is finished cooking, place place your open jars into the pot of boiling water to heat them up.
- Remove from water after a minute or so and flip upside down onto a towel. Use your jar clamps and hand protection as the jars will be hot.
- When your jam is finished cooking, flip jars right side up and use your funnel and ladle to fill each jar, leaving only ¼ inch of space between the rim and jam.
- Wipe rims clean with a damp paper towel then dry them before placing your seals.
- Use your hand protection to place the seals and screw on the lids as tightly as possible. Submerge the jars in the boiling water and allow to sit in boiling water for 10 minutes.
- Remove from water and let the jars sit at room temperature until the lids have popped, so the lid doesn’t click or move when you press on the middle. When the jars have popped and cooled, store in a cupboard for up to 18 months. Once opened, refrigerate and use in 1 month.
Notes
Nutrition
Nutrition information and cooking times are provided as a best estimate. Values may vary based upon ingredients and equipment.

Just wondering where the vanilla bean goes? Do you take it out so it doesn’t end up in the jar?
Hi Sandra, yes, you just pluck it out as you portion into jars. Easy! 🙂
I can not believe how amazing this jam is! Made it for the first time this week. My kids ( 7,5,3) have all asked for me to make more because they want it instead of the store bought stuff! Not only is it amazing on toast, but it’s to die for when paired with Brie cheese!!
I love that your kiddos want more! We really do prefer homemade jam, so I am thrilled you made it and enjoyed it so much!
I got the low sugar pectin but you don’t mention the calcium water in your recipe. Did you use it or only the pectin? If so, when do you add the calcium water?
Hi Jo Anne, so sorry about the delay in answering you! I’m guessing you have Pomona’s Pectin Powder? Oddly enough I just used that for the first time a few weeks ago, it’s very different from the sure-jell pectin I usually use. This recipe was designed with Sure-Jell or Ball low sugar powdered pectin. To use Pomona’s Pectin you’ll need to:
-increase the lemon juice to 5 tablespoons and combine the cherries, lemon juice, and 4 teaspoons of the calcium water in your pot. Bring that to a boil.
-combine your sugar and 3 3/4 teaspoons pectin powder in a separate bowl and whisk them to combine them. Then when your cherries are boiling rapidly, pour in the sugar/pectin and stir to dissolve.
– As soon as it returns to a rapid boil that doesn’t stop when you’re stirring, it’s ready to take off the heat and put in your cans.
I hope this helps and you enjoy the jam!
Mikayla
I love cherries and we make a lot of cherry jam in this house, though mostly mixed in with some berries. The texture and colour of this jam look wonderful!
Cherries and berries sound like a lovely mix, maybe I’ll make that my next project 🙂 Thanks for stopping by Katerina!