Asiago Bread
This page contains affiliate links. For more information please read my Disclosure Policy.
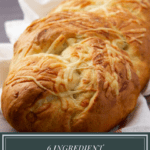
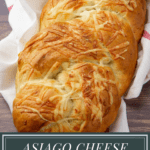

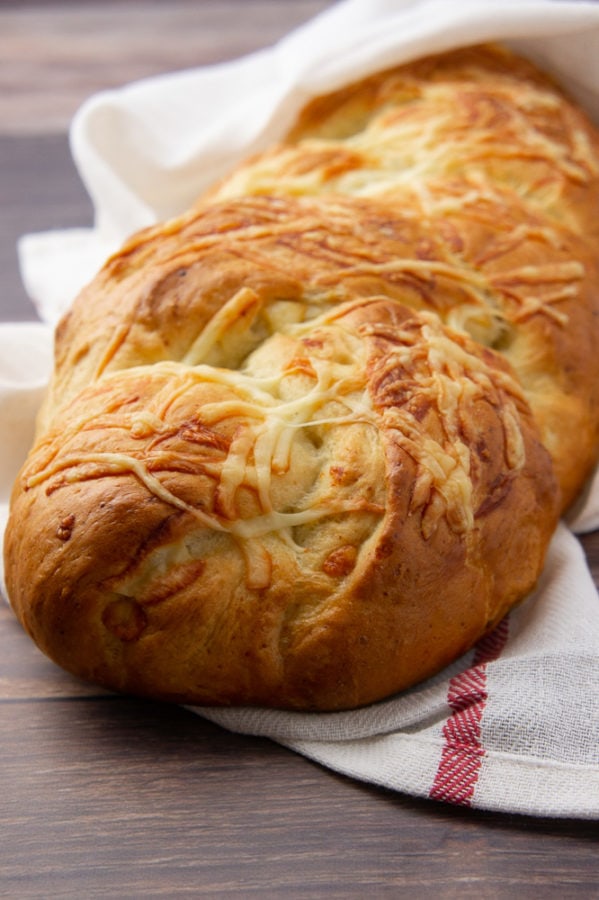
Asiago bread is an easy 6 ingredient homemade bread recipe that will yield a delicious, soft Asiago cheese loaf perfect for serving along side dinner, as the base for a crostini, or breakfast toast. Make Asiago cheese bread in just a few hours, and enjoy a cheesy fresh baked treat.
Fresh baked bread is one of those universally appreciated smells I think. That warm, yeasty scent when you walk into a bakery…mmmmm. Learning how to bake bread at home was one of the best decision I ever made, and it’s become a quick comfort to me whenever I want that bakery fresh loaf, without paying for an artisan loaf…or having to get out of my pjs.
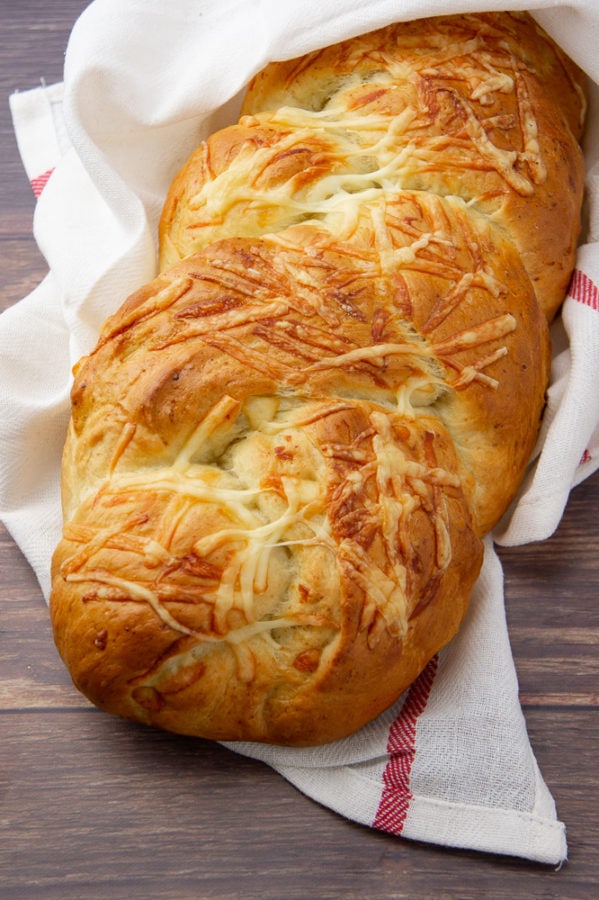
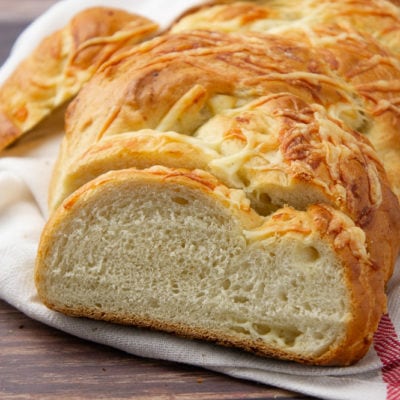
This particular loaf is simple, and inspired by my favorite bagel, the Asiago cheese bagel (add warm cream cheese, ohhhh man). It’s soft on the inside, just chewy enough on the outside and loaded with Asiago. Seriously, 3 different ways. It’s the kind of loaf that gets devoured quickly. You may even be too impatient to use a knife.
What is Asiago?
I have a fondness for this cheese. I make a killer Asiago Cream Sauce, and often use it to replace Parmesan or Romano cheeses in recipes.
Asiago is a cows milk cheese originally produced in the northeast area of Italy that thankfully, we can get here in the states as well. Authentic Asiago cheese can come in a variety of textures based on the length of it’s aging. Fresh Asiago is sweet, soft…and basically impossible to find here. But aged, crumbly Asiago is usually available at most grocery stores.
While not nearly as popular as it’s Parmesan and Romano cousins you can usually find one or two brands available. It’s nutty, salty, and downright delicious.
The Six ingredients
Yes. Only 6. Bread at it’s most basic can be as simple as yeast, water, and flour. This one adds just a few more for added flavor.
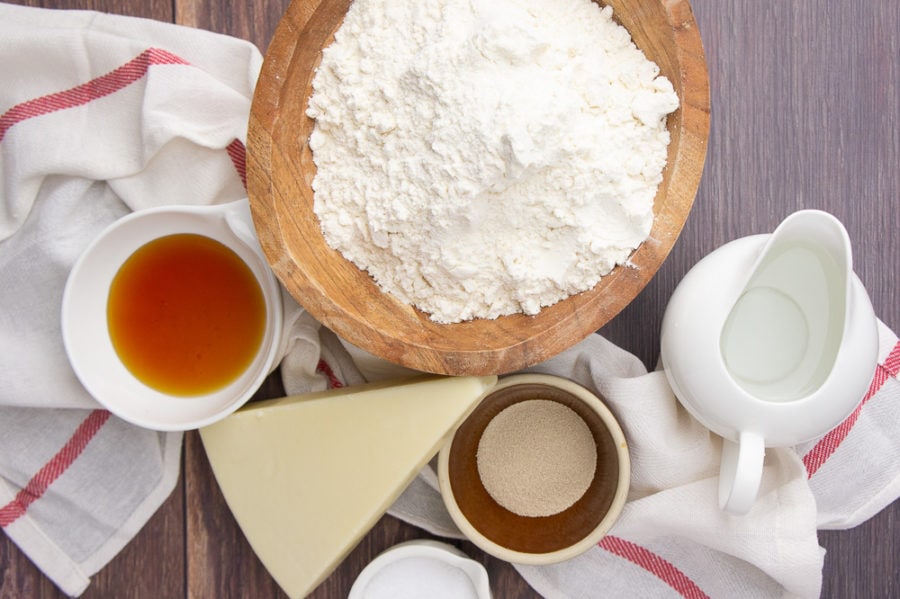
- Bread Flour – Bread flour is a wonderful, high protein flour that contains more gluten than your average AP flour. It results in beautiful texture and chew in this loaf.
- Water – Just some regular ole’ water.
- Yeast – I always use active dry. To use instant yeast, skip step 1 below.
- Asiago – You’ll need 3 to 4 ounces total. The average wedge at the store will do just fine.
- Honey – A little sweetness for the bread, which balances the cheese flavor, and helps feed the yeast for good rise.
- Salt – Because all delicious things include some salt!
- OPTIONAL: I always brush a bread loaf with an egg wash before baking for color and shine. (1 egg with 1/2 tbs of water) This is optional, you can also use milk, heavy cream, honey or even just water to help the final layer of cheese stick.
Pro Tip – Only have AP flour? It can replace bread flour 1:1 in this recipe (and most bread recipes). The results will be a little less airy/chewy, but still entirely delicious!
How to Make Asiago Bread
Ingredients gathered? Let’s begin. With some basic, standard bread making techniques, you’ll be off to the oven in just a few hours. (Most of which you won’t actually be doing anything to the bread!)
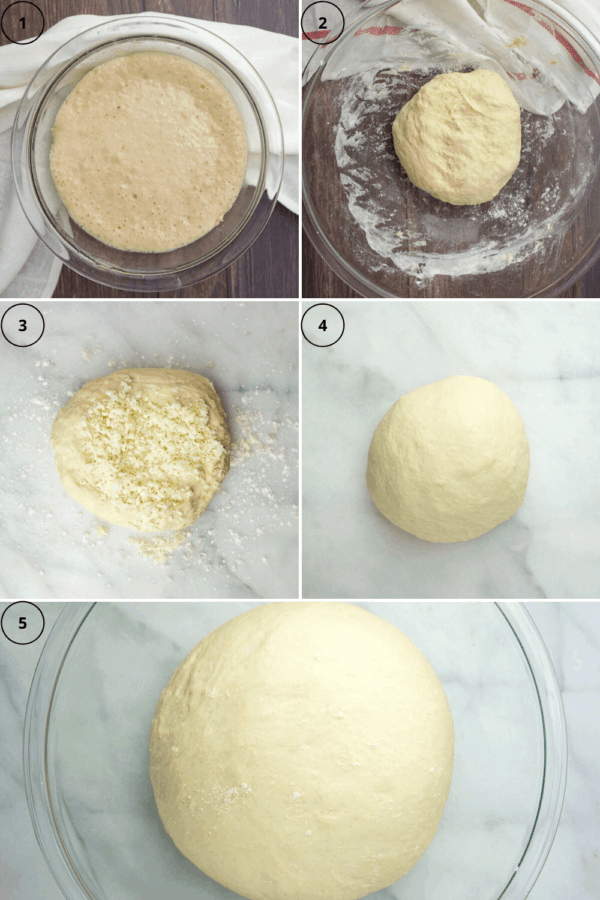
The First Rise
- First, warm your water up to between 100° and 110°F. Think baby’s bath water warm. Stir in the honey until dissolved, then add the yeast. Stir and let sit 10 minutes until bubbly and foamy on top. (Skip to #2 if using instant yeast.)
- Combine the flour and salt in a bowl, then add in the proofed yeast. Fold it together until a shaggy dough forms. Then using your hands, knead until no dry flour is visible any more and it stops being sticky about 5 minutes.
- Turn out onto a floured surface and add 1 ounce, or 1/2 cup of finely shredded Asiago cheese to the dough. Knead until completely smooth, soft, and elastic. About 7 to 10 minutes.
- Form into a tight ball and place in a lightly floured bowl. Dust the top with flour (lightly), and cover with plastic wrap.
- Let it rise until doubled, about 1 hour.
PRO TIPS: It’s better to use cooler water to proof yeast than water that’s too hot. Heat will kill yeast!
Don’t add too much flour to the dough! If it sticks to your hands when you turn it onto a floured surface, lightly flour your hands while kneading. Once the visible flour has disappeared, continue to flour your hands until the dough no longer sticks to them.
The Second Rise
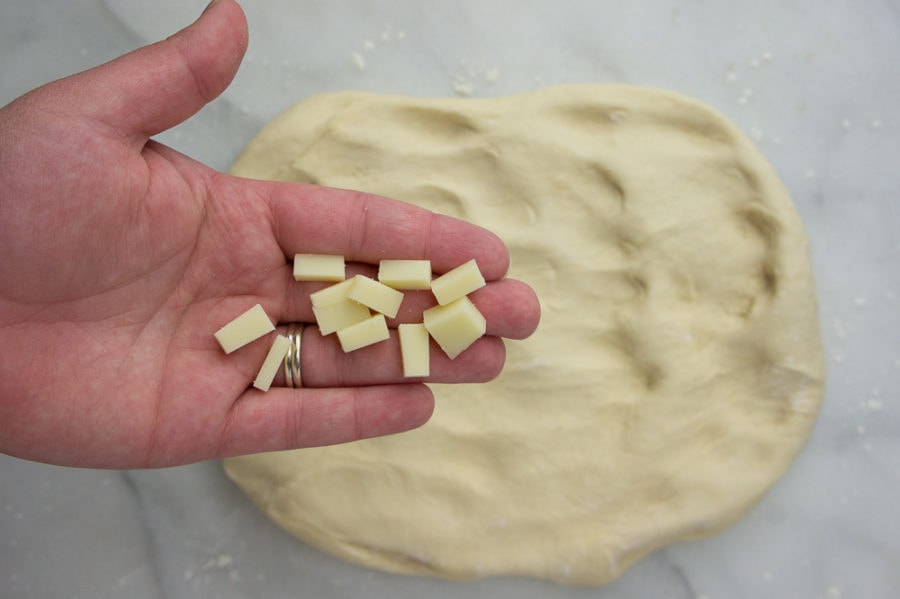
- Remove your bread dough from the bowl onto a clean surface and flatten into a rectangle. No need for perfection here. Scatter small chunks of Asiago across it. About another 1 ounce, or 1/4 cup.
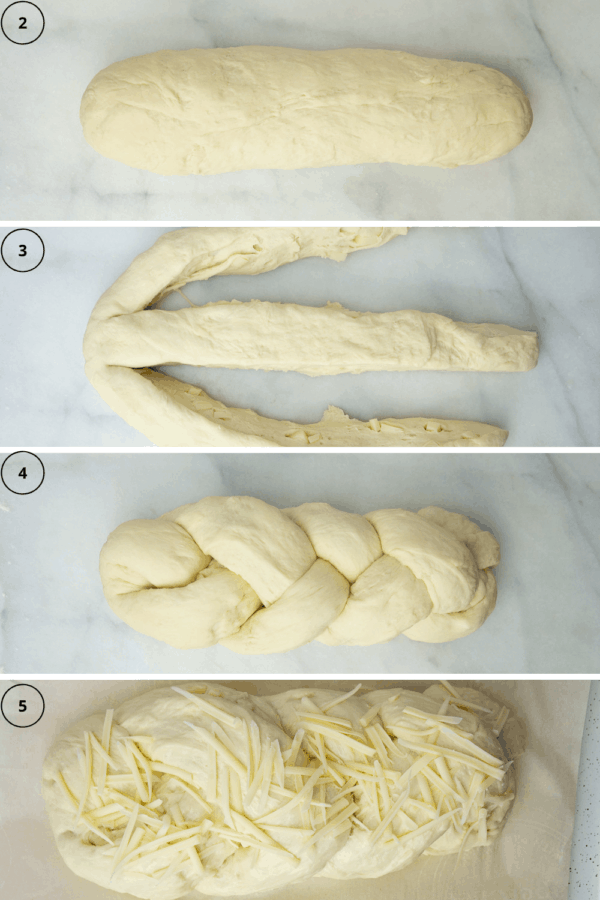
- Roll the dough from one long end to the other to form a log, pinching the seam to seal it.
- Place it seam side down on your work surface and flatten gently with the palm of your hand, just enough to make 2 slices, forming 3 segments. Don’t cut all the way through both ends, leave one end in tact.
- Begin braiding your 3 segments together. Don’t pull, but braid it tightly together by working slowly, avoiding gaps between the braid.
- At the end of the loaf, press the 3 segments together and tuck under the end of the loaf. Transfer to a baking sheet or stone. Cover loosely with plastic again and let rise another 45 minutes to 1 hour, or until very puffy and doubled in size.
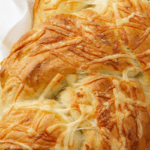
- If using, brush the dough very gently with your chosen wash. I use 1 egg beaten with 1/2 tbs of water which gives it shine and color. You can also use water, milk, cream, or honey. Top with the remaining 1 ounce of Asiago, shredded thickly.
- Bake at 325°F for 30 – 35 minutes. The bread should be browned, and the bottom hollow when tapped (careful, it’s hot!).
- Remove from baking sheet to a cooling rack and let cool completely before slicing. OR just tear into it and accept that you won’t have neat slices!
Pro Tip: Use a thick, sturdy baking sheet or stone for your bread to avoid premature browning of the bottom.

FAQ’S
Most fresh baked bread will last 3 to 4 days before the texture gets dry. I’ve found that wrapped in plastic or kept in a zip top bag that this loaf can last about 5…if it makes it that long.
Absolutely. Wrap tightly in plastic or freezer paper and freeze for up to 4 months.
Yes. Feel free to press them gently back in, but I didn’t worry about it at all. It bakes just fine!
Feel free to use any hard, aged cheese like Parmesan or Romano.
You may see less browning when it’s finished. To assist the cheese in sticking, you can brush the dough very gently with a small amount of water.
You can use a stand mixer to get the dough ready for the first rise. I recommend keeping it on a speed similar to what you would work at if doing it by hand. Be sure to stop the machine and scrape down the sides and bottom so the dough kneads evenly.
No. Feel free to shape it as you wish. I like the braid because it catches all the cheese on top and creates more cheesy crust. Be advised that shaping it into a ball may require more bake time, or if into smaller loaves less.
You may also like…
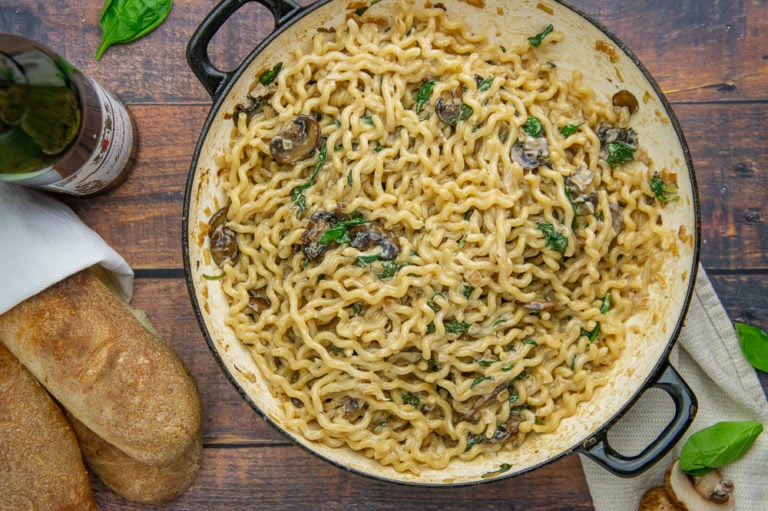
That’s it! You’ve got delicious cheesy bread with a lovely soft interior texture. Enjoy it with a nice Gnocchi Tomato Pasta or something saucy like Dr. Pepper Braised Short Ribs. Or simply slice and enjoy it topped with roasted garlic butter or tomato confit.
Don’t forget to check out these other awesome bread recipes!
- White Whole Wheat Sandwich Bread
- Garlic Dinner Rolls
- Honey Wheat Bread
- Sweet Molasses Brown Bread
- Easy Rosemary Focaccia Bread
- Mexican Bolillos: Crusty Rolls
- Chocolate Filled Bread
Asiago Bread
Ingredients
- 13.5-15 ounces bread flour 3 cups, plus additional 1/3 cup
- 8 ounces warm water 1 cup
- 2 1/4 tsp active dry yeast* 1 packet
- 3 ounces Asiago Cheese, divided
- 1 Tbs honey
- 1 tsp salt
Optional
- 1 egg
- 1/2 Tbs water
Instructions
- Combine warm water (no hotter than 110°F) and honey until dissolved. Mix in yeast and let proof until foamy and bubbly on top. About 10 minutes.
- Finely shred 1 ounce of Asiago cheese, about 1/2 cup, not packed.
- Combine 13.5 ounces of flour (3 cups, spooned and leveled) and salt in a large bowl and stir in the yeast water mixture until shaggy dough forms. Knead until no visible flour is left and dough is tacky but not sticky, about 5 minutes.*
- Lightly flour a clean surface and turn dough onto it. Add shredded cheese to the top and knead together until dough is smooth and soft, 7 to 10 minutes.
- Form into ball and place in a lightly floured large bowl. Lightly flour the top and cover with plastic wrap. Let rise 1 hour, or until doubled in size.
- When dough is nearly doubled, cut another 1 ounce of cheese into small, 1/2 inch chunks. About 1/4 cup.
- Turn risen dough out onto a clean surface and press gently into a rectangle. Sprinkle with chunks of cheese.
- Roll into a log along the long side, pinching the seam to seal and place seam side down.
- Press gently to flatten top and with a sharp knife, make two long cuts, staring about 1 inch from one end all the way through the other end. This should create 3 segments of dough connected at one end.
- Braid the segments together as tightly as possible to avoid any gaps in the braid. At the end of the loaf, press the 3 segments back together and tuck under the loaf.
- Transfer to a baking sheet or stone and lightly cover with plastic or a dish towel again until doubled in size, about 45 minutes.
- Preheat oven to 325°F and shred remaining 1 ounce of cheese in thick shreds.
- If using egg wash, beat together the egg and water and gently brush onto risen loaf. You can also use milk, cream, honey, or simply water. Sprinkle cheese on top.
- Bake for 30 to 35 minutes or until bread is browned and sounds hollow when you tap on the bottom.
- Remove to a cooling rack and let cool completely before slicing. Store in an airtight container for up to 5 days.
Notes
Nutrition
Nutrition information and cooking times are provided as a best estimate. Values may vary based upon ingredients and equipment.


I am looking forward to making this as Christmas gifts for our close friends and family. I am wondering if you can bake more than one loaf at a time and how that changes the cook time. Has anyone tried this?
Hi, I have doubled the recipe and baked two loaves at once. I found rotating them from top to bottom at the halfway point helped keep the bake even. Hope that helps!