Homemade Garlic Bread Rolls
This page contains affiliate links. For more information please read my Disclosure Policy.


These light and fluffy garlic infused dinner rolls are a homemade yeast raised bread that are perfect for holidays, parties, or just to enjoy at home. Enjoy a light garlic flavor in every bite of these soft garlic bread rolls and you’ll be sold on homemade dinner rolls forever!

The smell of warm, fresh yeast bread rising and baking in my oven is incomparable. Add a little garlic and the smell is that much better. These garlic bread rolls are easy enough to make that when I’m craving that soft, fluffy texture of fresh bread and want that delicious smell infused in my house, I can make these and know they’re going to be fantastic.
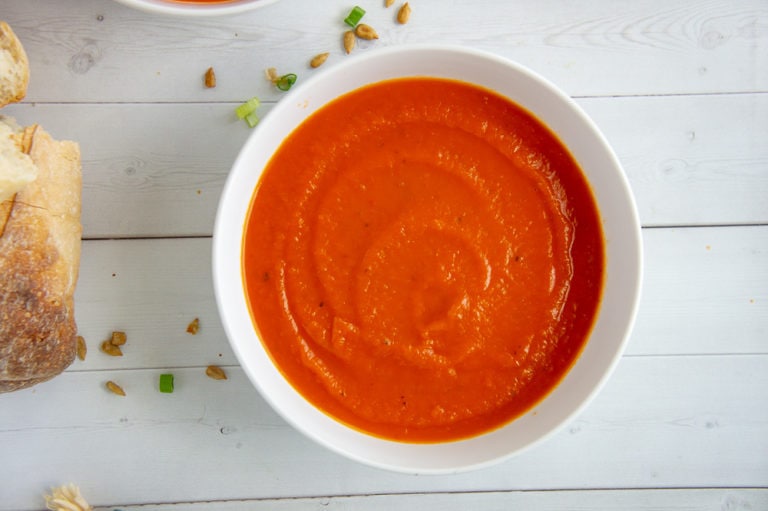
They’re delicious with roasted garlic compound butter, hot honey, or served with tomato carrot soup, giant cheese stuffed shells, zucchini noodle lasagna, pork tenderloin in mushrooms sauce….and pretty much anything else you can imagine.
Recipe Highlights
- Garlic in every bite – The technique I share to make these ensures that every bite has the perfect balance of garlic. No large cloves to make your kids grimace, just lovely garlic infused into it!
- Double or triple it – I often whip these up for holidays, so I can confidently say you can make a triple batch and it works great.
- Freezer friendly – Make a huge batch and then let them cool and freeze extras, then you’ll have amazing homemade bread at hand for months!
- Holiday PERFECTION – These have been requested at every Thanksgiving and Christmas meal since I developed the recipe. Yes, they are that good.
Ingredients & Subsitutions
One of the best things about making bread is the ingredient list. With pantry basics you can whip up a so many different varieties of bread. The difference lies in the ratios of ingredients, how they’re combined, and your baking methods.

- Bread Flour – This high protein flour creates a chewier exterior and fluffy rise when kneaded well during the dough stage. All purpose works as well, but you may need a little extra.
- Yeast – Either active dry or instant yeast will both work.
- Water – Warm water helps activate the yeast. Keep it at 105°F or below to prevent overheating the yeast and killing it.
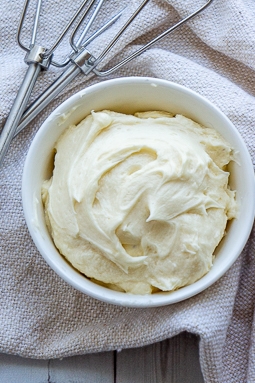
- Butter – Fat is essential for softness in bread. I go for unsalted butter, but you can also use bacon fat like I do in my hamburger buns and hot dog bun recipe.
- Eggs – One for the dough, one for the beautiful brown glazed finish.
- Salt – Do not skip it. Without salt, your bread will not taste good.
- Sugar – Just enough to feed the yeast and flavor the bread. Honey can be used instead.
- Garlic – Don’t be shy! You want 2 full tablespoons of garlic once prepped, which is about 12-15 whole cloves, depending on the size.
Step by Step Instructions
The process is really simple. I think bread gets a bad reputation of being too complex, so we let the stores charge us ridiculous amounts for what could cost pennies. It’s not complex, I promise, just a bit of a waiting game.
While it takes some time to wait for the rise, it’s free time. You don’t have to do that much! Just mix, wait, form, wait, and bake. That’s it. Probably 20 minutes of actually doing anything. Simple, right?

Step 1 – Prep yeast and garlic
It is NOT necessary to proof, bloom, or start your yeast, whatever you like to call it. As long as you’re sure your yeast is alive and healthy, you can add it straight to the flour in the next steps. However, it does speed up the rise time.
Mix your yeast, and sugar into the warm water and let it sit while you get your garlic prepped. It’ll get foamy and bubbly, which is a sign the yeast is awake and ready to work.
Meanwhile, chop your garlic. Give it a rough chop, then sprinkle over the salt and continue to chop it. Every few moments, scrape it back into a pile and use the edge of your knife to really smash it. Then chop, pile, smash, repeat. This will create a garlic salt paste that is KEY to the flavor in these garlic dinner rolls.

Step 2 – Make the dough
Combine the proofed yeast and water mixture and one egg in a large bowl, or in a stand mixer. Add in one third of the flour and begin to mix. Repeat with another third once the flour is wet, and then again until all the flour is mixed in.
Add in the softened butter and garlic paste and continue to knead until a soft, elastic dough is formed. If it’s VERY sticky, add more flour 1 tablespoon at a time. Often, I just coat my hands with residue from the butter paper and keep kneading.
Hand kneading takes about 10 minutes. Feel free to do this on a clean countertop once the dough is somewhat together. In a stand mixer, use the dough hook and knead for 5 minutes on medium speed. Once done, form into a ball, lightly grease with oil or that handy butter paper, and cover the bowl to let it rise.
Then, form the dough into a ball and place in a well oiled bowl, turning to coat. Cover and let rise until doubled, about 1 hour.

Step 3 – Punch down and shape the rolls
Get a baking sheet lined with parchment paper or a silicone mat. Punch the dough down to knock out the air and turn it out onto a clean, lightly floured surface.
Divide the dough into 15 pieces. I use a kitchen scale for this, and measure each at 1.8 to 1.9 ounces, but you can certainly freehand.

Begin to shape the dough by forming a little purse. Pull the dough down from the top of each ball and gather it at the bottom. Pinch it there then place the pinched side down on the flat surface and roll your hand over it in a circle to form a tight ball. My hamburger bun recipe has a great video if you’re struggling to shape them. Arrange them on a baking sheet with 1 inch between them.

Step 4 – Rise, Glaze, and Bake
Once all your rolls are formed, cover loosely with plastic wrap or a clean kitchen towel, and allow to rise until again doubled in size, about 1 hour. Check to see if they’re ready by gently touching them. If the indent from your finger (be gentle) slowly fills in, they’re done.
Preheat your oven to 350°F and prepare your egg wash glaze. Mix 2 teaspoons of water with the remaining egg and beat it together until you have a smooth, loose yellow liquid.

When your oven is ready, gently brush the tops of each roll with the egg wash. DO NOT PRESS DOWN. Too much pressure will cause the rolls to deflate, so go slow, and be gentle.
Place in oven and bake for 17 to 20 minutes or until the tops are golden brown and the bottoms sound hollow when tapped. Be careful not to burn your fingers! Remove from oven and transfer to cooling rack to cool.

FAQs
Allow the bread to cool completely then place them in an airtight container or bag at room temperature for up to 3 days. For longer storage, freeze them for up to 4 months.
Absolutely. You can roll them into any shape you please, but keep in mind that making them larger, or thinner, or otherwise changing the size and shape will affect baking time. Keep an eye on them to avoid burning.
Yes. Hardier herbs like rosemary, thyme, and oregano do particularly well in this dough. Simply chop it very finely and add it in with the garlic paste.
Yes. If using prepared garlic, you’ll still want to work it into a paste with the salt. Roasted garlic can be added in directly with the salt. Garlic powder is trickier. Try 2 teaspoons into the flour.
That’s it! Over the years I’ve made these for potlucks, BBQs, holiday dinners, and just the weekend when my husbands wants them. They’re delicious on their own, but nothing beats them warm with a nice pat of salted butter.
I really hope you enjoy both making and eating these garlic bread rolls. It’s a relaxing process, and the smell…oh the smell of warm yeasty bread and toasty garlic, I think I’m going to go bake a batch right now!
Love this recipe? Please consider leaving a 5 star rating in the recipe card below, or a comment to share your experience with fellow home cooks. I hope you enjoy and as always, Happy Eating!

Homemade Garlic Bread Rolls
Ingredients
- 1 cup warm water between 105° and 110°F
- 2 1/4 tsp active dry yeast 1 packet
- 2 tbs granulated sugar
- 2 large eggs
- 2 tbs garlic, minced
- 1 tsp kosher salt
- 15 ounces bread flour 3 cups, plus extra for dusting
- 1 ounce unsalted butter, softened 2 tbs
- 1 tbs oil
Instructions
- In the bowl of a stand mixer, or other large bowl, sprinkle yeast into warm water with 1 tablespoon of sugar. Let proof until foamy and bubbly on top.
- Meanwhile, mince garlic. Sprinkle salt over garlic and continue to chop, scraping your knife over it firmly until it forms a chunky paste. Set aside.
- When yeast is ready, fit onto stand mixer fitted with dough hook and add in remaining sugar and 1 of the eggs beaten. Turn on mixer or mix by hand to combine.
- Add in the flour in three parts until fully incorporated. Next mix in the softened butter and garlic, kneading until dough pulls away from bowl and is smooth but tacky. About 4-5 minutes on a stand mixer or 10 minutes by hand.
- Form dough into ball and place in well oiled bowl, turning to coat. cover with plastic wrap or a clean towel and allow to rise until doubled in volume, about 1 hour.
- Punch down dough and turn out onto lightly floured work surface. Divide dough into 15 equal pieces. Pull edges of each piece and pinch at bottom. Use the palm of your hand and gently place the ball seam side down on work surface and roll to form ball.
- Place balls on parchment lined baking sheet 1 inch apart. Cover and let rise again until doubled, about 1 hour.
- Preheat oven to 350°F, and beat second egg with 2 teaspoons of water. Brush tops of rolls gently with egg wash and place in preheated oven. Bake 17-20 minutes.
- When rolls are golden brown remove from oven and place on cooling rack. Serve warm or store in an airtight container or bag for up to 3 days. Freeze in sealed container for up to 4 months.
Nutrition
If you made this, please tag me on Instagram or Facebook and share the foodie love with fellow home cooks. Thanks for visiting!
Nutrition information and cooking times are provided as a best estimate. Values may vary based upon ingredients and equipment.

Came out amazing. Good texture light. Reheat in air fryer at °400 for 3 minutes. Great outer shell crunch.
Thanks for sharing how it went, glad you enjoyed them Cheryl!
Garlic bread rolls were a total hit! We served them with tomato soup and they were perfect. Thanks a million for sharing this fantastic recipe – it’s a new favorite in our home! 🍞🧄🥣😋
Megane, I love hearing all the different ways that my garlic rolls are used. Thanks!
I ate half the batch before they had cooled. These rolls are amazing! Will make again for Thanksgiving. 🙂
Erin, Thanks that is so great to hear!
I swear this is my favorite garlic bread! It is so tasty and my family loves it!
Thanks Amy, I love that my rolls are your favorite and your family loves it as well!
I always say that I’m “body by carbs” as I LOVE a killer slice of bread or a roll. These were so good; almost too good. These are dangerous in the most delicious way! I LOVED the garlic paste as it infused the rolls perfectly!
Lori, I am laughing, “body by carbs”, I can live that quote as well. Thanks very much for sharing your love for these rolls!
I made these for dinner tonight to go with our spaghetti. I was surprised how perfect they came out. I will definitely make again. They were delicious.
I’m glad you liked them and found a new recipe to repeat. Thanks for sharing how it went 🙂
Wow, these garlic rolls look super delicious and the colour on them is absolutely amazing! I can’t wait to give these a try, thank you for sharing this recipe!
I hope you enjoy them Ramona, they’re always welcome on our table!