Water Bath Canning – a Complete Guide
This page contains affiliate links. For more information please read my Disclosure Policy.
Learning about water bath canning is an essential skill for cooking from scratch. It’s an easy, effective way to make homemade jams, jellies, and pickles shelf stable, and is simple to learn how to do.
If there’s one skill that I absolutely recommend to home cooks who like to make things from scratch like I do, it’s how to water bath can. It may seem like this big, complex thing to learn, but I promise it’s really easy once you get the hang of it.
Since I do water bath canning often throughout the year, I figure it was high time to share a step by step guide on how to do it. You’ll find everything you need right here, from a supply list and how to instructions, and tons of other tips on canning times and troubleshooting along the way.
What is Water Bath Canning?
Water bath canning is simply the process of using hot, boiling water to kill micro-organisms and seal home preserves so they’re shelf stable.
The boiling water heats the contents of the jar up to the point that any potential mold or fermentation is no longer possible.
It also sucks all the oxygen out, creating an airtight seal that makes acidic preserves shelf stable for up to a year. Nifty!
Pressure Vs. Water Bath Canning
The real difference is in the equipment and the way the preserves are sealed and sterilized.
Water bath canning uses hot water to heat up the preserves and kill yuckies hanging around in the jar.
Pressure canning uses well…pressure! You would need a pressure canning pot that seals much like a pressure cooker, or I’ve heard instant pots can also be used (don’t quote me on that). The pressure works so effectively that it’s the only method that is safe to seal non-acidic preserves like vegetables and proteins. These would be foods with a pH of 4.7 or higher.
What Can be Preserved with Water Bath Canning?
There are lots of home canners out there who don’t play by the rules. In my house we definitely play by the rules for one very important reason: Botulism.
I don’t want to scare you, because as long as you follow the proper steps and only use this method of canning for the proper preserves, that’s a pretty low risk.
Here’s the most important thing, you should only use water bath canning for acidic home preserves with a pH of 4.6 or lower. Before you panic or try to buy pH strips for your preserves, there are really great lists of common pH levels in food available online.
Most fruits that are made into preserves are safely within that zone. But some, like figs, persimmons, and tomatoes need more acid added to it. Here’s a list of home preserves that are safe to do with water bath canning:
- Fruit Preserves made with berries, stone fruit, apples, and pears (some stone fruits/pears are not safe, please refer to the list)
- Homemade pickles that use vinegar
- Tomato sauces and salsa that have enough added acid (such as lemon juice, lime juice, or vinegar) to drop the pH into safe levels.
If you’re a beginner, my best advice is to use reliable, well tested recipes until you are familiar with how much acid may need to be added, and how to do it.
Water Bath Canning Supplies
Okay, now the fun part! Let’s chat about the supplies I recommend you have before you start canning.
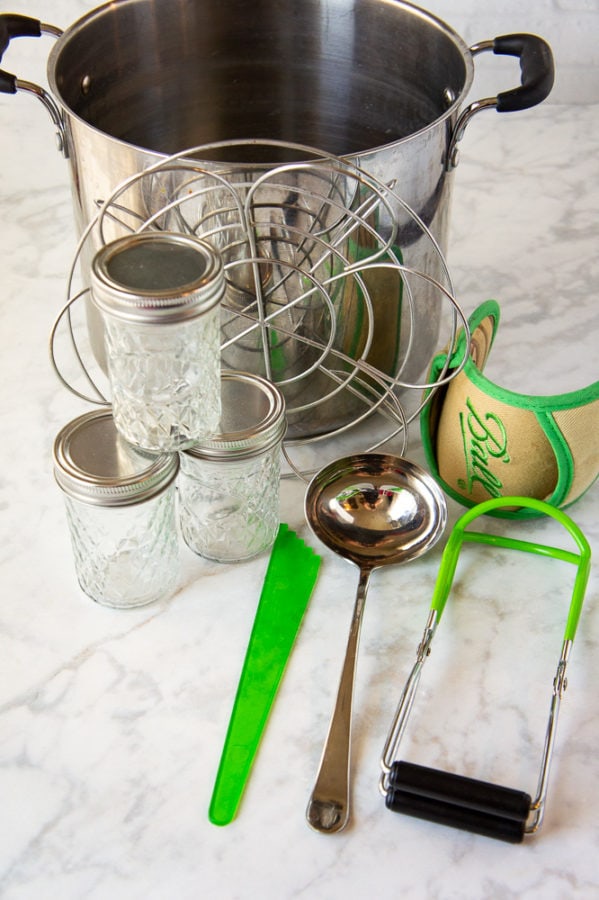
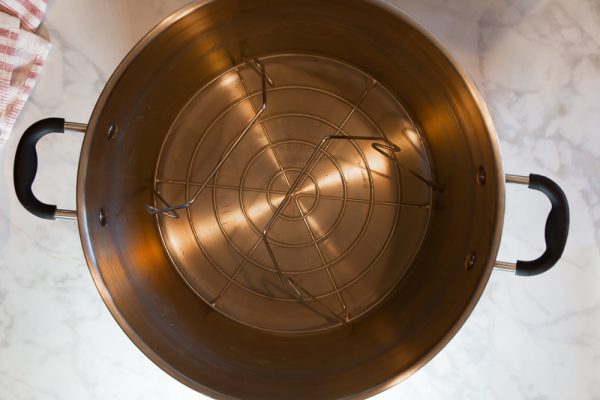
- A large canning pot with canning rack – You can buy a canning pot, or use a large wide stock pot and simply buy an insert that keeps the jars from the bottom of the pot (shattered jars are no fun!).
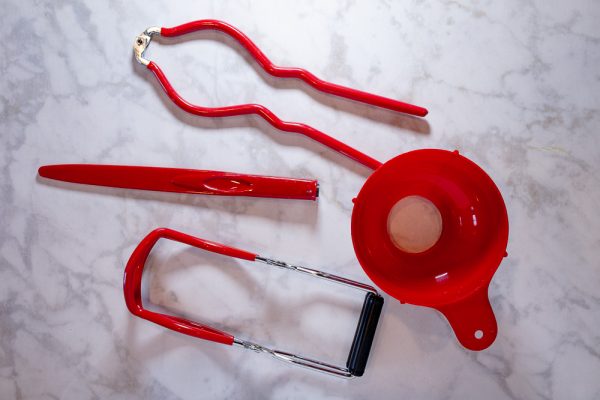
- Jar clamps – This is essential, trust me!
- Hand Protection – I like to use thick gloves, but my mom goes with towels, just be aware those jars will be HOT.
- Funnel – A good wide mouth one works well for canning.
- Ladle – I like a nice metal one for working with hot jam, especially if you can get one with a hook that holds it on the side of the pot.
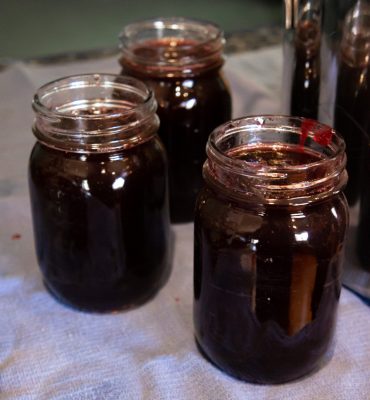
- 8 ounce mason jars(or whatever jars you choose to use) – I like 8 ounce jars because I go through it faster, which means more jam variety in my fridge, but you can use any jar with NEW lids.
- You can also buy a canning set, but there are tools in there I never use, so that’s up to you!
I should mention that I reuse mason jars all the time, and that is completely safe to do. They must be clean, and you must use NEW seals every time. You can purchase seals on their own for either wide mouth or standard mason jars.
How to Water Bath Can
- Before you start cooking your recipe fill your canning pot with enough water to cover your canning jars by 1 inch. Bring it to a boil over high heat.
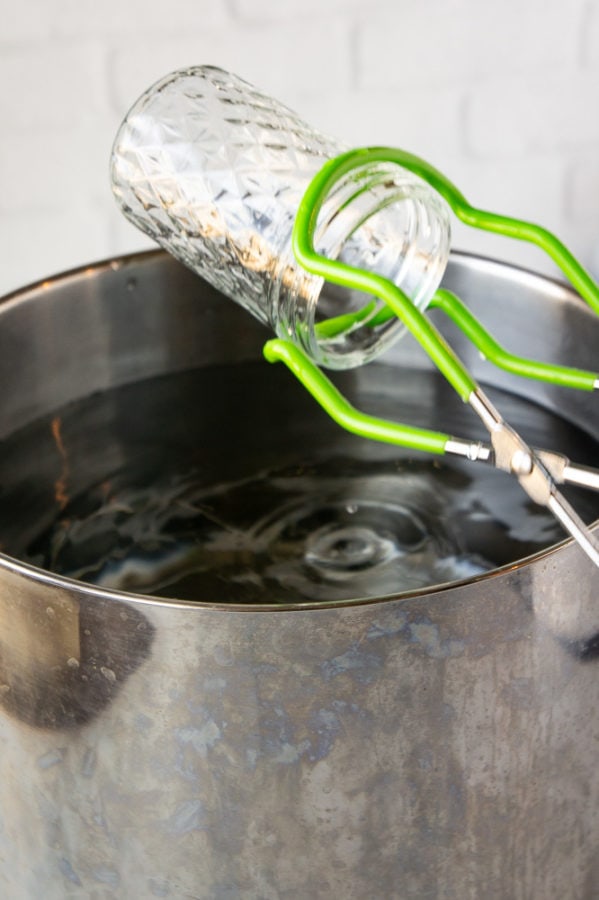
- While your cooking place your clean jars in the pot of boiling water for a minute or so to warm them up. This prevents cracking from a temperature difference when you add the hot food to them.
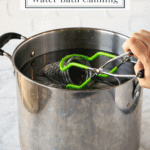
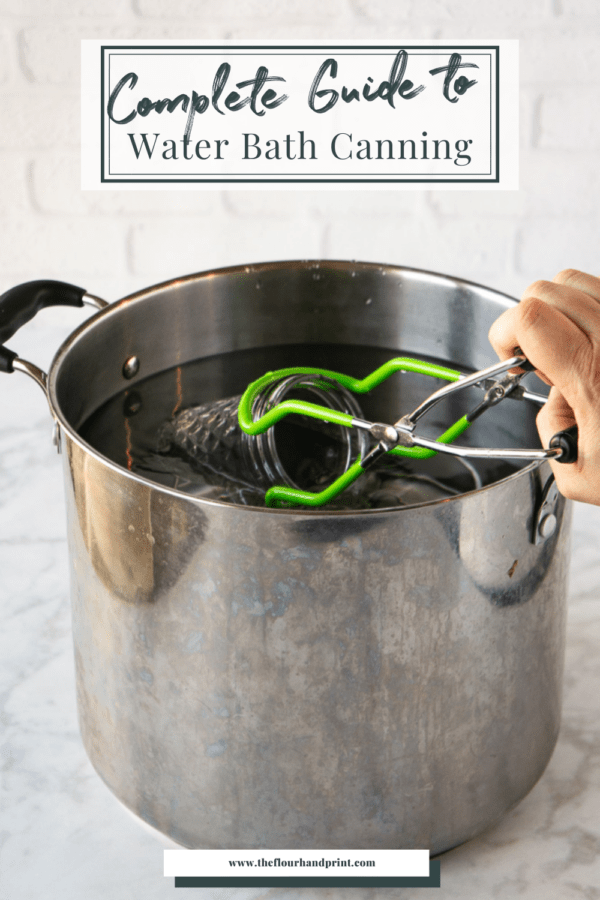
- Remove them from the water with your jar clamps and place them on a towel upside down to let the water run out. Make sure your jar clamps are angled as the picture shows below to prevent hot water from running down onto your hand or stove.
- When your preserves are done, flip the jars over using your hand protection, they’ll still be hot.
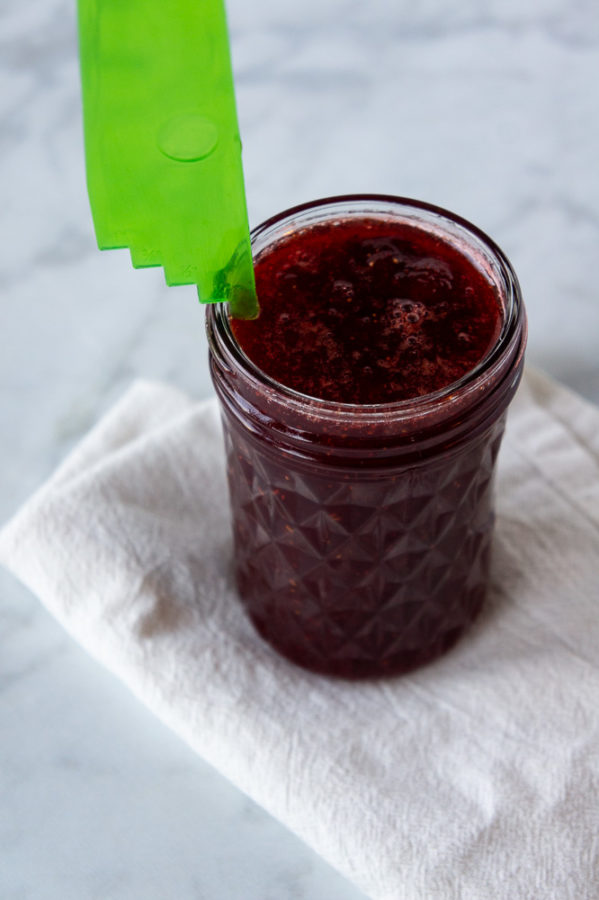
- Using your funnel and ladle, fill jars immediately with your hot preserves, leaving ¼” of space between the rim and the jam.
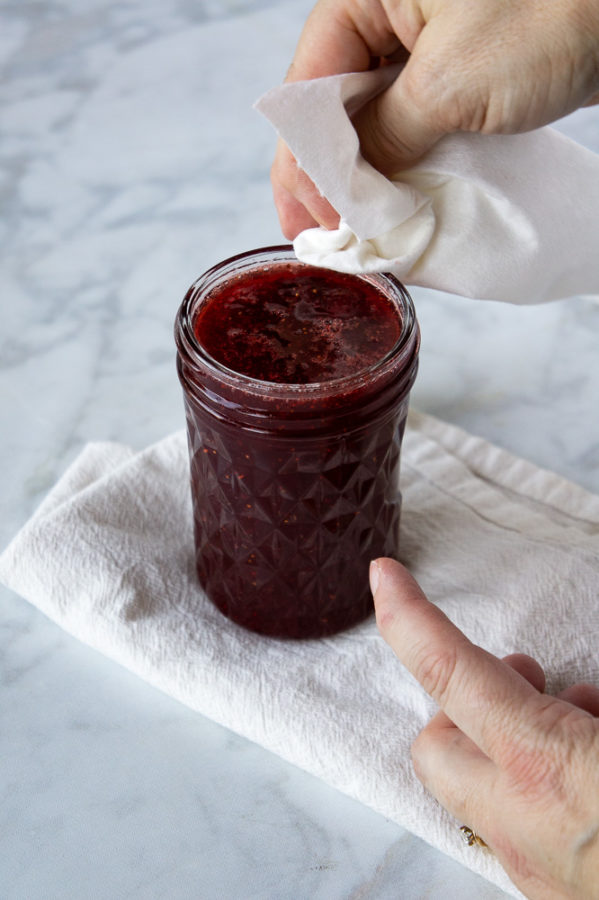
- Wipe the rims clean carefully with a warm, damp paper towel then dry them completely. This is important for the jam to seal properly.
- Place seals on and using your hand protection, screw on the lids as tightly as you can. Then use your jar clamps to submerge the jars in the boiling water again.
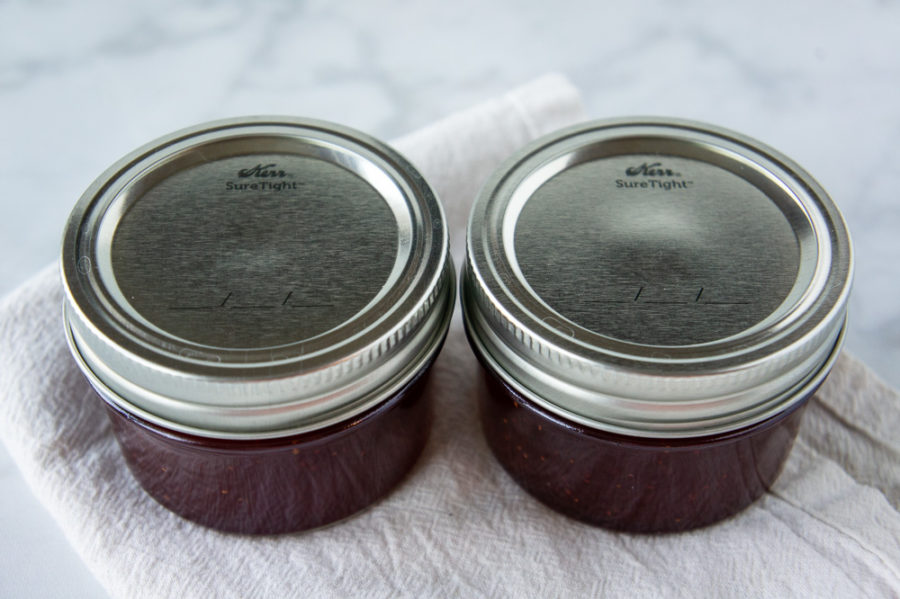
- Allow to ‘process’ in the boiling water for 10 minutes. Remove and set them on a towel, (they’ll be very hot!) and leave them at room temperature until each lid has ‘popped’
Pro Tip: You’ll know the jars are ready for the cupboard when you hear a ‘pop’ of the seal locking. You can also check this by pushing down on the center of the seal. If it clicks, it isn’t done yet. This can take up to 24 hours, so be patient!
Key Tips to Remember
It’s pretty easy, right? Here are a few extra tips that can really help make sure your preserves and pickles are shelf stable when you’re done.
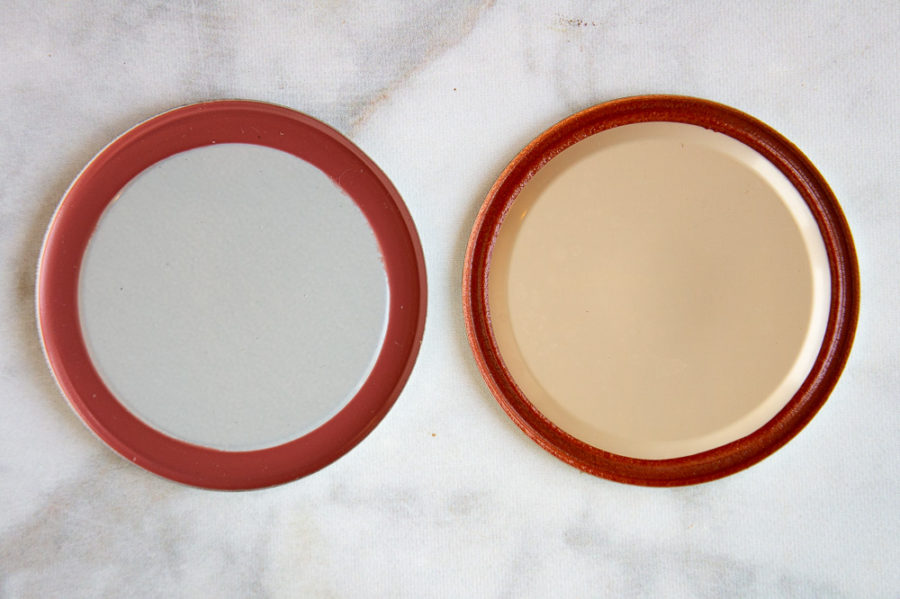
Seals must be new to safely create an airtight lock – you can tell a seal is old by checking the inner rubber seal. If there is an indent, it’s best just to use on jars you’re not trying to make shelf stable.
Always use hand protection when dealing with hot jars – Whether you purchase one of the tools I recommend, or use a couple of thick towels, please make sure to protect your hands. The jars are HOT coming out of the water, and will be for a good while.
Make sure the water is at a ROLLING boil before you start the timer – Really important guys! The water will likely drop temp a little as you add the jars. Return it to a rolling boil before you start timing it.
Always wipe the rim of the jars clean – A slightly damp paper towel (warm water if canning something sticky), then a second pass with a dry one is important. Make sure it’s clean so the seal can properly adhere.
Water Bath Canning Times Chart
One pretty important thing to remember is to follow the canning times recommended for the recipe you’re following.
If you’re canning a new one that you made however, it’s useful to know the common processing times for different types of preserves. Keep in mind that these are for 8 ounce (half pint) jars, for every size you go up (to pint/16ounces to quart/32 ounces), add 5 minutes to the processing times
| Fruit Jams & Jellies | 10 minutes |
| Applesauce | 15 minutes |
| Tomato Sauces | 30 minutes |
| Pickles (with Vinegar) | 10 minutes |
How to know your jars are shelf stable and ready to store
There’s one really easy way to tell if your jars have sealed. Just check the seal! Okay, okay, to be specific, the seal that you put on the jar is going to bubble when it’s processed in the hot water.
You’ll see the raised spot on the lid when they come out. When the jar has ‘sealed’ the heat will literally suck the seal down and you’ll hear what home canners call the ‘pop’.
If you’re not around when it happens, just touch the top of the seal. If they indent or click to your touch they aren’t ready. If the lid is taut and doesn’t move, you’re good to go.
It’s important to know that it can take an entire day for jars to ‘pop’. If after a few hours the lid on your preserves still clicks, and the jar is cool enough to handle with your bare hand, place the jar in the fridge.
If after 24 hours, the seal is still clicking, then the seal has failed. You can either try to redo it with a fresh seal, or do what I do. Just keep that jar in the fridge to enjoy right away!
Canning without a Water Bath
I’m just going to say it. I do not recommend trying to make home preserves shelf stable without the use of either a water bath or pressure canner. Here the two methods I’m most often asked about, and why I do not recommend them.
Can I use wax instead of seals? There are a lot of alternatives to the metal seals and lids out there, most of them old fashioned. My great grandmother used these methods and lived a long healthy life, but for safety purposes I’d really just recommend using the metal seals. Wax does not kill any micro-organisms, and it has to be done PERFECTLY to create a proper seal.
Can’t I just flip the jar upside down? Again, an old fashioned method that might work okay, but I can’t and don’t recommend it for safety purposes. Water bath canning heats the content of the jars to the point of killing bacteria and creates the essential seal.
With supplies in hand and this step by step guide, you’re well on your way to being a water bath canning pro. I hope you find this helpful and if there’s a questions I forgot to answer, please don’t hesitate to ask in the comments section below. I usually say happy eating, now I’m gonna sign off with Happy Canning!!
Check out my many canning recipes for inspiration, or head to my Guide on Jams and Jellies for even more ideas!
- Strawberry Watermelon Jam
- Apricot Jelly
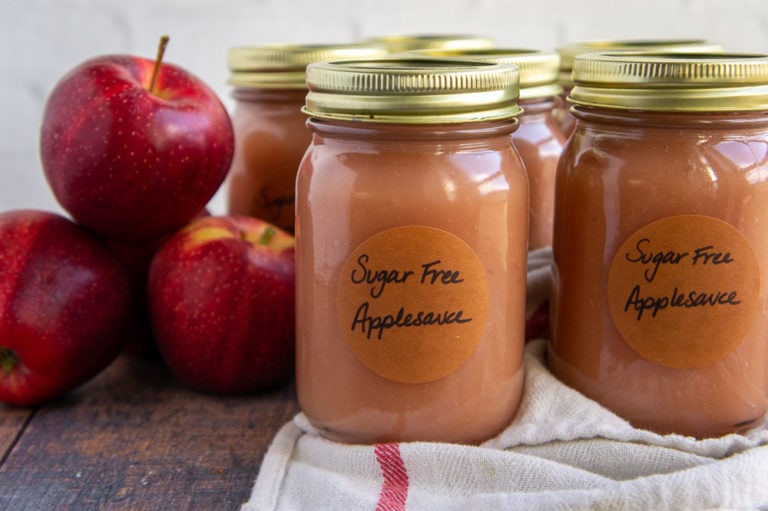
- Sugar Free Applesauce
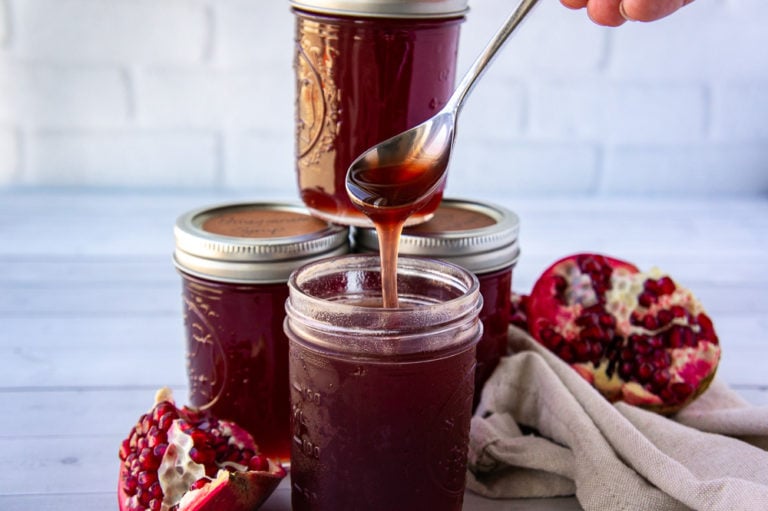
- Pomegranate Jelly
- Strawberry Jam
- Pomegranate Cranberry Jam
- Pear Butter
- Slow Cooker Apple Butter
- Loquat Jam
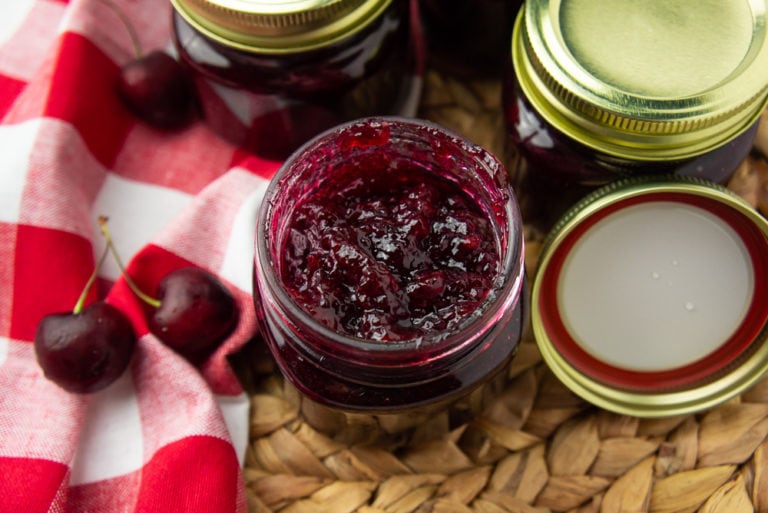
- Cherry Vanilla Jam
Water Bath Canning
Equipment
- 1 Canning pot with jar rack I prefer a 21 qt+ sized pot
- 4* 8 ounce mason jars with seals and screw bands*
- 1 ladle
- 1 headspace tool optional
- 1 fine mesh sieve optional
- 1 jar wrench
- 1 Canning kit A great option for new canners! All in one kit
Ingredients
- 1+ gallon water**
Instructions
- Assemble materials so easily accessible.

- Before processing your preserve mixture, clean your jars, screw bands and seals by washing with warm soapy water, or by running through a clean, empty dishwasher.
- Bring your canning pot, full of water to a boil. You will need at least 1 inch of water above the top of your jars when submerged to properly seal them. It's a good idea to check if you're unsure by lowering a jar in before boiling.
- Cook your recipe.
- Your jars need to be warm before spooning in hot food so they don't shatter or crack during canning. You can keep them in the dishwasher after running to retain heat (run the cycle just before you want to fill the jars), by heating VERY gently in a low temperature oven, or by dipping the jars into the boiling water for a few moments before filling.
- When ready, place your funnel into the mouth of one jar and carefully ladle your recipe into the jar. Typically you will want to use your headspace tool to verify you have left 1/4 inch of space from the rim to the top of the preserve. Fill all the jars.
- Use a damp paper towel to wipe any drips from the top of rim and then dry the rims. Place on the seals.

- Using a towel, thick rubber gloves, or a canning glove to protect your hand from the hot jars, carefully place the screw bands around the rim and tighten hand tight. You can also use a lid grip tool to tighten, but always protect the hand touching the glass jar.
- Using a jar clamps carefully lower the jars into the boiling water until submerged and leave for the processing time called for in your recipe.
- Remove from the water, place on a towel and verify seal has taken before storing. The seal can take several hours to take, so don't panic!
- The jar is sealed when you press down on the middle of the lid and it does not move or click. There should be a small indent in the middle of the lid. If after a few hours the lid clicks or there is no indent, store it in the fridge. If after 24 hours, it still clicks, the seal has failed, and it needs to remain in the fridge.
- Store sealed jars in cupboard for up to 1 year.

Notes
Nutrition information and cooking times are provided as a best estimate. Values may vary based upon ingredients and equipment.
I was following the pomegranate syrup and went to your water canning guide as the recipe stated, however, it doesn’t do any good because you then refer back to the recipe for the water bath time. I cannot add the chrome extension as the computer is not mine, so unless I know how long to water bath I’m out of luck. Dang, I wanted to make a lot of to last the year. I have so much jelly made, I needed something else. It would be great to know the times for the size of the jars. I was going to be using the 1/2 pints, pints and 4 pint jars (16 oz). Thank you.
Hi Glenna,
I apologize for any frustration, but it does say in the water bath canning guide under the ‘Water Bath Canning Times Chart’s section that for fruit jams/jellies (syrups too) that half pint (8oz) jars need to be processed for 10 minutes and for every size you go up to add 5 mins, so for your 16 ouz jars 15 minutes. I hope that clears things up and you’re able to get it stored up for the whole year!
Can Normal Jam Jars & Lids be used instead of the ring type screwing lids when doing water bath canning?
Hi there, I’m gonna make a guess that you mean the all in one type of metal lid that comes on store bought jam jars?
If so, no. When you’re doing water bath canning at home it’s very important to use new seals and the screw type band lid is what holds it down and keeps it water tight during the sealing process so you get a clean and shelf stable result. It’s the only type of lid I would recommend. I hope that helps!