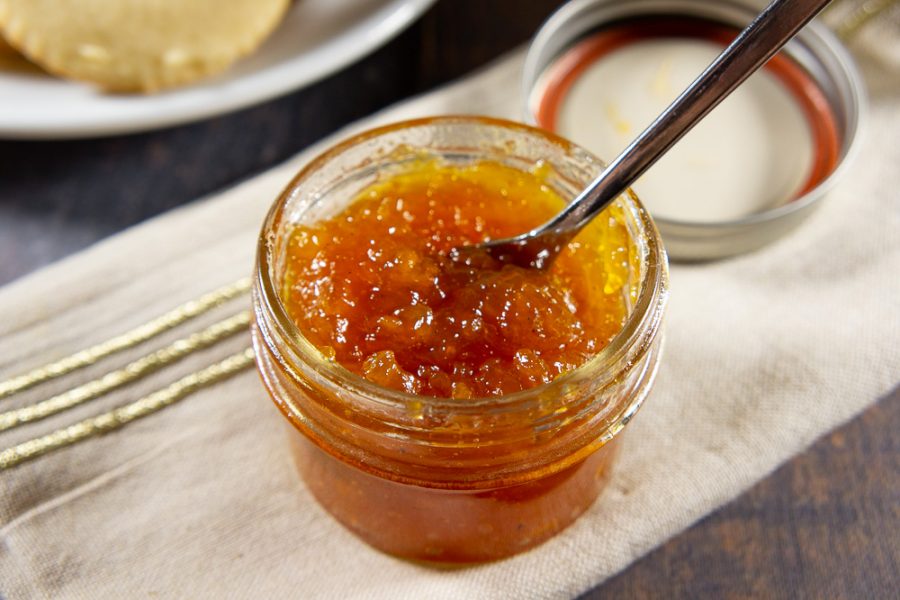
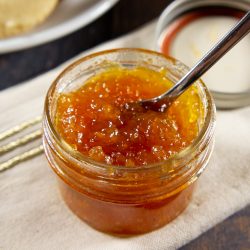
Loquat Jam
This page contains affiliate links. For more information please read my Disclosure Policy.


This easy, ginger and vanilla infused loquat jam recipe comes together in about 30 minutes on the stove. Learn how to make loquat jam with water bath canning instructions included for year long enjoyment. It’s a fabulous way to preserve either a small batch of loquats, or use the excess from your tree!
There’s something special about homemade jam. I’ve shared homemade strawberry Jam, pomegranate jelly, pear butter, pomegranate cranberry jam, and all are truly delicious. BUT, this one is unique guys, and oh so delicious.
Living in California, I have access to a LOT of produce, but until last year, I’d never heard of a loquat before. It was only at this ONE u-pick orchard that I could even get them. If you have a tree and it’s excess fruit is bringing you here…I’m jealous.
Now that I know about the loquat, I battle the horde of other ‘in the know’ people at the u-pick for my bag of them and immediately head home to make this loquat jam. It’s a small batch since that’s all I ever have enough for, but it can be easily doubled or tripled for those with more fruit to work with.
What’s a Loquat?
One major benefit of living surrounded by amazing California produce and it’s growers means I can talk directly to the people producing it!
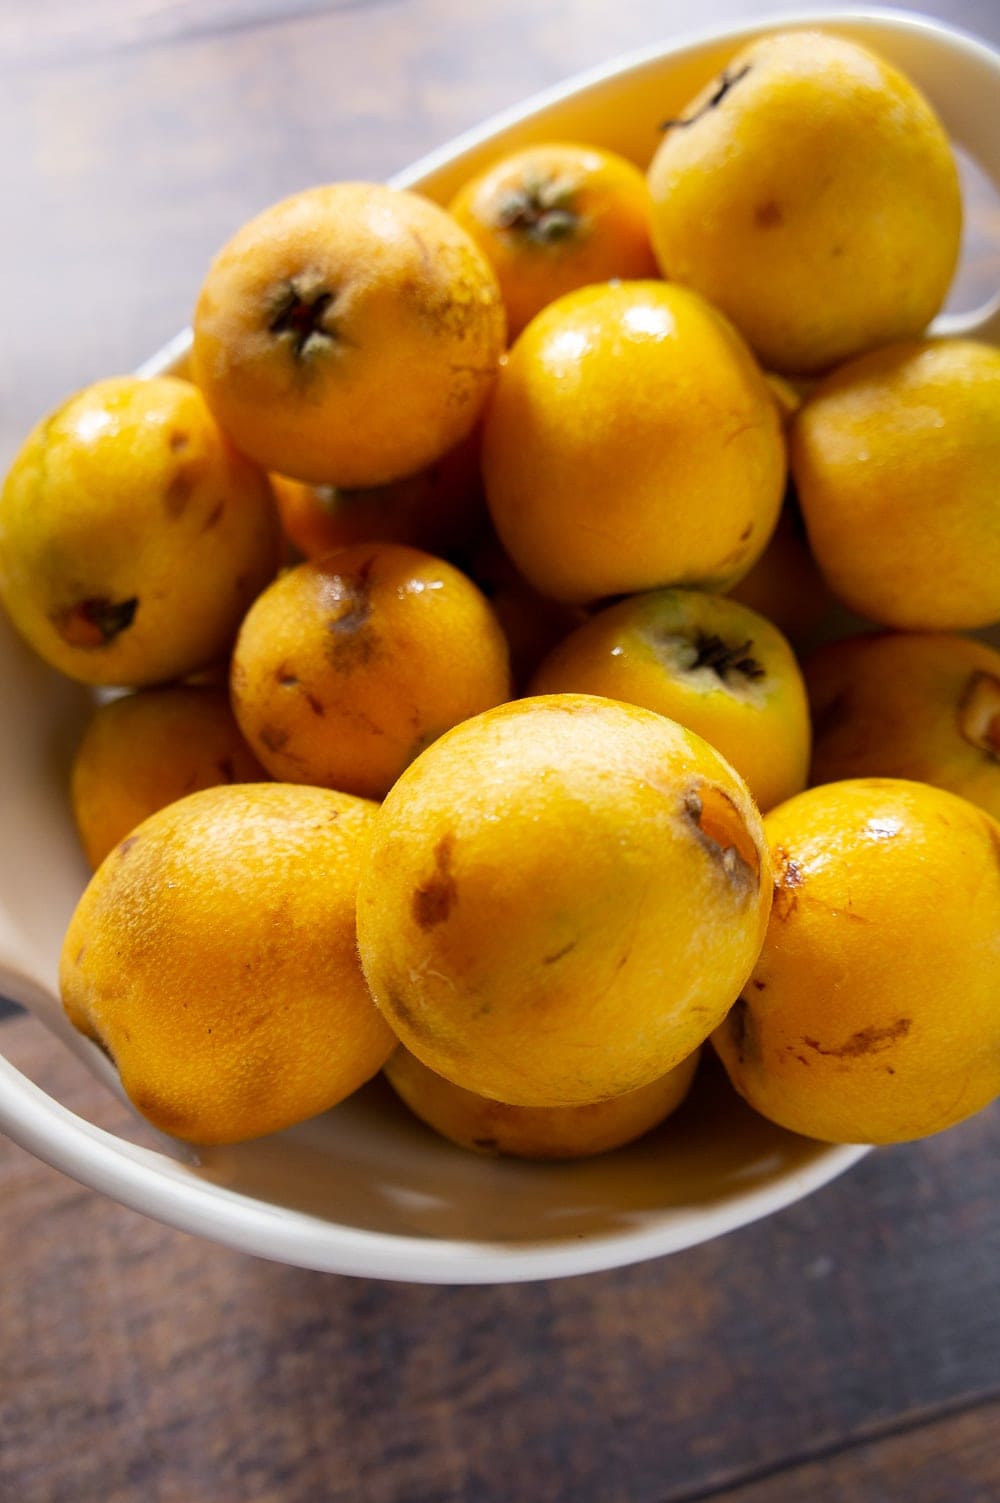
He told me I could liken it to a tart, slightly more tropical apricot. They’re delicate and don’t travel well, which is why they’re not a grocery store fruit. But that shouldn’t stop us from eating them!
Turns out they’re actually known as a Japanese plum, and are a fruit native to China. There are tons of varieties, almost 800 but only a few are grown in California. The flesh is bright yellow and both the large seeds and skin come off remarkably easily.
Read more about them in my complete Loquat guide!
Loquat Jam Ingredients
Aside from the gorgeous fruit, there are a few other simple ingredients you need to make this loquat jam recipe.
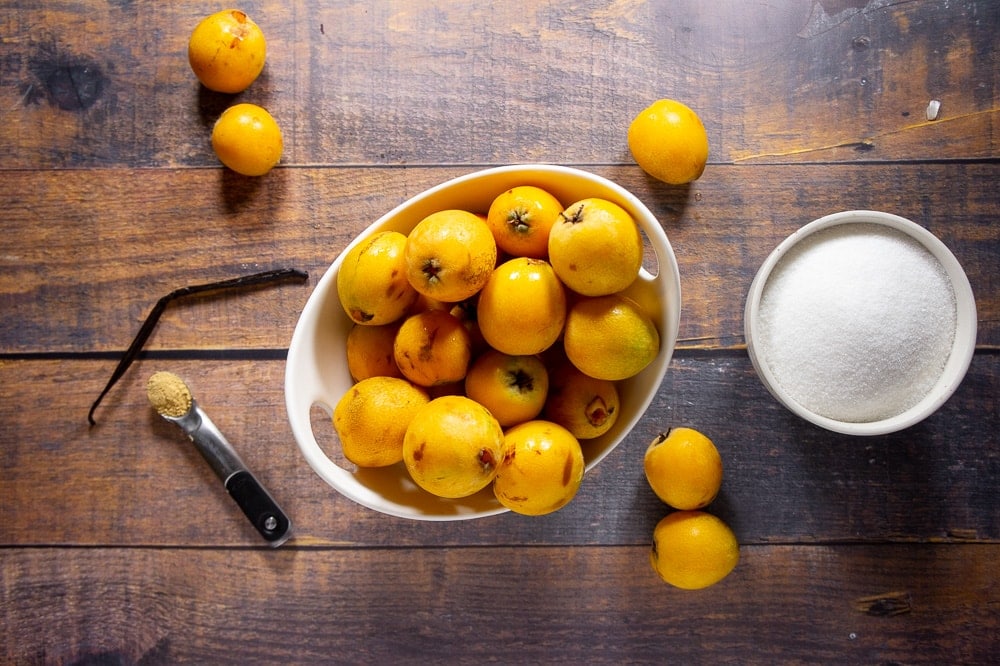
- Loquats – even for a small batch like this, you’ll need about 2lbs of fruit. After seeds and skins are removed, it’s less than you think!
- Vanilla Bean – I love fresh vanilla in jam, and seeds are lovely to look at suspended in jam, but you can also use 3 teaspoons of vanilla extract instead.
- Ginger – I prefer ground because it adds flavor but not texture. To use fresh ginger, substitute 1 tablespoon of grated ginger.
- Sugar – Just white, granulated sugar.
How to make Loquat Jam
The more I make homemade fruit and veggie preserves the more I realize just how simple it is! I’ve included both instructions for making the jam, and instructions for water bath canning your loquat ginger jam for safe shelf storage. If you’re canning and not experienced, please read the canning instructions BEFORE you start cooking. It takes some timing.
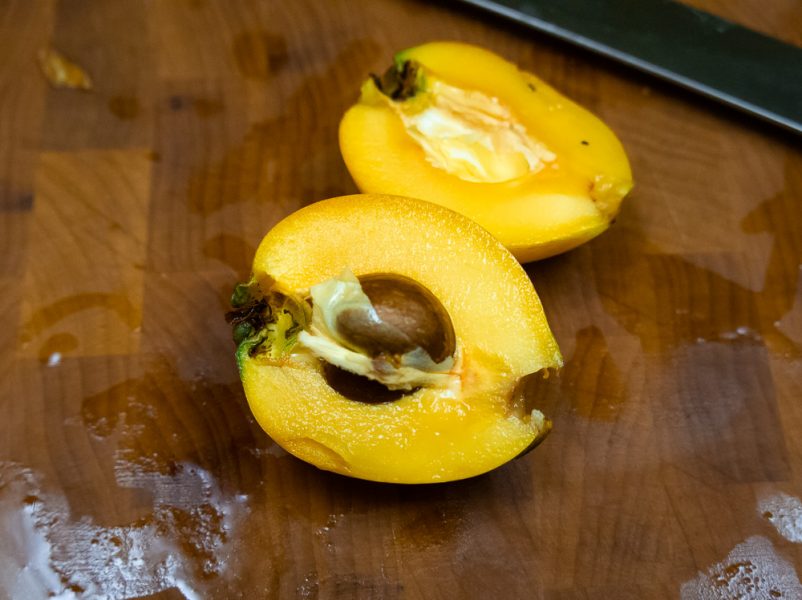
- First, process the 2 lbs of loquats. Simply cut them in half, remove the seeds and peel off the skin. There is a small layer of thin white pith beneath the seeds, peel that off as well.
- When all your fruit is cleaned, chop it into small chunks. It will break down further with cooking.
- If using fresh vanilla bean, split the pod and scrape out the seeds. Reserve the pod.
- Combine the fruit, sugar, ginger, and vanilla (pod included) into a large saucepan over medium heat.
- Stir until the sugar dissolves, then continue to stir every few minutes, dragging a spoon over the bottom of the pan to prevent sticking and scorching.
- Continue to cook until the loquats have broken down into small pieces (like the size of peppercorns), and the mixture has thickened to a dense syrup. When you can drag your spoon along the bottom at the jam very slowly fills it back in and clings to the spoon, you’re done. This took 25 minutes for me. Remove the vanilla bean pod.
- Proceed with canning, or pour in clean jars and store in the fridge for up to 1 month once cooled.
The longer you cook it, the thicker it will be. While this is not harmful or inedible in any way, to achieve the spreadable jam consistency, do not cook too long. It will thicken as it cools, so stop while the mixture still moves with some fluidity.
Pro Tip: If your fruit is still in large chunks when the jam begins to thicken use the back of a wooden spoon, or a potato masher to break it down quickly.
Water Bath Canning (optional)
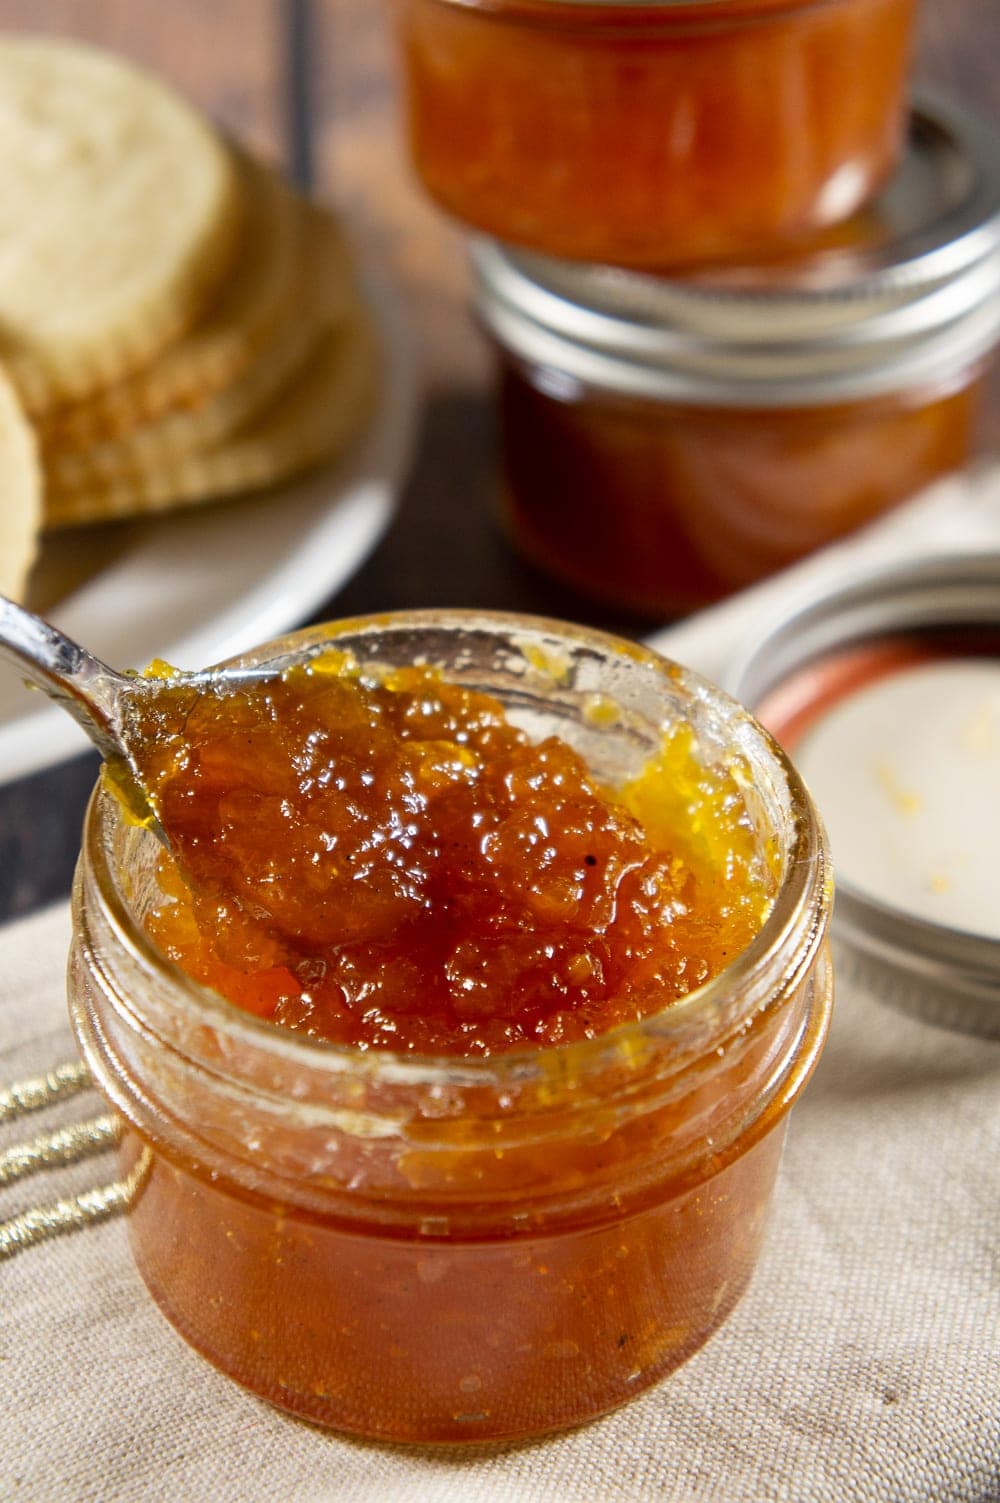
Because this is a small batch recipe, whether you choose to process it for long term storage is completely up to you. 2 pounds of loquats cooks down into a surprisingly small amount, only about 12 ounces of jam. I chose to can mine in small 4 ounce jars so I can enjoy it all year.
You’ll need:
- A large canning pot with canning rack – You can buy a canning pot, or use a large wide stock pot and simply buy an insert that keeps the jars from the bottom of the pot (shattered jars are no fun!).
- Jar clamps – This is essential, trust me!
- Hand Protection – I like to use thick gloves, but my mom goes with towels, just be aware those jars will be HOT.
- Funnel – A good wide mouth one works well for canning.
- Ladle – I like a nice metal one for working with hot jam, especially if you can get one with a hook that holds it on the side of the pot.
- 8 ounce mason jars(or whatever jars you choose to use) – I like 8 ounce jars because I go through it faster, which means more jam variety in my fridge, but you can use any jar with NEW lids.
- You can also buy a canning set, but there are tools in there I never use, so that’s up to you!
To water bath can your jam:
- Before you start cooking your recipe fill your canning pot with enough water to cover your canning jars by 1 inch. Bring it to a boil over high heat.
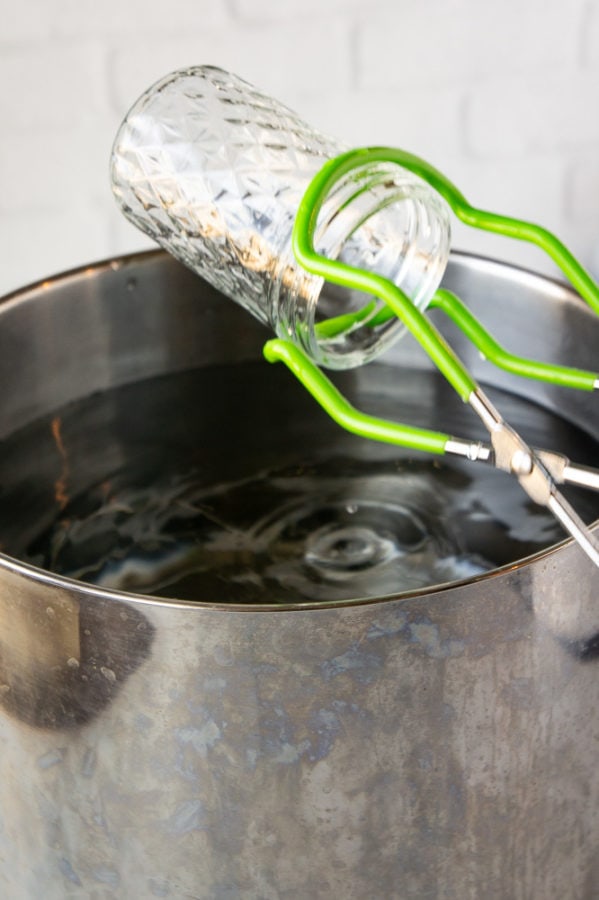
- While your cooking place your clean jars in the pot of boiling water for a minute or so to warm them up. This prevents cracking from a temperature difference when you add the hot food to them.
- Remove them from the water with your jar clamps and place them on a towel upside down to let the water run out. Make sure your jar clamps are angled as the picture shows below to prevent hot water from running down onto your hand or stove.
- When your preserves are done, flip the jars over using your hand protection, they’ll still be hot.
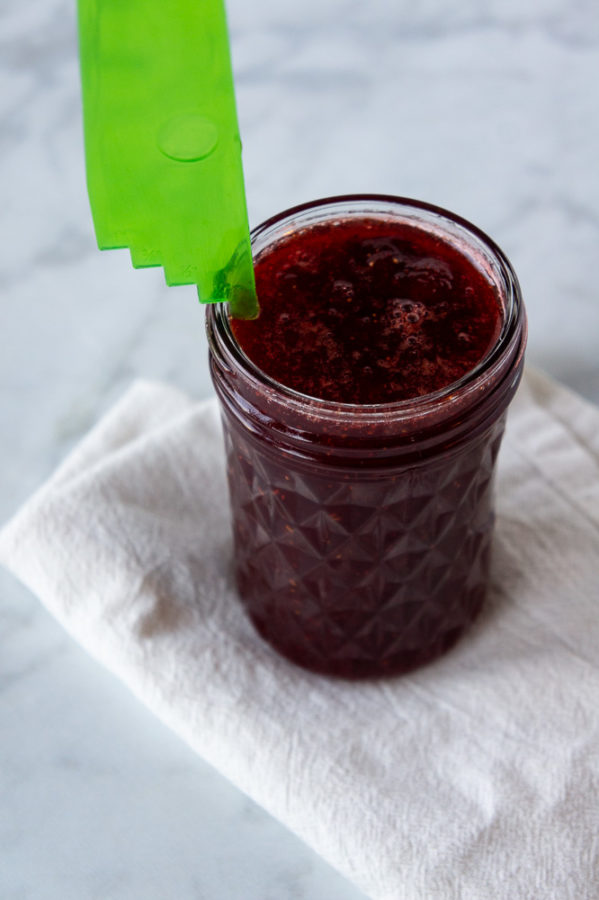
- Using your funnel and ladle, fill jars immediately with your hot preserves, leaving ¼” of space between the rim and the jam.
- Wipe the rims clean carefully with a warm, damp paper towel then dry them completely. This is important for the jam to seal properly.
- Place seals on and using your hand protection, screw on the lids as tightly as you can. Then use your jar clamps to submerge the jars in the boiling water again.
- Allow to ‘process’ in the boiling water for 10 minutes. Remove and set them on a towel, (they’ll be very hot!) and leave them at room temperature until each lid has ‘popped’
Pro Tip: You’ll know the jars are ready for the cupboard when you hear a ‘pop’ of the seal locking. You can also check this by pushing down on the center of the seal. If it clicks, it isn’t done yet. This can take up to 24 hours, so be patient!
FAQ’s
Absolutely, sub in 3 teaspoons for 1 fresh vanilla bean.
Yes. One tablespoon of finely minced or shredded ginger is equivalent of about 1/4 teaspoon ground.
Yes! To freeze your jam, place the cooked loquat jam in clean, freezer safe containers, leaving about 1 inch of space between the jam level and the top of the container. Let cool completely at room temperature. Then cover and freeze for up to 1 year.
Absolutely! If loquats weren’t so hard to get around here, I’d definitely make a large batch! You can double or even triple this with no problem, just increase the other ingredients accordingly.
Freshly cooked jam can be stored in a fridge for up to 1 month. If you choose to freeze or can your jam, it’s stable for up to a year. Once opened however, you should consume if within a month.
Nope! This loquat jam recipe requires no pectin. They’re naturally high in pectin which means they’ll set into a lovely jam with just some sugar and a bit of time.
Enjoy your Loquat Jam!
I’m a big fan of tart and sweet jams. It’s refreshing to have a break from the heavily sweet store bought jams, or those made with really sweet fruit.
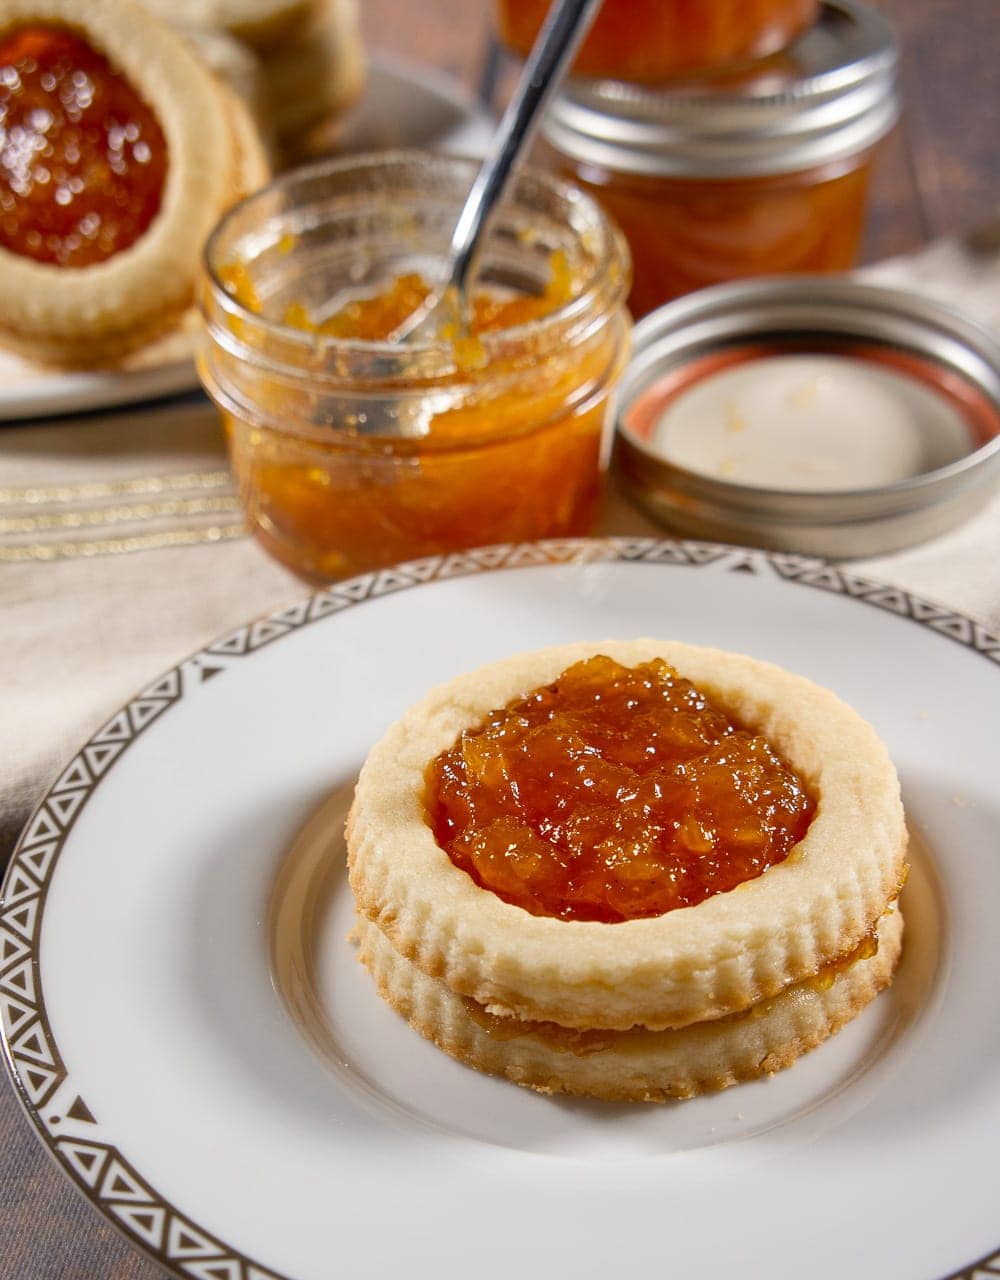
I love this particular jam on toast, waffles, and other warm baked goods. It’s also perfect for filling sandwich cookies like my Shortbread cookies!
Wherever you might enjoy a sweet fruit, try substituting this jam, I think you’ll be happy you did! I’d love to hear what you think of this small batch loquat jam or any variations you make. Until then, happy eating!
You may enjoy these other loquat recipes…
Loquat Jam
Ingredients
- 2 lbs loquats*
- 1 1/2 cups white sugar
- 1 whole vanilla bean or 3 tsp extract
- 1/4 tsp ginger, ground or 1 tbs fresh ginger, minced
Instructions
Loquat Jam (see below for canning instructions)
- Remove seeds, the white pith beneath the seeds, and skins from loquats. Chop to small dice.
- Split your vanilla bean with the tip of a small knife and gently scrape the seeds from the pod out. Reserve both.
- Combine chopped fruit, ginger, sugar, and both the vanilla bean seeds and pod in a large saucepan over medium heat.
- Cook, stirring to dissolve the sugar. Continue to stir occasionally to prevent sticking or burning, until fruit has broken down to small pieces and the jam has thickened enough to cling to the spoon and leave a trail on the bottom of the pan when the spoon is dragged through. About 25 minutes. Discard the vanilla bean pod.
- If canning, proceed as instructed below. If freezing or storing in the fridge, ladle into clean jars and leave about an inch from the top of the jar to the top of the jam. Let it cool completely then seal and store.
- If canned or frozen, this jam lasts up to 1 year. If stored in the fridge, or once opened from the cupboard or freezer, this lasts one month.
Water Bath Canning
- Before you begin cooking your jam, fill a large canning pot with enough water to cover your jars by 1 inch when submerged. Bring to a boil over high heat (make your jam while this happens).
- Set out 4 clean 4 ounce jars (or more if doubling, etc) with NEW lids and seals on a clean towel.
- When your jam is almost finished cooking, place your jars in the boiling water to warm them. This only takes a minute. Remove from the water, drain off excess water, and flip upside down on the towel to dry.
- When the jam is done, use hand protection to flip over the jars. Using a ladle and funnel pour in the jam, leaving 1/4 inch of space from the top of the jam to the rim of the jar.
- Wipe any jam from the rim and dry the rims. Then place the seals and lids on, using hand protection to handle the hot jars. Tighten the lids hand tight and use your tongs to submerge them back into the water.
- Let them process for 10 minutes. Then remove to the towel to cool and seal. When the lids 'pop' or no longer click or move when pressed upon, the jam is ready for cupboard storage for up to 1 year.
- Alternatively, if freezing, simply place jam in freezer safe containers with 1 inch of space from the rim, and let cool completely on the counter. Then freeze up to one year.
Notes
Nutrition
Originally published 7/6/2019, Updated 4/1/2020
Nutrition information and cooking times are provided as a best estimate. Values may vary based upon ingredients and equipment.


This recipe seemed to have a lot of sugar in it and my gut told me to cut back. I should have way too much sugar way too sweet. The idea of the jam is amazing and I will make it again but with much less sugar. I think one cup is plenty. It should be very tasty with some cheese and crackers.
Hi Debbie,
We all have our own preferences, and I’m glad the jam sounds good. I hope less sugar works and gives you the flavor and consistency you’re after :).
Good recipe! I also wanted to let you know that Loquat dries very well for a taste quite similar to dried apricot. I bet it would make a great “fruit roll-up” as well.
Please do not put me on your email listing. Thanks!
Steven, what a great idea for a all natural fruit roll up for my kiddos. I am thrilled you like my recipe, also rest assured you would need to ‘sign up’ for my email list, I don’t mass add people!
Absolutely delish. Only used one cup of sugar. It made about 3 4 ounce jars. But definitely worth it. I really need to know the secret of peeling a reseeding these things because that took over an hour
Hi Suz, thanks for sharing how it went. Prepping them can feel pretty tedious, one reason I don’t mind the small batch recipe! Technically you don’t need to peel them, I prefer it that way, but if you wanted to speed it up, just seed them and leave the skin on.
Yeah thats the only downside i guess is that it can be time consuming but not a huge deal in the long run. Came out delish.
Thanks so much Mike for sharing.
Is this 2 lbs of fruit with or without seeds?
2lbs refers to the whole fruit before peeling or seeding :).
I made this today – from 1 kg loquats I got 3 x 1/2 pint jars + a bit for the fridge.
SO labor intensive deseeding etc, but SO worth it. Y.U.M.
Thank you for sharing the recipe ! 🌺
(I have another 2 kg in the freezer, and now I have a technique !) 😍
Thanks for your review Helen! I’m so glad you liked the jam enough to make it again!!
So glad I bumped into this recipe. It’s perfect for brunch and I can’t wait to make more of this jam!
I’m glad you liked it! It is great for brunches, enjoy loquat season!
I live in Texas and have a couple of Loquat trees in the back yard I raised from 1 gallon plants. You’re right; quite a bit of yield. My next door neighbor has 16 large trees ( about 18-20 ft tall ) in their back yard which go unused. The fruit yield is so heavy, if you don’t remove the clusters it breaks the branches so she allows me to go over and remove what I’d like. This last year I got about 4 – five gallon buckets full. I typically wash, halve, de-seed them and run them through my dehydrator. For the next 5 months I don’t have to buy bananas to eat with my morning oatmeal; I just throw a handful of dehydrated loquat halves in with it. The pectin in them aids in regularity and if you’re pre-diabetic like I am they are excellent for blood sugar control. I never knew you could make jam without the hassle of getting a complete canning set-up so, next time around I’ll make jam also. I do appreciate the tip by my fellow Texan about leaving the skin on and processing them after cooking. Anything to make it easier and you don’t waste the edible skins as well.
Hi Skip, thanks for sharing your loquat knowledge! I wish I had a dehydrator set up to give that a try, maybe I’ll give it a go with my oven. I hope you enjoy your jam, this makes a small enough batch that no canning is needed!
Can’t wait to try this recipe. I have a big loquat tree in the back yard. Is it 2 lbs. of whole loquats, or 2 lbs. of the chopped dice? Thank you!
Hi there! It’s 2 lbs whole, though if you have a big loquat tree, feel free to double or triple it and make extra, especially if you are up for canning!
what is 7lbs in cups. I completely did my measurements weong and it came oit very watery. please help! i have another batch of loquats ready to jam up!☺️
Hi Sandy! I’m here to help! Translating lbs to cups isn’t terribly exact, so I’m going to estimate about 2.5 cups per pound once they’re pitted and chopped, but that can vary!
For simplicity, for every 5 cups of loquats you have, I’d add 1.5 cups of sugar for it to set up.
For 7lbs, I’m guessing you’re looking at anywhere from 17 to 21 cups of fruit, so about 5 1/4 to 6 1/4 cups of sugar!
If your jam is watery, feel free to let it reduce longer, it should tighten up a little! Or, just enjoy some loquat syrup on your morning pancakes! I hope this helps!
First attempt and turned out beautifully
Thanks for letting me know Pauline, I’m glad you enjoyed the recipe!
Love the unique flavor of the Loquat. It was the first time making it and it’s delicious! I read that the seeds are poisonous. They seem like such a beautiful seed to Just throw away. Do you use them in any way? Crafting use for beads or stringing for a garland or something? Just curious. Thanks! 🙂
I’m so glad you were able to try Loquats! And of course, very glad you liked the jam! I believe you’re right, most stone fruits pits or seeds have some poisonous characteristics, and I certainly don’t recommend anyone eat them, though I think you’d have to consume quite a few to be of danger. They’re so hard (and I hear bitter) I imagine that’d be unpleasant in any case! I agree though, I’ve always thought the seeds are so pretty, much prettier than a peach pit, but no sadly I usually discard them. Outside of planting them to grow your own tree, I’m not sure what can be done. I’m not a crafty person truthfully, but I did a quick search and I couldn’t find anything about using them for crafting! You could be the first! 🙂 Thanks again for stopping by!
We live in Texas and have a loquat tree. Every year the birds get to them before they ripen. For some reason this year was different. I had enough to make a double batch. Turned out great. One change – I left the peels on and ran them thru a food processor after they cooked. Love the texture and color. Can’t wait to serve it with scones in the morning.
Thanks for reviewing Michele! I’m glad to hear you were able to get to your tree before the birds, although I bet they love them as much as we do! Thanks for sharing how you handled the peels, good to know for next time! Enjoy your jam 🙂