Salt Crust Pork Belly
This page contains affiliate links. For more information please read my Disclosure Policy.
This salt crusted pork belly is a easy, crispy pork belly recipe that is roasted entirely in the oven. With a simple two part roasting process, you’ll have the best pork belly you’ve ever had right at home.
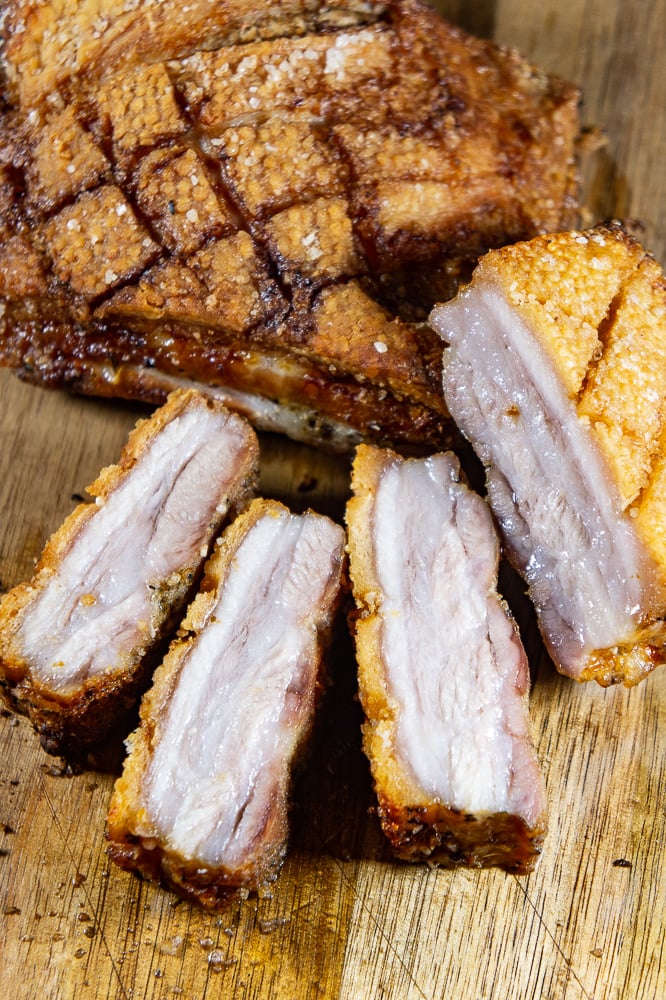
I still remember the first time I had pork belly. It was a pig-inspired food truck in Portland and out came this paper tray with a perfect dry rubbed, succulent pork belly on a bed of slaw all wrapped in a delicious bun. I was hooked.
Ever since then I pretty much order pork belly whenever I see it. There are TONS of ways to prepare pork belly, and each delicious in their own way. BUT, when I’m roasting pork belly at home, I tend to fall back on this one simple salt crust pork belly recipe. It was a hit the first time I made it, and it’s been our favorite ever since.
What do you mean by Salt Crust?
To make perfect pork belly you have to account for the fat in some way. That’s a significant portion of the cut! Without consideration of how to treat the fat, you can end up with chewy or flabby results. No thanks.
By first scoring the fat on the top of your pork belly and coating it with a good layer of salt, you help that fat render and draw out moisture, leaving seriously delicious crispy roast pork belly in it’s wake. It’s a simple, 2 step baking method that you’ll find easy, I promise.
Ingredients
If you’re a pork belly newbie, welcome, if you’re just looking to change up your methods for cooking those pork belly slabs, also welcome. To make this, you’ll need just a few very simple ingredients.
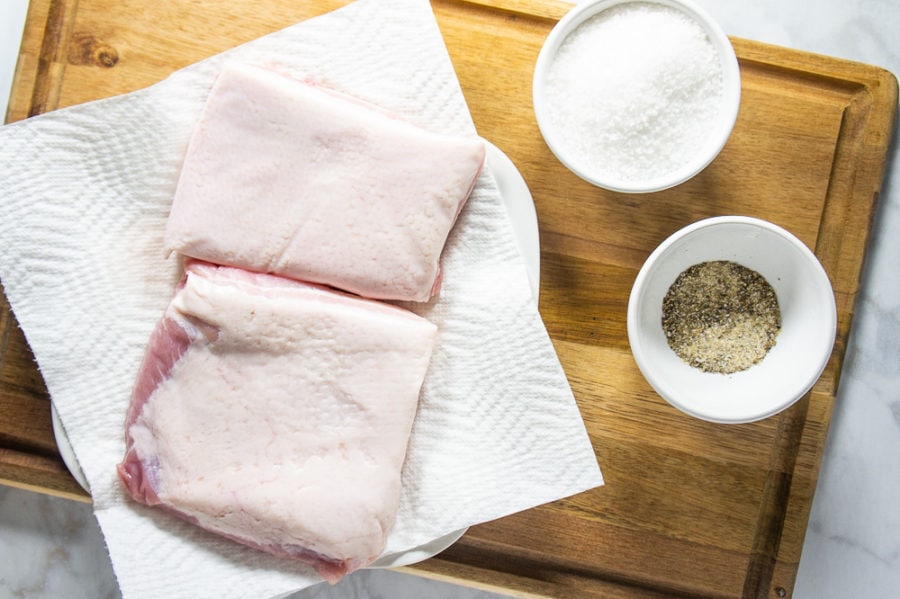
- Pork Belly – Most grocers sell pork belly in manageable skin-off slabs or strips. You can also request it from the butchers counter and they often can sell you a larger slab if you’d like it. I prefer skin off slabs because they’re easier to handle and cook.
- Salt – My go to salt for pretty much everything is Morton’s Coarse Kosher Salt. You can use what you like but I do recommend a coarser salt rather than fine table salt.
- Seasonings of choice – What’s important here is the method, rather than the specific spices I use, it’s very flexible!
Ingredient Tips
- When choosing pork belly, look for good marbling. By this I mean a good ratio of white fat to pink meat. If the belly you’re looking at is mostly white, you won’t get enough yield for it to be worth it. Your ideal slice is 2 to 3 inches thick.
- If you have skin on pork belly that’s totally fine! I don’t like it but there are plenty who would disagree with me. It can get tough when baked or roasted, so here’s a video on how to remove it, or ask your butcher to! If you prefer it on, simply be sure to score it deeply into the fat (more on that later)
- I like to rub the sides and bottom of my pork belly with a rub made up of paprika, garlic powder, onion powder, salt and pepper. This is usually a 2:2:2:1:1 ratio (ex, 1 tsp of each, then a 1/2 tsp of salt and pepper). You can use whatever you like, but DO NOT rub the top, white fat part. If you can let the pork belly refrigerate for an hour or two after the rub, even better.
- You can also use a marinade! If you’d like to marinade your pork belly be sure to place it and the marinade in a wide, flat bottom dish or plastic bowl. You want the white fat part to be sitting up out of the marinade (don’t submerge it). Cover and refrigerate anywhere between 1 to 24 hours.
- This method works with both pork belly strips or slabs, you can easily adjust it to whatever size you have.
How to Make Salt Crust Pork Belly
This method not only yields delicious crispy pork belly, it’s also fun! It’s a ‘yea I did that’ moment when you pull the finished belly out and see how it’s transformed from inedible to entirely decadent. The whole process takes maybe 90 minutes, and as far as portion…well that depends on how willing you are to share.
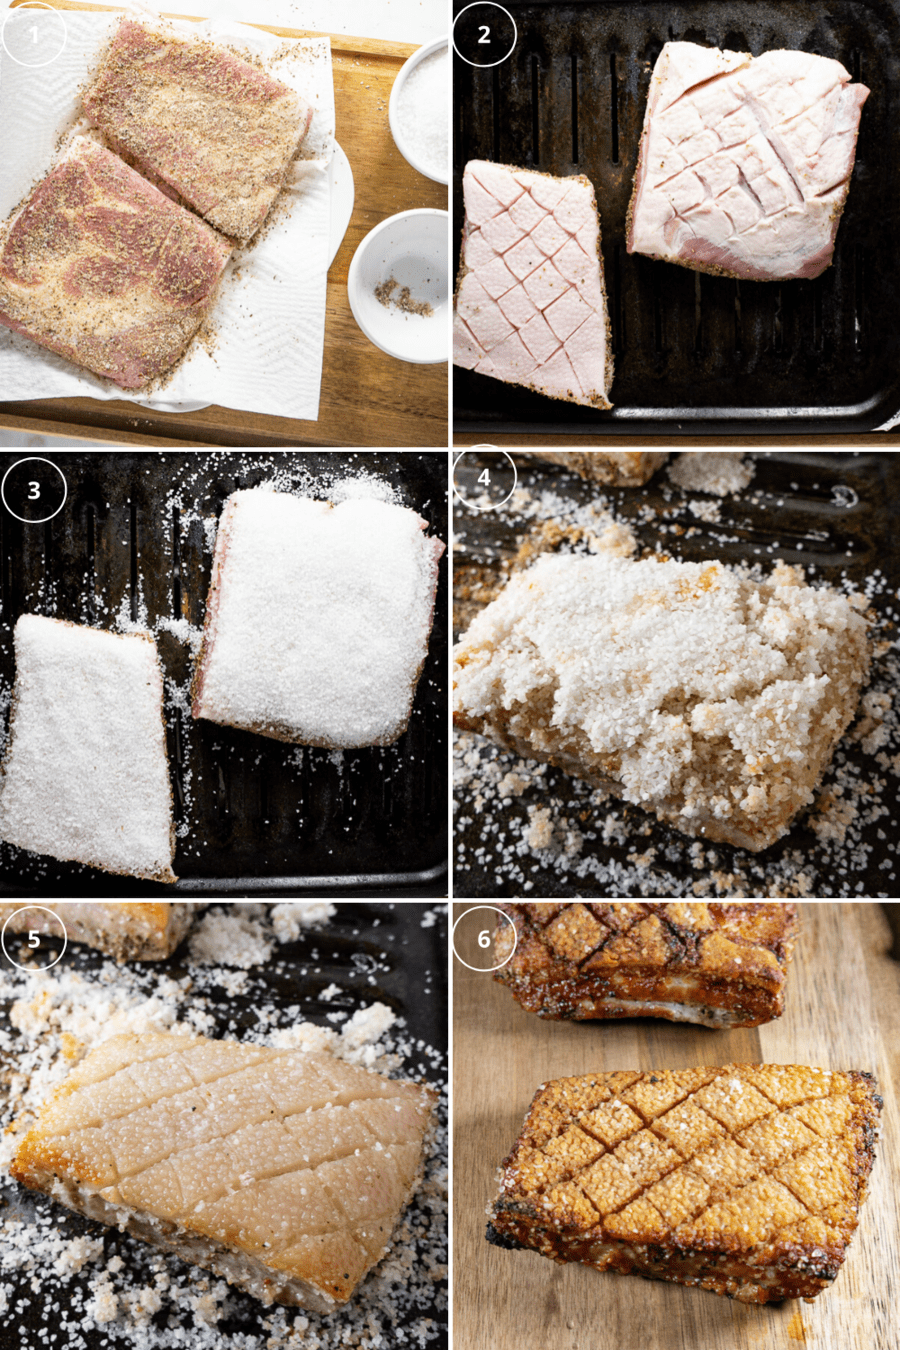
- First create your rub if using and rub the sides and bottom of the pork belly, do not apply to the top fat. Either chill for an hour or two, or move ahead and preheat your oven to 350°F.
- While your oven is preheating, place your pork belly, fat side up, on either a broiler pan or an oven safe baking sheet and rack. Line the bottom pan with foil and pour in enough water to have an inch or two in the bottom pan. Score the pork belly with a sharp knife by cutting diagonal lines across the top, try to slice deeply into the fat without cutting the meat.
- Pat the fat layer dry with paper towels. Cover the scored fat with a thick layer of salt. You should not see any meat coming through, and the salt layer should be even. For 2 lbs of pork belly, this is usually about 1 1/2 cups of salt. Make sure your belly is even on the pan as well (See tip below).
- Carefully (the water will spill so keep it even!) place the pan in the center rack of your oven and roast for 40 minutes.
- Remove your belly from the oven and turn it up to 450°F. The salt will have formed a crust that breaks off easily. Remove all possible salt from the top of the pork belly and the pan (it will burn). If need be, momentarily move the pork belly to a plate and wipe the top rack off.
- Return the pork belly to the oven for 20 to 30 minutes, or until the top layer is crispy and golden brown.
- Allow to rest on the pan for 10 to 15 minutes, then slice and serve!
Pro Tip: If you pork belly is not sitting evenly on your rack, fold up little squares of foil and slide it under to level it. This is important for even crisping!
FAQ’S
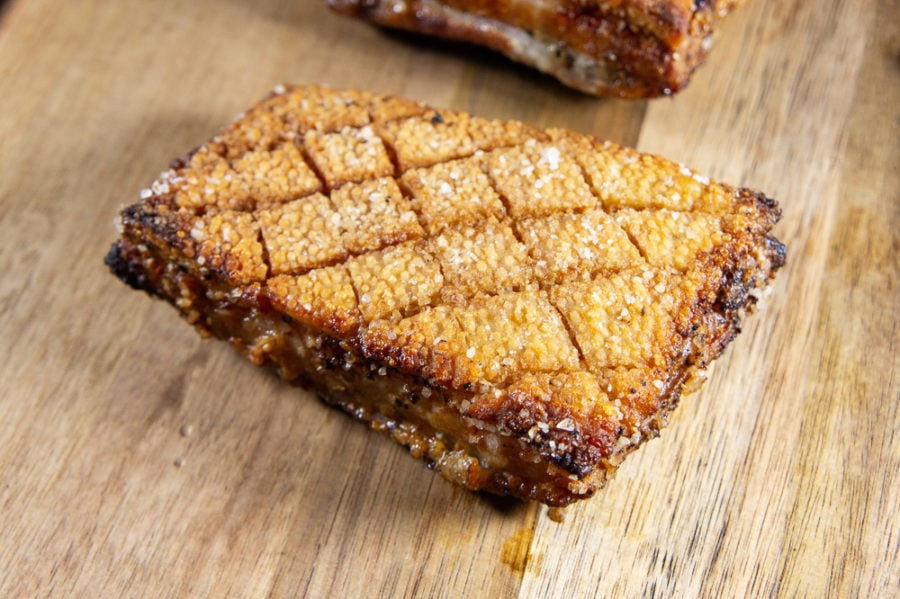
If your pork belly isn’t level, meaning the surface is all the same height, your salt crust may not roast evenly. Since the salt crust renders the fat and creates the final crispy crust, you want this to be as even as possible for uniform crisping.
You’re roasting a very fatty piece of meat at high temperatures, which can easily lead to burning. By adding water into the bottom of the pan, the fat that drips down is caught by the water and less likely to smoke.
I usually have slightly darker edges on my salt crusted pork belly, but it it’s getting too dark for your liking, you can cover the edges with foil to stop the cooking while the middle finishes up.
I use a pastry brush, but a paper towel will work as well, just be gentle (it’s hot) and do your best. Some salt will remain, and this is part of the final flavor, you just don’t want large chunks left over on the pork or the pan.
Serve, Eat, & Enjoy
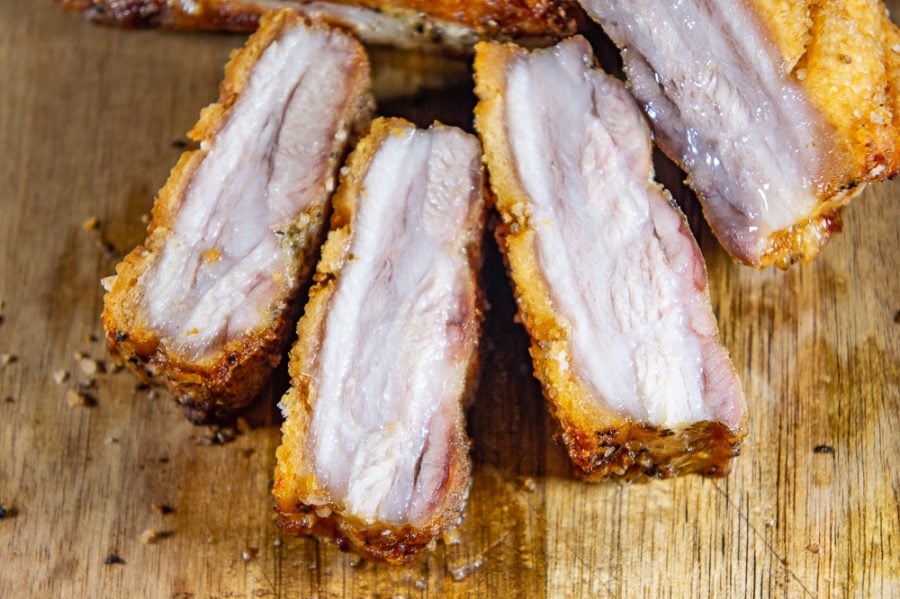
Now that you have this gorgeous, glistening perfect pork belly recipe, it’s time to eat it! While my husband would happily just steal slices straight off the cutting board, it’s a lovely protein to serve with a great variety of side dishes. It works with tangy, saucy, hearty, or light meals as a flavorful addition.
Because it’s a very rich piece of meat, I usually say a slice or two per person is enough, but I’ll let you have the final say on that ;). In any case, check out my recommended sides, and as always Happy Eating!
What to serve with pork belly…
- Grandma’s Easy Potato Salad
- Brussels Sprout Slaw
- Easy Italian Polenta
- Kale Strawberry Blueberry Salad
- BBQ Lentil Bake
- Tomato Spinach Salad
- Apple Coleslaw
- Rustic French Style Lentils
- Pasta with Asiago Cream Sauce
- Quick Overnight Sauerkraut
Salt Crust Pork Belly
Equipment
- Broiler Pan OR
- Baking Sheet with an oven safe cooling rack
Ingredients
- 2 lbs pork belly skin off, slab or slices, 2-3 inches thick ideally
- 1 1/2 cups Coarse salt
- Rub or marinade of choice*
Instructions
- If using a rub, apply to the bottom and sides of the pork belly. Do not rub the fat, and if possible let sit for an hour or two (optional).
- Preheat your oven to 350°F. Cover your baking sheet or the bottom pan of your broiler pan with foil and pour in enough water to fill it by an inch or two. Then place the top rack on and the pork belly on that.
- Score the pork belly by making diagonal slices about an inch apart across the fat. Try to score deeply into the fat without cutting the meat.
- If your pork belly is thicker in some places, tuck small folded squares of foil under the bottom to create an even top surface. Apply a thick, even layer of salt to the top. try to cover all the fat and meat.
- Carefully transfer to the oven on the middle rack and roast for 40 minutes.
- Remove from oven and turn the temperature up to 450°F. Begin to flake off the salt crust. Remove as much salt as possible from the pork and the pan (if it's in the water, that's fine). Add more water if it's evaporated.
- Return the pork to the 450°F oven and roast again for 20 to 30 minutes or until the top is golden brown and crispy.*
- Remove from oven and let rest on the pan for 10 to 15 minutes. Slice and serve!
Notes
Nutrition
Nutrition information and cooking times are provided as a best estimate. Values may vary based upon ingredients and equipment.




What my dreams are made of ahahah that crispy skin has my name all over it! Just ordered some pork belly to make it this weekend!! I’m counting the seconds!
Yay! I’m so happy you were inspired to try it, I know you’ll love it if you like that crispy skin!
Yum I love how crispy this pork belly is… One of the best cuts of meat!
Couldn’t agree more Chandice 🙂
My mouth is already watering! Love pork belly but never tried to make it at home. My hubby will be very happy if I make this recipe for him!
I hope both you and your hubby enjoy!
Oh that crust is to die for! This is so tender and delicious. I can’t wait to make this recipe again because it was very easy and the pork belly just delicious.
I’m so glad to hear you enjoyed it Ashley! I agree, that crust is the best part!
Such an easy recipe! The crust looks amazing!
Thanks Amanda! I hope you give it a try 🙂
Pork belly can be such an underrated cut of meat. It is one of my favourites – so full of flavour, and I love the crackling, which is always the best bit!
It is underrated! And I think has a reputation of being complicated, but it’s so good! The crusty top part is always the favorite 🙂
I have never tried anything like this, but my mouth is watering! It looks incredible!
It’s such an easy recipe, I hope you’re able to give it a try Denise, I think you’ll enjoy it!
This salt crust pork belly was amazing. I will be saving this recipe to make it again soon.
I’m so glad to hear you think it’s worth repeating, happy eating Heidy!
Oh. My. Gosh. This is seriously the best pork belly recipe ever! It comes out perfect every time.
This made my day! I’m so glad you agree, it’s my go to method for sure!
Wowzer, the crust on this salt crust pork belly looks like perfection. I can’t wait to impress my husband with this recipe.
I hope it works! It certainly tastes like a showstopper, thanks for stopping by Kelly!